If you want your WordPress (WP) website to outperform the competition, performance optimization and search visibility are non-negotiable. A streamlined site loads fast, ranks higher, and delivers a smoother experience for visitors—which all translates into better engagement, conversions, and long-term growth.
The good news? You can apply a handful of practical habits to keep your WordPress site running like a well-tuned machine—delivering strong ROI with minimal ongoing upkeep.
1. Choose a Reliable Hosting Provider
Your hosting provider has an outsized impact on site speed, uptime, and stability. Every page request flows through your host’s servers, so their infrastructure and configuration directly affect how quickly and reliably your website loads for real users.
A quality WordPress hosting provider pairs fast, secure, scalable servers with responsive support that can step in when you hit a snag or see performance regressions.
Be precise about uptime. 99.99% uptime is roughly less than an hour of downtime per year, while 99.9% is closer to 8–9 hours. That extra downtime matters—especially for ecommerce or ad-monetized content where every minute is money.
Speed is equally vital. A fast host ensures users around the world get snappy responses—think of it like upgrading from a budget laptop to a high-end workstation for your website.
And when something breaks, 24/7 expert support is a lifesaver. If your site goes down, a capable support team can diagnose and fix the issue quickly so you can focus on growth, not firefighting.
2. Optimize Images
Images tell your story—but if they’re not optimized, they can drag down load times, Core Web Vitals, and ultimately your SEO.
A common mistake is uploading large, uncompressed images. Even a few multi-MB assets can balloon page weight, frustrate visitors, and hurt rankings.
The fix is quick: make image optimization part of your publishing routine. Your pages will feel faster and your metrics will look better across the board.
What Is Image Optimization?
Image optimization reduces file size without noticeable quality loss. It usually involves compression, resizing to display dimensions, and picking the right format so pages load quickly while staying sharp.
There are two compression types: lossy (big size savings with minimal visible quality loss) and lossless (retains all data with smaller savings).
Use lossy for most inline photos and featured images, and lossless for logos, UI elements, or graphics that need crisp lines and text. Where available, deliver modern formats like WebP and AVIF via your CDN or image tool to cut weight further—while keeping your existing JPG/PNG uploads as source files. (WordPress 6.5+ supports AVIF uploads natively.)

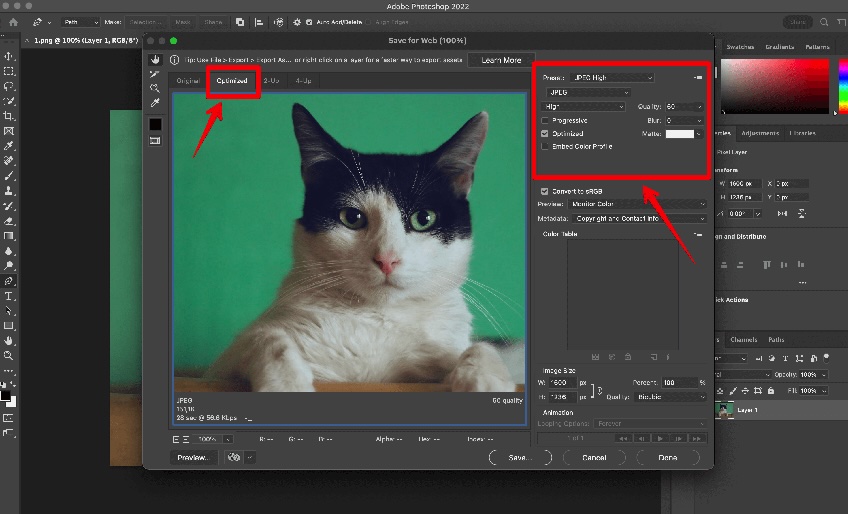
For example, compressing a 2.4MB image down to ~219KB (with no visible quality hit) can reduce its footprint by more than 90%—so Mr. Buttons stays adorable without slowing the page.
Helpful tools include Monosnap, Adobe Photoshop, and TinyPNG. You can also try JPEGmini, ImageOptim (Mac), or automate inside WordPress with Smush.
Choose the Right Image Format
Format choice matters for both quality and performance. Here’s what to keep in mind:
- JPEG: Best for colorful photographs and large hero images.
- PNG: Great for transparency, UI elements, diagrams, or images with sharp contrast.
- TIFF: Useful for archival and professional workflows—not for the web.
- GIF: For simple animations or limited-color graphics.
When possible, deliver modern formats (WebP/AVIF) via your CDN or image plugin to trim file sizes even more—without changing your editorial workflow.
3. Limit Plugins
Plugins unlock powerful features—but installing too many can slow your site and increase risk. With 60,000+ plugins available, it’s easy to overdo it. Less, used wisely, is faster and safer.
Every active plugin adds code, queries, and scripts. That overhead can tank performance, introduce security holes, and cause conflicts after core updates.
What Happens When You Use Too Many Plugins?
Impact varies by plugin quality and configuration, but these are the big three risks:
- Security Risks: Outdated or abandoned plugins are a leading cause of hacks—think XSS, SQLi, or RCE vulnerabilities.
- Slow Performance: Extra HTTP requests, render-blocking scripts, and heavy database queries hurt Core Web Vitals. Use Google’s PageSpeed Insights to pinpoint issues.
- Instability and Crashes: Conflicts between plugins—or with core—can break critical flows and take hours to debug.
Best Practices for Plugin Management
Keep your stack lean, secure, and measurable:
- Update promptly to patch vulnerabilities and improve performance.
- Deactivate and delete what you don’t use—dormant plugins still add risk.
- One plugin per job. Doubling up (e.g., two caching plugins) can backfire.
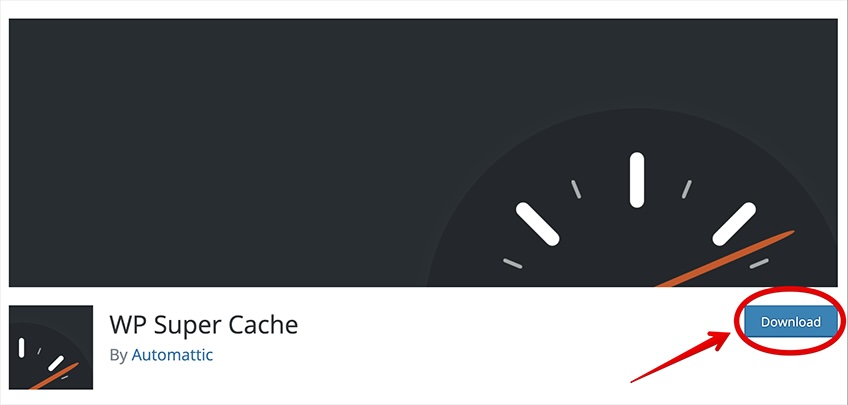
4. Use a Caching Plugin
WordPress builds pages dynamically—pulling from the database and rendering via PHP on each request. Under load, that costs time and server resources.
Caching plugins save and serve static versions of pages, cutting processing dramatically. The result: 2–5× faster perceived speed, better UX, and stronger rankings.
Excellent options include WP Rocket, LiteSpeed Cache, and WP Super Cache. If you use Cloudflare, consider enabling APO for full-page caching at the edge.
Once enabled, your server can deliver prebuilt HTML instantly instead of rebuilding pages for every visitor.
On shared hosting or during traffic spikes, caching is essential. Many managed hosts—like Hostinger, DreamHost, and Bluehost—offer server-level caching. If you’re not on a managed plan, add a caching plugin.
5. Minimize Background Processes
WordPress runs background tasks that can pile up if misconfigured, including:
- Core, theme, and plugin update checks
- Scheduled posts and cron jobs
- Search engine crawl requests
- Automated backups and syncs
Backups and scans can slow things down if they run too frequently or during peak traffic. Schedule heavy tasks for off-hours and avoid hourly backups unless truly necessary.
Match frequency to publishing cadence. If you post weekly, daily full-site backups probably aren’t required. Keep incremental backups, and run full backups during low-traffic windows.
Watch crawler load, too. Use the Page Indexing Report in Google Search Console to spot errors and avoid wasted crawl cycles.
For higher-traffic sites, consider replacing WP-Cron with a real server cron (set DISABLE_WP_CRON in wp-config.php and add a system cron) to reduce overhead and improve reliability for scheduled tasks.
6. Don’t Host Videos on Your WP Website
WordPress lets you upload video files—but hosting them yourself is rarely a good idea. Video is bandwidth-intensive and can quickly blow through “unlimited” plans or trigger soft limits and overage fees.
Common overages include:
- Visitor overage: Extra charges for unique monthly visits.
- CDN overage: Data transfer beyond plan limits.
- Disk space overage: Large files push you past storage thresholds.
- Bandwidth overage: Viral videos can spike outbound bandwidth.
Large media also bloats backups, complicating restores.
Instead, upload to YouTube, Vimeo, or SoundCloud (for audio) and embed the URL. WordPress will handle the oEmbed for you.
This offloads storage and streaming while keeping the viewing experience seamless.
Pro tip: High-res (2K/4K/8K) uploads can bottleneck on your connection during publishing, too—another reason to let dedicated platforms do the heavy lifting.
For more time-savers, see the latest WP tips every webmaster should know.
7. Activate a Fast Theme
First impressions form in milliseconds, and slow themes can derail them. Some themes look gorgeous but carry bloated scripts and inefficient CSS, which hurts speed, UX, and SEO.
Pick a lightweight, performance-tuned theme and add complexity only when you need it. You can always layer features later.
Consistently fast, reliable choices include:
Also consider the latest default themes for strong accessibility and performance foundations. Before switching, test in staging to confirm plugin and layout compatibility.
8. Use a Content Delivery Network (CDN)
A Content Delivery Network (CDN) serves your static assets (images, CSS, JS, fonts) from servers closer to your users. Shorter distance equals lower latency and faster delivery.
Without a CDN, a visitor in Asia hitting a North America origin may see delays. A CDN routes requests to the nearest point of presence for faster loads worldwide.
Typical CDN-served assets include:
- CSS and JavaScript files
- Images and other media
- Web fonts and static assets
This reduces strain on your origin server and speeds up global delivery.
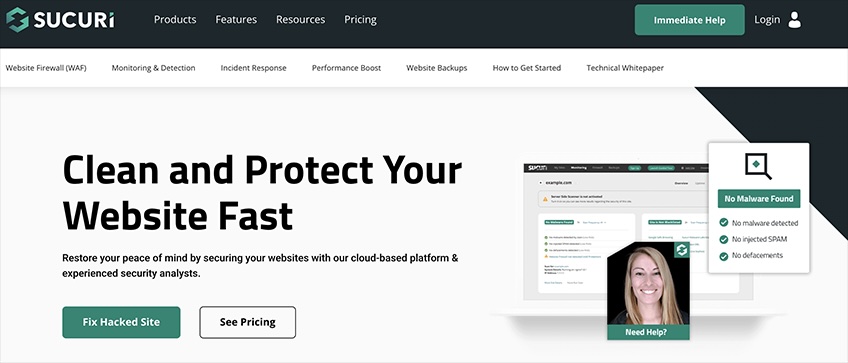
Popular providers include Cloudflare, KeyCDN, and Sucuri. Many hosts bundle CDN integration with their plans, and HTTP/3/QUIC support further reduces latency on flaky networks.
CDNs stack nicely with caching plugins for even better resilience during spikes or media-heavy page views.
9. Implement Lazy Loading
Lazy loading delays off-screen media (images, videos, iframes) until it’s needed. That reduces initial page weight and speeds up perceived load—a win for UX and SEO.
It directly supports Google’s Core Web Vitals targets—especially LCP, CLS, and INP—by focusing resources on what’s actually visible first.
With fewer assets loading upfront, users on slower networks or older devices still get a responsive experience.
How to Use Lazy Loading
Since WordPress 5.5, images get loading="lazy" by default. For your main hero/LCP image, don’t lazy-load it; instead ensure it’s correctly sized and consider adding fetchpriority="high" (WordPress adds this automatically in many themes) so it renders as early as possible. For iframes and videos, use the native loading="lazy" attribute or a plugin for fine-grained control.
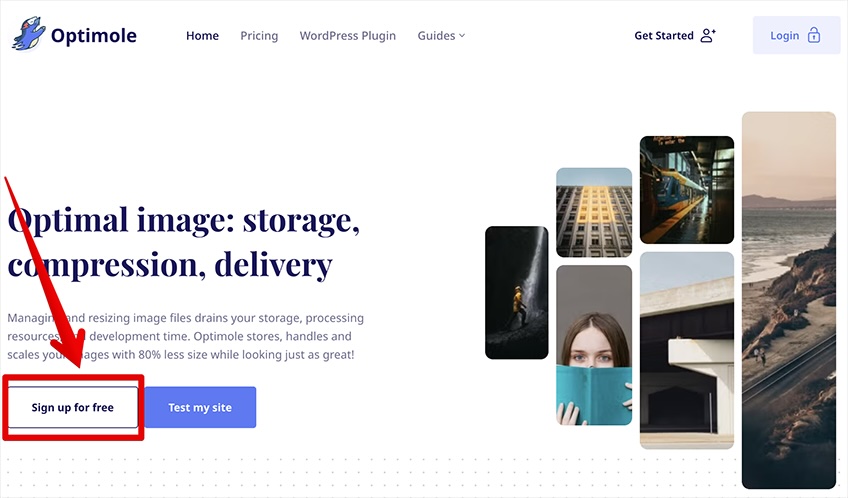
For more control (including videos and iframes), consider plugins like LazyLoad, Optimole, or Smush.
Prioritize your hero/LCP image separately—ensure it’s compressed, correctly sized, not lazy-loaded, and hints priority for fastest render.
10. Upgrade to the Latest WP Version
Staying current with WordPress delivers performance fixes, security patches, and editor improvements that you don’t get from plugins alone.
Update to the latest major release (6.x at the time of writing) for a faster block editor, improved accessibility and typography tools, and better compatibility with modern PHP versions—signals that also support better UX and rankings.
Always back up first and, if possible, test updates on a staging site to catch theme or plugin conflicts before going live.
11. Upgrade to the Latest PHP Version
PHP powers WordPress. Running a current, supported PHP 8.x version (e.g., 8.2–8.4) can deliver double-digit performance gains, lower CPU usage, and stronger security compared to older 7.x builds, which are end-of-life.
Many hosts let you switch PHP versions from the control panel. If yours doesn’t support a recent 8.x version, it may be time to migrate.
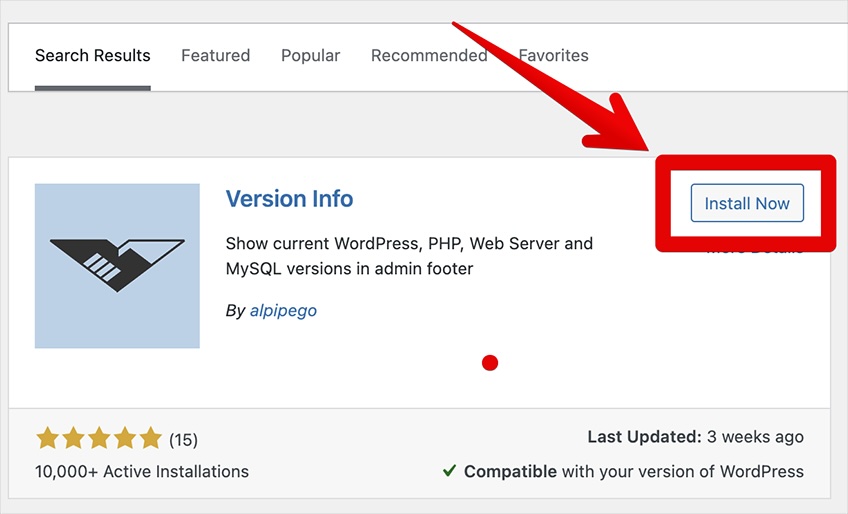
You can verify your PHP version with the Version Info plugin—it displays the version in your dashboard footer.

If you’re below PHP 8, ask your host to upgrade. If they can’t, move to one that supports modern versions by default.
12. Optimize Your WP Database
WordPress databases collect clutter over time—post revisions, spam comments, expired transients, and orphaned metadata—that can slow down queries.
Regular tune-ups keep things fast. You can optimize by hand in phpMyAdmin or use a plugin.
- Manual optimization via phpMyAdmin (advanced users)
- Plugin-based cleanup for safer, one-click maintenance
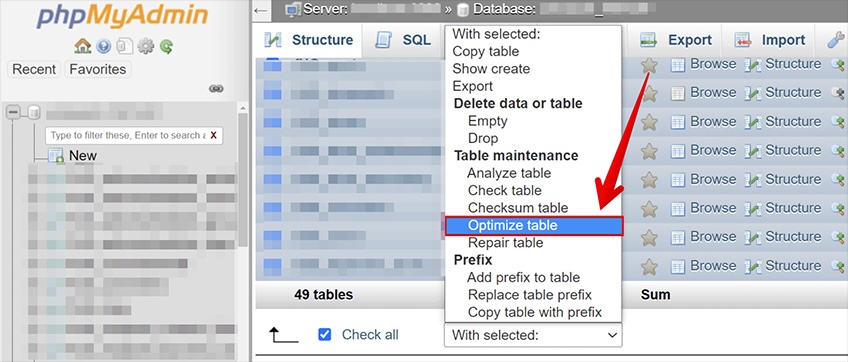
Manual Optimization with phpMyAdmin
In your hosting panel, open phpMyAdmin, select your database, check all tables, and choose “Optimize table.” Back up first so you can roll back if needed.
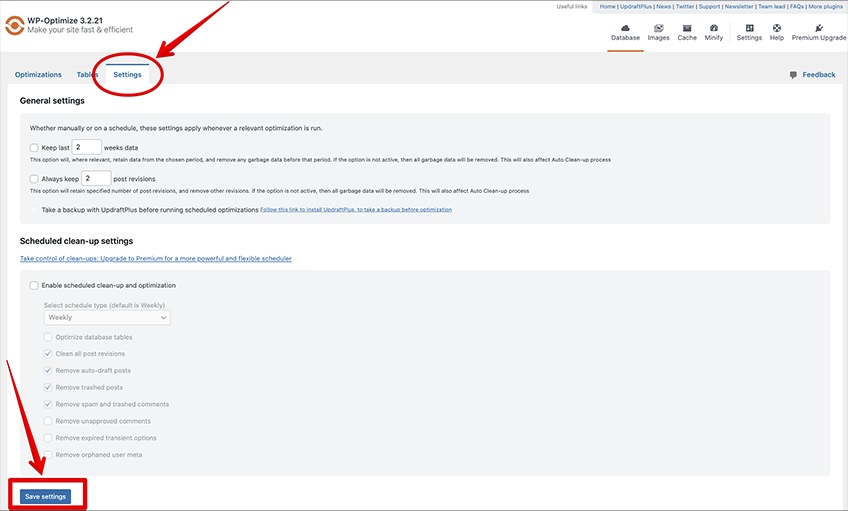
Optimize with a Plugin
Prefer automation? Use WP-Optimize, UpdraftPlus, or BackWPup for scheduled cleanups and routine maintenance.
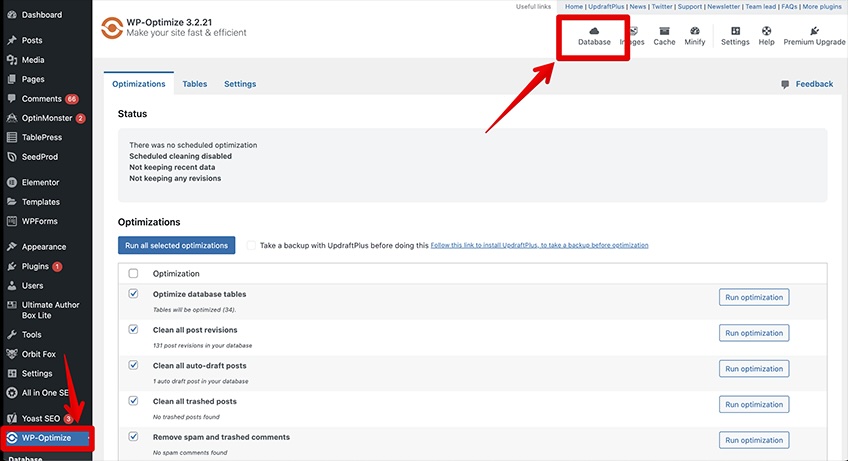
These tools can remove expired transients, spam, and excess revisions. Set and forget with scheduled runs in the plugin settings.
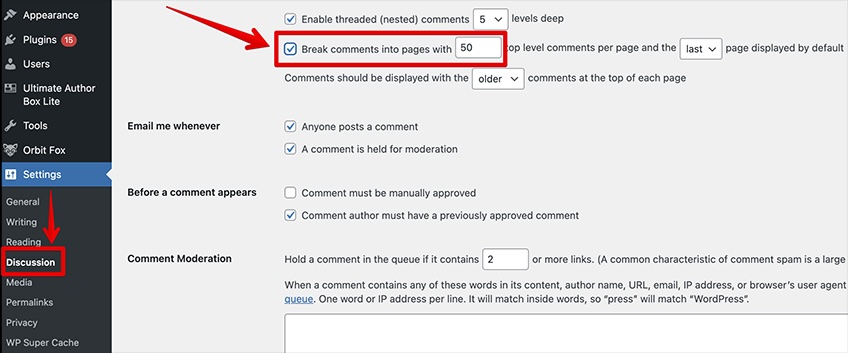
13. Break Comments Into Pages
Comment-heavy posts signal engagement—but loading hundreds at once slows rendering.
In Settings > Discussion, enable “Break comments into pages” and set a reasonable per-page count (e.g., 25–50). This keeps threads fast and readable.
14. Use Excerpts on Your Homepage
Showing full posts on archive pages can be slow and reduces click-through. Whether you can switch to excerpts depends on your theme or template:
- Classic themes: Many themes include an “excerpt vs full text” option. If not, use the More tag or template tweaks.
The Settings > Reading option “For each post in a feed, include Excerpt” affects RSS feeds—not necessarily your on-site archives—so use your theme/template settings for visible pages.

15. Minimize External HTTP Requests
Each external resource—scripts, fonts, images—adds an HTTP request. Too many requests slow pages.
Trim nonessential calls by:
- Disabling third-party scripts you don’t need
- Hosting critical scripts locally when possible
- Deferring and preloading wisely with your performance/caching plugin (HTTP/2/3 makes heavy concatenation less necessary than it used to be)
16. Disable Image Hotlinking
Hotlinking happens when other sites embed your images directly from your server—consuming your bandwidth without permission.
On Apache, edit .htaccess to add rules like:
# Disable image hotlinking (Apache)

RewriteEngine On
RewriteCond %{HTTP_REFERER} !^$
RewriteCond %{HTTP_REFERER} !^https?://(www.)?yourdomain.com

[NC]
RewriteCond %{HTTP_REFERER} !^https?://(www.)?google.com

[NC]
RewriteCond %{HTTP_REFERER} !^https?://(www.)?facebook.com

[NC]
RewriteCond %{HTTP_REFERER} !^https?://(www.)?pinterest.com

[NC]
RewriteRule .(jpe?g|png|gif|webp|avif)$ - [NC,F,L]
On Nginx, use valid_referers in your server config. If you use Cloudflare, enable built-in Hotlink Protection to block abusive embeds at the edge.
17. Use a DNS Firewall
Security is performance. A DNS-level firewall blocks malicious traffic upstream—before it hits your origin—reducing load and risk from bots or DDoS attacks.
Security plugins like Wordfence are helpful, but network-level filtering stops bad actors earlier in the chain, keeping your server focused on real visitors.

Strong options include Cloudflare, DNSFilter, and AI-powered DNSSense.
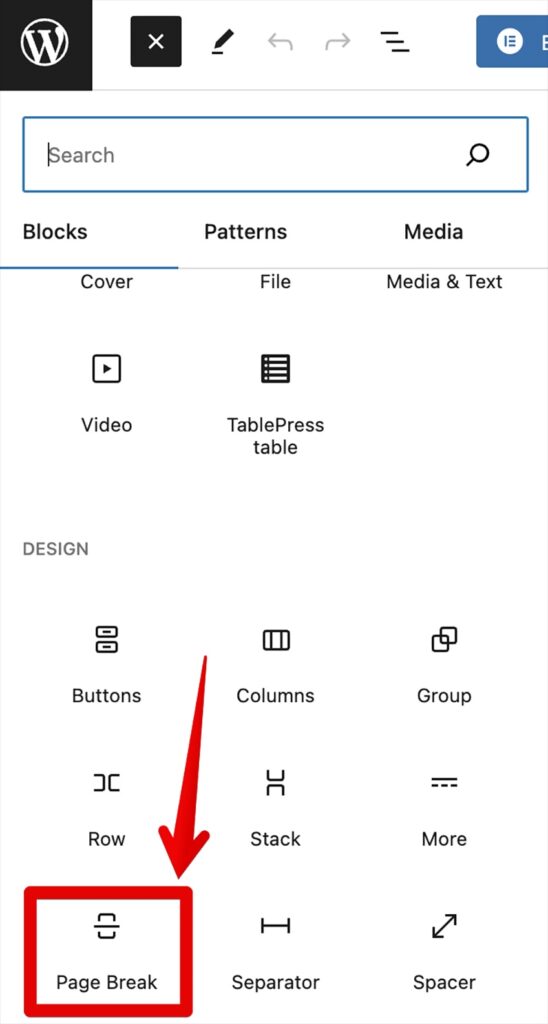
18. Split Articles Into Multiple Pages
Long-form content tends to rank well—but single pages with dozens of images or embeds can become unwieldy. Pagination keeps pages light and scannable. Use it sparingly; when in doubt, a table of contents and lazy loading often preserve UX without extra clicks.
In the Classic Editor, insert <!--nextpage--> where you want a break. In the block editor, use the “Page Break” block. Include clear navigation so readers don’t feel forced to click endlessly.
19. Fix Mixed Content Errors
After migrating to HTTPS, you may see “mixed content” warnings when some assets still load over HTTP.
Really Simple SSL can rewrite URLs on the fly, but for the best long-term fix, update hard-coded HTTP links in your theme, plugins, and database. Consider enabling HSTS at the server or CDN level once you’ve confirmed all assets serve securely.
For bulk updates, use a safe search-and-replace workflow to switch legacy URLs to HTTPS without corrupting serialized data.
20. Minify Your Files
Minification strips comments, whitespace, and line breaks from CSS, JS, and HTML to reduce file size and speed up delivery.
Avoid outdated minify plugins that haven’t been maintained. Use modern, well-supported tools—e.g., Autoptimize (minify/aggregate, defer, remove unused CSS) or performance suites built into top caching plugins. Note that with HTTP/2/3 you usually don’t need heavy concatenation; focus on deferring non-critical JS and serving critical CSS efficiently.

21. Limit the Number of Post Revisions
WordPress auto-saves revisions as you edit. Over time, thousands of versions can clutter your database.
Control the count by editing wp-config.php and adding:
define( ‘WP_POST_REVISIONS’, 5 );
This caps revisions per post at five and trims the rest automatically—keeping queries lean.
Conclusion
Speed, stability, and user experience are the foundation of search performance in 2026. Focus on what helps people: fast pages, clean design, accessible content, and trustworthy execution. The technical steps above make those outcomes repeatable.
Benchmark regularly, monitor crawl and indexing, keep software current, and prune anything that doesn’t serve users. Consistency here is often the difference between page two and position one.