A website wireframe is the structure upon which you build your online home—or, your website. Like a house, you need a solid and supportive framework for your website that makes it comfortable, easy to navigate, and welcoming for visitors.
In fact, you want the wireframe to be so good, visitors are going to want to keep coming back over and over again. (Which you may or may not want when it comes to your actual house.)
While the process of creating a wireframe may seem time consuming to new website owners, it actually saves time in the long run by allowing you to not just plan but optimize every section of your website for better user experience and increased conversions.
Creating a website wireframe doesn’t have to be a painstaking process. You also don’t need to be a designer to create one.
With wireframing software, you can build it quickly, address any key stakeholders’ concerns, and easily push the project forward to development and design. It should be a fast, simple, and painless process.
We’ll show you how.
What is a Website Wireframe?
A website wireframe is like a blueprint for your website.
It’s the framework upon which you build your site, allowing you to plan and optimize for the best possible user experience. In your wireframe, you can plan text and image placement, navigation menus, footer links, and other important site elements.
The goal of a website wireframe is to plan your site for optimal functionality. You want to create a framework that will make the user experience feel seamless while also allowing you to drive conversions and keep visitors on your site.
Why Do You Need Website Wireframe?
A website will function without a wireframe, but it likely won’t feel as cohesive without one. Taking the time to build a wireframe can bring you plenty of benefits:
- It allows you to visualize the layout and the navigation of your site before you invest too many resources in fully-designed pages, ultimately saving you time in trial and error.
- It allows you to prioritize your content, ensuring visitors will see the most important information first.
- It helps you stick to a clear and familiar site structure for your visitors.
- It ensures you’re always putting the user first, giving you the opportunity to plan for usability, functionality, and overall user experience.
- It gives you the chance to apply design principles and best practices to your framework.
What Needs To Be In a Website Wireframe?
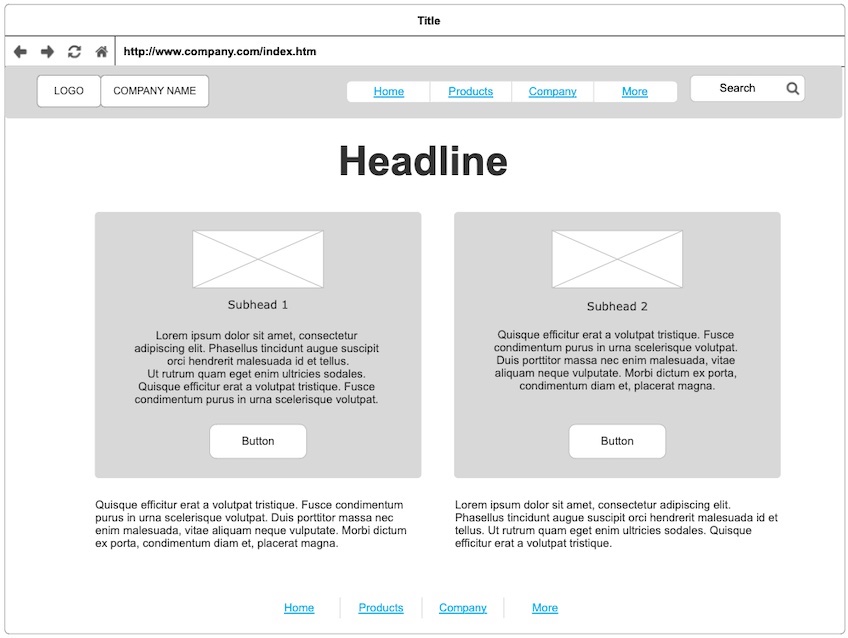
Not all wireframes are the same, but most include similar basic elements:
- Header: This is the title (H1) of the page, which is one of the first things the visitor sees when they click on your site.
- Subheaders: These are used to organize the hierarchy of your content. You’ll usually see them written as H2, H3, H4, and so on.
- Main Content Area: This is where the actual text on the page goes. You don’t need to actually write the copy in the wireframe. Rather, you can use placeholder text in your blueprint.
- Image Placeholders: These are squares or rectangles you place in a wireframe to pinpoint where an image or graphic will go. Usually, these placeholders are marked with an X sign inside the box.
- Buttons: These are the call-to-action buttons users will click to buy, register, sign up, or perform another action. Generally, most pages will have one or two such buttons.
- Search Field: This is an optional but frequently added feature for web pages. It helps readers navigate through your website.
- Hero Sections: These sections are meant to make your page more visually appealing, break the information, and underline specific pieces of text, such as testimonials.
- Footer: Normally, the footer will be the same throughout the entire website, and it generally includes links to important pages such as the privacy policy.
Keep in mind that wireframes need to be very simple—no frills, no fuss. Their main job is to address functionality issues and user flow, as well as give your web designer a skeleton to work with. Don’t worry yet about planning the exact copy, color schemes, and images for your site. That’ll come later in the design process.
What Should Not Be in a Website Wireframe
It may feel tempting to make your wireframes super extravagant and detailed. After all, the actual design is the fun part of creating a website, right? But the best wireframes are simple. They should address functionality and user experience above all else.
In that line of thought, here are some elements your wireframe should not include:
- Colors—This is a matter of design and branding, not something related to the actual structure of a web page, so stick with blacks, whites, and grays for your wireframes.
- Actual images—You can include image placeholders, but you shouldn’t include the actual images or graphics that you’ll be using.
- Typography—Just like colors and images, typography is meant for a later stage in the creation of the web page, when you’re in the full design process.
Of course, all of these elements are important for your website. But when it comes to wireframing, they can distract from the main goal. Plus, if you add these elements in your wireframes without approval, you might be wasting your time, as they could be changed at a later stage in the web design process.
Wireframing Software Is a Huge Time-Saver
In theory, you can create wireframes the old-school way: with pen and paper. However, that would also mean you’d likely have to scan your wireframes, upload them into some sort of file-sharing system, and take them to the design stage from there.
If that sounds a bit time-consuming and futile, it’s because it is. There are far better ways to create wireframes.
The simplest way to build your wireframe is with a drawing tool like Paint. This is very easy to do, but it’s severely dated and might cause irregularities in your wireframes, make your process hard to scale, and impede collaboration.
The better alternative is using wireframing software. These tools give you options to either create wireframes from scratch or start from templates. Either way, they save you time by including all the wireframing elements in one system, so you can just drag and drop them into your project.
Moreover, wireframing software also helps you collaborate better with other members of the team. Most often, these tools can be accessed by multiple members of the team at the same time, giving all key stakeholders a chance to give their input on the project while it’s still in development.
The good news is there are a lot of wireframing tools available, for every need, level of experience, and budget. Here are a couple of the most popular wireframing tools available today.
MockFlow
MockFlow is a beginner-friendly wireframing software with a ton of useful features for creating your website’s blueprint. Here are just a few:
- Over 1,000 pre-built templates
- Drag-and-drop components
- Master pages to save time
- AI tools and Wizard Mode to accelerate the wireframing process
- Collaboration features with defined user roles, including reviewer, editor, and admin
MockFlow comes in four pricing plans:
- Basic: Free
- Wireframing: $14 per editor per month
- Product Design: $19 per editor per month
- Enterprise: Starts at $160 per month, only comes with annual plan
Using Mockflow is extremely easy. Here’s how to get started:
- Create an account.
- Choose the type of wireframe you want to create (e.g., “Web”).
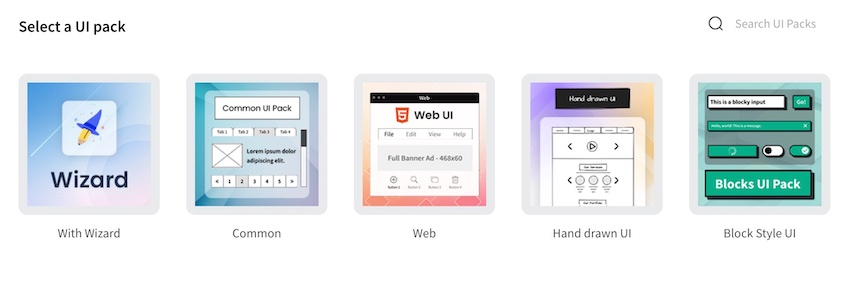
- Name your project.
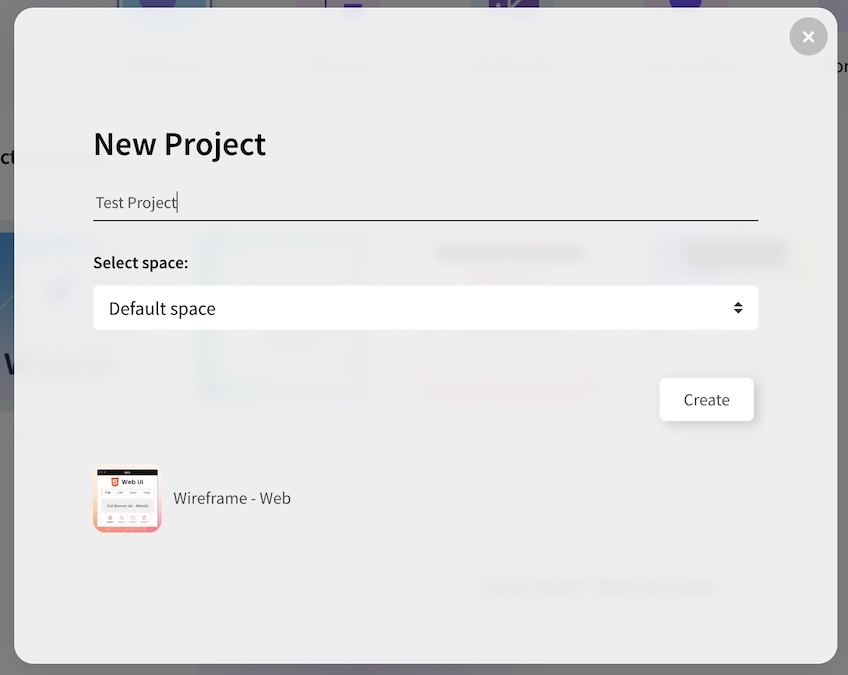
- Drag elements from the left-sided menu and drop them into the page.
It may take some time to play around with the software and get it exactly right, but once you get started, you’ll be able to take the wireframing process fully into your own hands.
Figma
Figma has become known as the rockstar of design tools—and for good reason. It can be used for wireframing and design, and it comes with a wide range of time-saving elements, making it easy to manage and scale your design projects.
Here are some of the features you get with Figma:
- Integrations with other tools, like Adobe Photoshop and Sketch
- Excellent collaboration features
- Open design system that allows you to create shared libraries for your team
- Vector graphics editor
- Pre-loaded frames to design for any device
- Tools for designing, prototyping, development, and more
Figma comes with four pricing plans:
- Starter: Free forever
- Figma Professional: $12 per editor per month billed annually
- Figma Organization: $45 per editor per month billed annually
- Enterprise: $75 per editor per month billed annually
Although Figma allows you to create pretty advanced designs and wireframes, it’s extremely easy to use.
- Create a new account.
- In the Dashboard, click on See all.
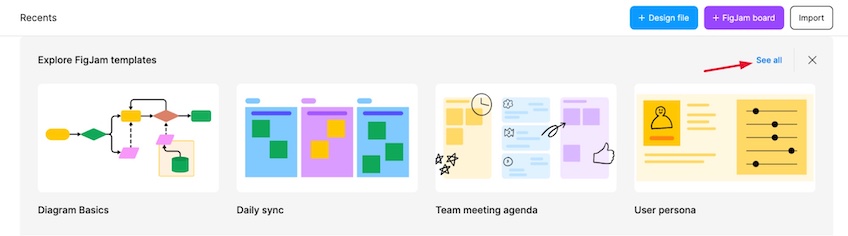
- A box will pop on the screen. Search wireframe in the search box.
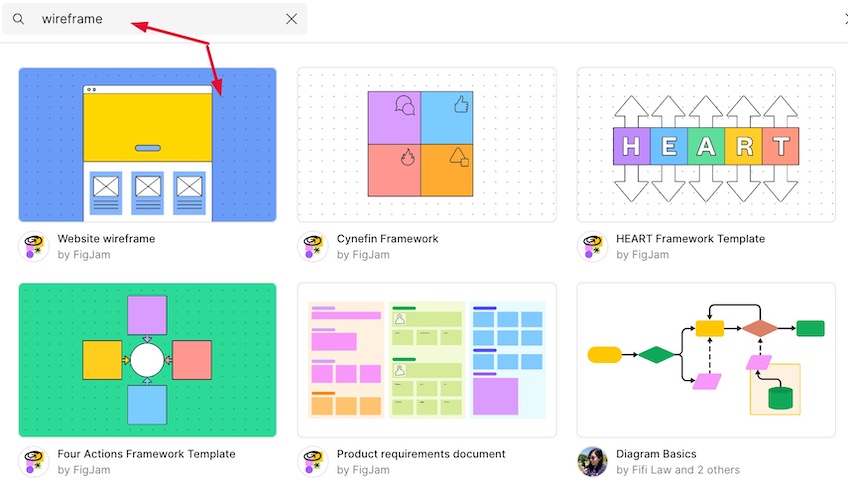
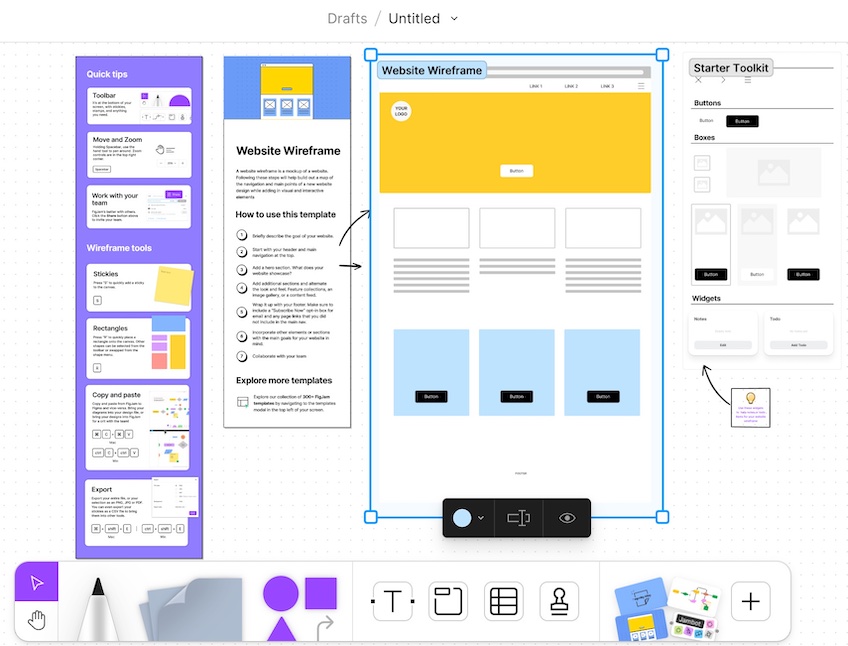
- Select the Website wireframe template.
- Select any wireframe element on the page to drag it to your desired location.
Again, you’ll want to take the time to play around with the software and optimize each element for functionality and usability. Once you get going, though, you may find that creating a wireframe is actually kind of fun. Just don’t get too bogged down by the details, and remember to keep it simple. Keep in mind that you’re just building the framework for the house, and the interior design can come later.