You’ve successfully built a website—but now you want to turn it into an app.
So where exactly do you begin?
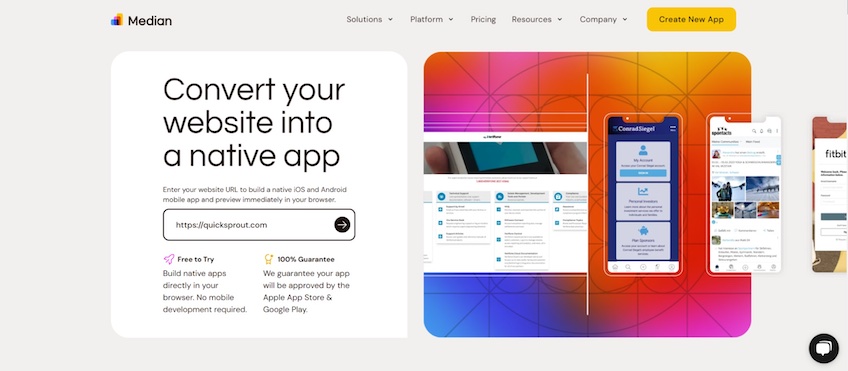
Building an app used to be an intimidating process. Today, it’s as easy as a few clicks. With the help of an online app development platform, you can turn a website into an app without needing to hire a developer.
Turning a website into an app provides tremendous benefits: you can expand the reach of your website, increase user engagement, and gain access to native application features like push notifications.
Getting everything exactly right will take a little time, but once you do, you’ll have a valuable new tool for promoting your brand and reaching your audience instantly—all without any special coding knowledge.
The Quickest Way to Turn a Website Into An App
An online app builder is a platform that takes a website and packages it as a “native app.” Users can download and install native apps on phones, tablets, and other mobile devices.
Here’s what you need to get started:
- An established website—You can create an app from any website you own, as long as it’s accessible through a URL. If you haven’t yet built a website, take a look at a few popular website builders.
- An online app builder—We’ll be using Median (formerly known as GoNative). Median provides an extensive breadth of utilities and a completely free version. So, you can build and test your app without paying while still having the option to pay for premium features such as plugins if you want to take it a step further.
Online app builders help you build a website within minutes. They’re easy and fast, and most will walk you through each step so you can feel confident with each stage of the app development process.
Pricing can range from $0 to thousands of dollars depending on your needs and preferences. For example, Median has a Self-Serve Free plan that allows you to build an app for free. You can also use its Self-Serve Professional plan, which provides more features such as JavaScript Bridge and access to its plugins. Pricing starts at $790.
If you don’t want to do all the work yourself, Median also offers Full-Service and Enterprise plans that provide you access to Median’s team of developers.
Here are a few other popular online app builders:
- AppMySite—A website-to-app builder that specializes in WordPress, WooCommerce, and Shopify sites.
- Twinr—A fast website-to-app builder designed for sites on ecommerce builders, including Shopify, WooCommerce, BigCommerce, and SquareSpace.
- Webtonative—A streamlined online app converter with powerful features like push notifications and ads.
10 Steps to Turn a Website Into an App
Turning a website into an app only takes a few minutes. But you might want to finetune your user experience by configuring your app further. Median makes this process easy by letting you build and test your web app as you develop it.
1. Create a New App on Median
Go to Median and type in your website’s current URL.
On the next page, fill out your App Name and Contact email address.
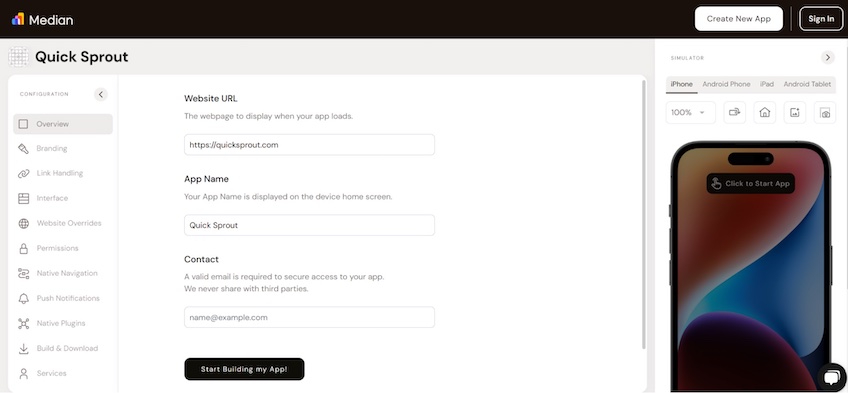
Click on Start Building My App!
Median will now pull your website in, generate an app, and walk you through customizing and configuring the app.
2. Define Your App Branding
Now you can customize the appearance of your app. This section includes your App Icon, Splash Screen, Theme Colors, and Status Bar.
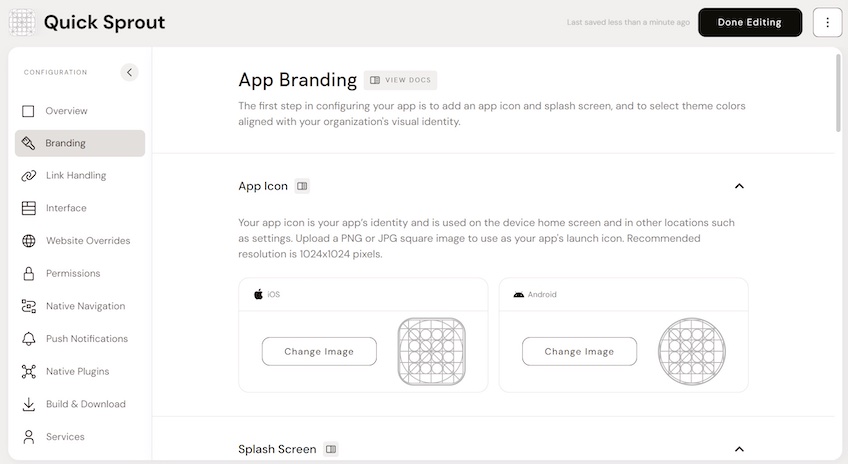
You’ll want to match the style and feel of your app to your website. Here’s how:
- Upload images to your App Icon and Splash Screen so users see your logo and branding when they install, click on, and open your app.
- Update your Theme Colors with your brand colors for a more consistent user experience.
- Set your Status Bar to “light” or “dark” based on your overall style.
3. Customize Your Link Handling
Link handling controls how links are handled within your app—such as whether apps are opened in a new window or within the same window.
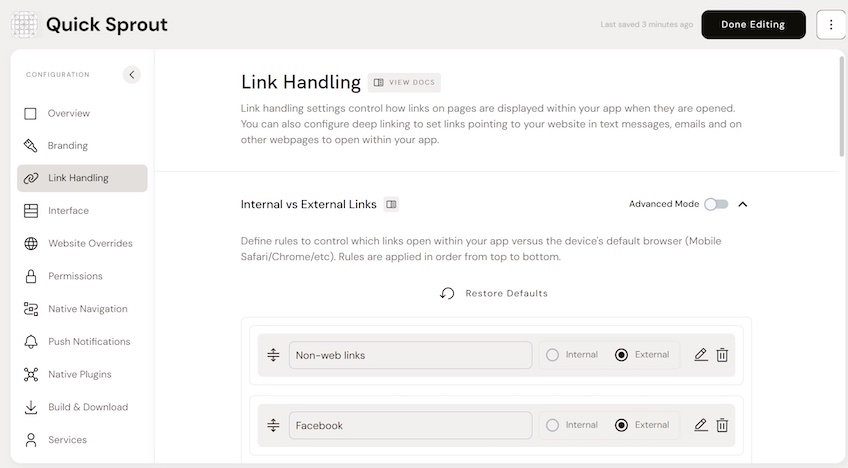
Consider whether you want links in your app to go to new windows and whether you want a given link to go to your website or to launch your app.
- Define rules for your Internal vs. External Links, such as whether Facebook launches within your app’s browser or the user’s browser.
- Set your New Windows function to open links within new windows inside your app by default.
- Build Universal Links / Deep Links to control when a link will launch your app rather than your website.
- Create a URL Scheme Protocol if you need streamlined redirects. (You likely don’t.)
4. Configure Your App Interface
Here, you’ll specify how your app behaves in action. This section includes whether the app runs in full screen, the screen orientation it runs on, and how it manages swipe gestures.
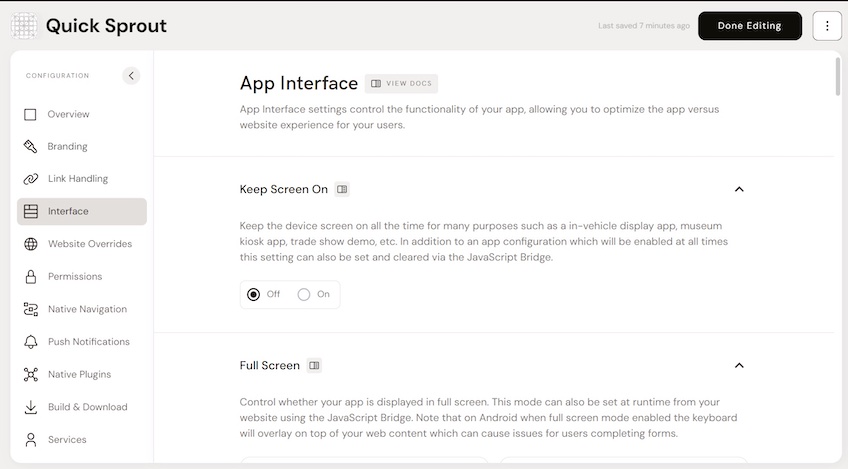
Use Median to fine-tune your user experience:
- Select Keep Screen On if you want to keep the screen on when the user is in your app; this is useful for things like kiosk apps.
- Select Full Screen if you want the app to be displayed in full screen. On Android, this will also provide a keyboard overlay.
- Set Dark Mode if you want your app to run in dark mode on iOS or Android. You can also select Auto to switch between light mode and dark mode automatically.
- Set Screen Orientation to auto-rotate, fixed portrait, or fixed landscape, depending on whether your app is running on iOS or Android and whether it’s running on a tablet or a phone.
- Enable Native Page Transitions if you want a loading screen between pages to indicate to the user that the page is still loading.
- Enable Pull to Refresh if you want users to be able to refresh a page by pulling the page downward.
- Enable Swipe Gestures if you want users to be able to navigate your app by swiping left or right.
- Enable Pinch to Zoom if you want users to be able to pinch to zoom in and out of their screen.
- Customize Font Scaling to change the default font size on Android, overriding the normal font size.
- Set Maximum Windows to indicate the maximum number of windows that a user can open at once, improving performance.
- Set Viewport Width to specify the scale of your pages and how much of the page is shown.
- Set Localization to define the language that your app is in by default.
- Set Offline Page to customize the page shown when your app is offline. When you transition a website to an app in this fashion, the app still pulls your website live from the internet—it doesn’t work when offline.
5. Build Your Website Overrides
If you’re building a simple app, you probably won’t need website overrides. But you could. Overrides let you override things like your website’s style (CSS) and website’s programming (JavaScript).
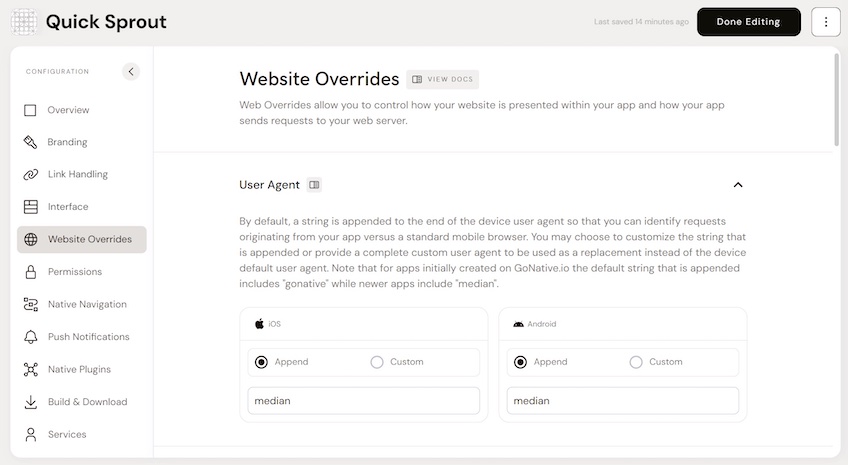
If you don’t think you need this section, you likely don’t! However, it’s an advanced feature that is good to have available if you do need it in the future.
- Set a UserAgent string for a custom user agent on your iOS or Android app.
- Add Custom Headers to an iOS or Android app to send customized headers to the web server.
- Add Custom CSS to iOS and Android, iOS apps only, or Android apps only, to affect how the website is styled on these specific platforms.
- Add Custom JavaScript to iOS and Android, iOS apps only, or Android apps only, to affect how the website operates on these platforms.
6. Set Your App Permissions
Many apps need permissions—some more than others. A fitness app might require the user’s location, while an image editing app might require access to the user’s files. In this section, you’ll set your app’s permissions.
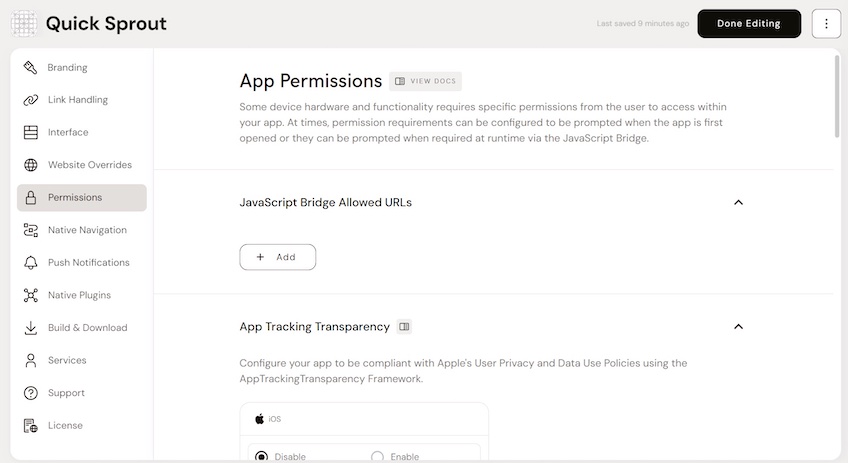
You can set the following app permissions:
- Add JavaScript Bridge Allowed URLs to allow on-demand permissions requests. These URLs trigger if you want to prompt the user for permission when they take an action within your app rather than when they initially download and install your app.
- Add an AppTrackingTransparency framework to help you remain in compliance with Apple’s User Privacy and Data Use Policies.
- Toggle Location Services if you need to prompt your users to provide you with location access.
- Toggle WebRTC Audio & Video if you need to prompt the user for camera and microphone access.
- Toggle the Downloads Directory if you need access to the user’s public download folder, not just an app-specific folder.
- Turn on Background Audio if you want to play sounds while operating as a background service.
- Under iOS Permission Descriptions, describe the permissions that your application requires for your iOS users.
7. Design Your Native Navigation
When users access your website through a browser, they use their browser’s navigation. When users download your app, however, they need to rely on the navigation options that you give them. That means you may need to design a native navigation bar for some traditional navigation elements, such as navigating forward, navigating backward, and refreshing.
On Median, you can select Top Navigation, Sidebar Navigation, Bottom Tab Bar, and Contextual Nav Tab Bar. Once you’ve enabled a type of navigation, you can style it and edit its content.
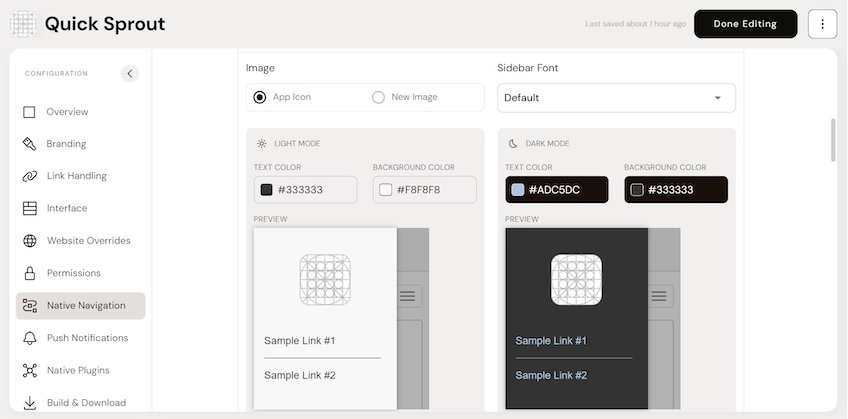
- Select the type of navigation you want: Top Navigation, Sidebar Navigation, Bottom Tab Bar, and Contextual Nav Tab Bar.
- Set the Display Mode to Auto or Always, depending on whether you want the navigation bar to show all the time or just when toggled on.
- Set the Styling of your navigation bar, such as whether it displays in light mode or dark mode.
- Use the Visual Editor to add and remove links as needed—depending on your site, you may want different navigation elements in your app than your website.
- Use the Auto New Windows feature to set when links in your navigation bar will open in new windows.
8. Configure Push Notifications
Push notifications are one of the major benefits of a native application. You can implement push notifications with a service (such as OneSignal). In this section, you can control your push notification settings, such as Automatic Registration, Automatic Data Transmission, and Notification Sounds.
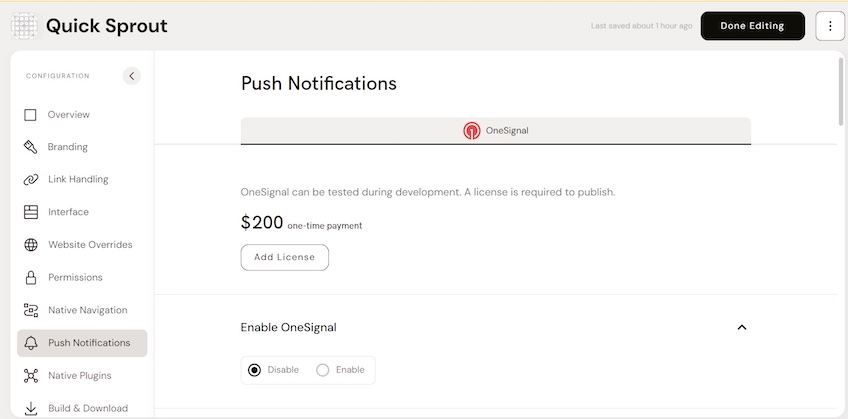
- Choose to enable or disable OneSignal, depending on whether you want your app to have push notifications. There is a one-time payment associated with OneSignal.
- Set the AppID given to you by OneSignal if you have enabled it.
- Set Automatic Registration to Automatic or Manual to control how users opt into push notifications.
- Set Automatic Data Transmission to Automatic or Manual to control how data is transmitted between your app to OneSignal.
- Set Foreground Notifications to Show or Hide to indicate whether foreground notifications are shown in the app.
- Set the Android Notification Icon to an icon that will show alongside your notifications.
- Set Data Tags Native UI JSON URL to help users manage their OneSignal subscriptions.
- Set Notification Sounds to implement custom notification sounds.
9. Integrate Native Plugins
Plugins extend the features and functionality of your application. Median provides a variety of one-click plugins you can add to your app:
- Social Login
- QR/Barcode Scanning
- Google Firebase Analytics
- Face ID/Touch ID Android Biometrics
- In-App purchases
There are costs associated with these plugins, ranging from $200 to the thousands—but they may help you monetize your app, meaning you can look at the money spent as a long-term investment into a profitable venture.

Select the plugins you want, and Median will do the rest, automatically integrating the plugin with your app. You must create an account with the plugin service to use it.
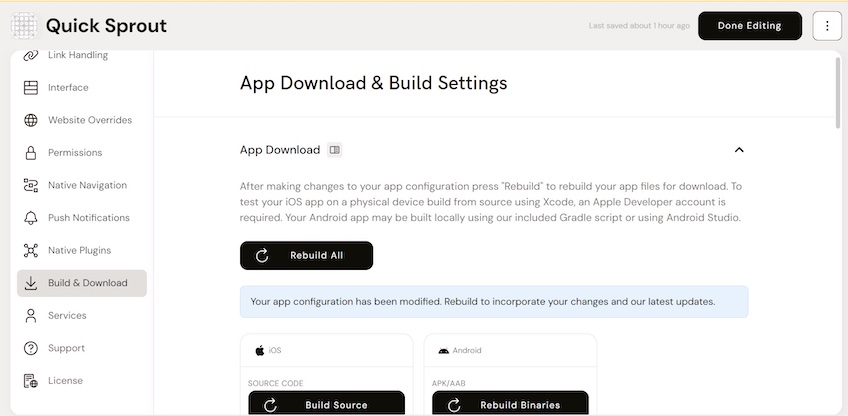
10. Build and Download Your App
Finally, it’s time to build and download your app. You’ll be downloading your application’s source code for iOS or Android, which can then be uploaded to an app marketplace.
- Click Rebuild All to ensure that any changes you’ve made are built into your application.
- Click Build Source for iOS and/or Android, depending on which platforms you want to create an application for. You can also choose to download an APK for Android.
And that’s it!
You’ve successfully turned your website into an app. The source file downloaded is what you need to get your app distributed on major app delivery services such as the Apple App Store and Google Play.
What’s Next for Your App?
You’ve turned your website into an app, but you still need to distribute it so users can find it. Once you’ve built and packaged your app, you can upload it to third-party marketplaces, like Google Play, Apple App Store, and Amazon Appstore.
Median lets you save and modify your app on their platform, so you can continue to update, develop, and manage it side-by-side with your website.
Now: What kind of app are you thinking of making?