So you’ve made the leap to use WordPress to build your website. Smart move. If you’re feeling unsure about what to do next—or how to make changes to your site—that’s normal and fixable.
Don’t worry, this is a common challenge for people new to WordPress.
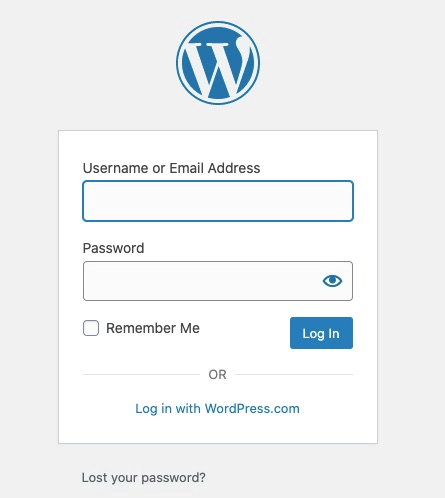
The first thing to do is log in to your admin dashboard. Think of the dashboard as your site’s control center. From here you’ll adjust settings, manage users, add plugins, control your theme, and configure URLs (permalinks) for your pages and posts.
You may use this dashboard daily, so it’s essential to know how to access and navigate it. Without dashboard access, you’ll struggle to fully control your website, publish content, or keep it secure.
To access your WordPress login page, add /wp-admin or /wp-login.php to the end of your site’s URL. For example, www.yoursitename.com/wp-admin (or /wp-login.php) will take you to the login screen for your dashboard.
Because WordPress powers a huge portion of the web (over 409 million people view 20+ billion WordPress pages each month), attackers constantly target the default login paths. Bots and bad actors routinely scan for sites using the standard /wp-admin or /wp-login.php endpoints, then hammer them with password guesses.
That’s why it’s wise to change your login URL to something non-obvious. It won’t replace good security practices, but it will dramatically cut down on automated login attempts and nuisance traffic from brute-force bots.
Changing the login URL also reduces the effectiveness of the bots trained to target /wp-admin over and over again.
Because this is such an important part of running a secure site, I’m dedicating this post to why changing your WordPress login URL matters—and how to do it, step by step, in just a few minutes.
4 Steps to Change Your WordPress Login URL
Here’s the quick overview—details for each step are below.
- Backup your site
- Download and activate the WPS Hide Login plugin
- Set up the WPS Hide Login plugin
- Test it out
What to Expect When Changing Your WordPress Login URL
Although changing your login URL sounds technical, it’s quick and painless—and it immediately reduces drive-by bot traffic on your site. Follow the steps below and you’ll add another layer of protection without touching code.
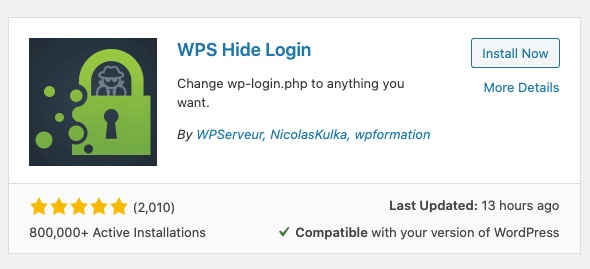
You can change the login URL a few different ways, but the simplest and safest option is to use a plugin. Several plugins can do this; the most popular, lightweight choice is WPS Hide Login (2M+ active installs and regularly updated for current WordPress versions).
Below, I’ll show you how to install and configure WPS Hide Login to protect your site from automated attacks.
The Good
Brute-force attacks are the most common login threat. These attacks are run by bots that try thousands of username/password combinations in minutes. Hiding the default login path won’t stop a targeted attack, but it will dramatically reduce the noise and wasted server resources from generic bot scans.
So instead of leaving your login page at a URL attackers can guess, make it something only you and your team know—and pair it with strong authentication.
By default, the WordPress login lives at www.yoursitename.com/wp-admin (which redirects to /wp-login.php). Bots scan site after site looking for that path and then attempt endless combinations to get in.
This is even more effective for attackers when people reuse usernames and choose weak passwords such as:
- 123456
- Password
- admin
- 12345
- 123456789
- qwerty
- And more
To keep accounts safe, avoid password reuse entirely. Use long, unique passwords for every site and store them in a reputable password manager. Also create a unique custom login URL—moving away from /wp-admin makes your site harder to discover by scanners and decreases junk traffic hitting your server.
Best practice: combine a custom login URL with strong passwords, limited login attempts, and two-factor authentication (2FA) for admin users. If you use a plugin like Wordfence or a dedicated 2FA plugin, enable it for all administrator accounts.
Happily, changing the login URL is smooth and beginner-friendly when you use a plugin. No code editing required.
The Bad
If you’re trying to minimize plugins, I get it—plugins require updates and can add overhead. Some folks try to change the login URL manually instead of installing one more plugin. I strongly recommend against that approach unless you’re very comfortable with WordPress internals.
Manual changes via File Transfer Protocol (FTP) or other file editors mean touching WordPress core behavior. That’s risky if you’re not experienced—and WordPress updates can overwrite your changes, forcing you to redo the work after every update.
Manual edits also introduce edge-cases when you log out or when caching and rewrite rules conflict with your changes—leading to surprise lockouts.
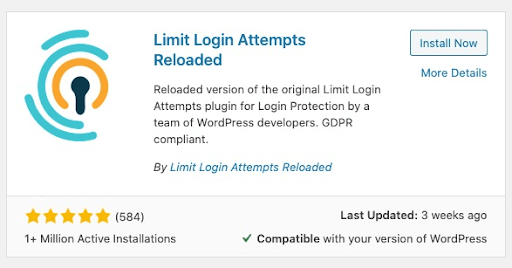
Another smart defense is to limit login attempts. A reliable option is Limit Login Attempts Reloaded, which blocks repeated failures and slows brute-force bots dramatically. Keep this plugin updated; past versions have received security patches like most widely used plugins. Many full security suites include this control as well.
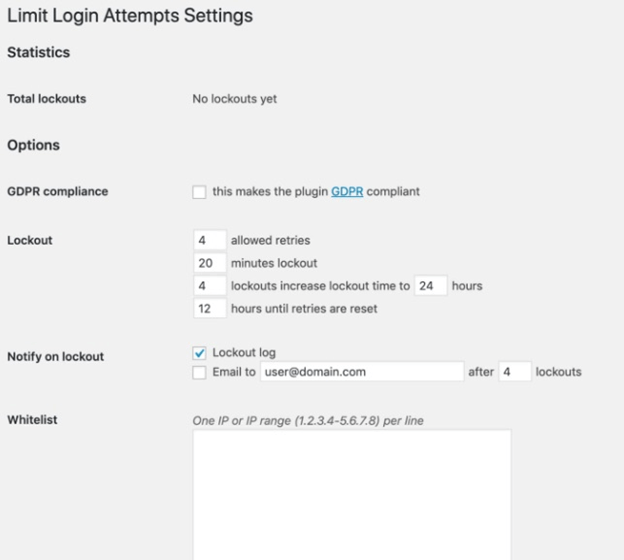
This plugin lets you monitor and control:
- Total lockouts: How many times attackers were blocked from logging in
- Lockout rules: How many failed attempts trigger a lockout, lockout duration, and how long until retries reset
I suggest a retry limit of four to allow for honest mistakes by you or trusted users without opening the door to brute force.
Using Limit Login Attempts Reloaded is a solid companion to a custom login URL.
To stay on the safe side and avoid breakage, stick with changing your login URL via a proven plugin. In this guide I’ll use WPS Hide Login—it’s popular, lightweight, and user-friendly.
Step 1 – Backup Your Site
The very first thing you should do—before touching your login URL—is back up your website.
If anything goes sideways while you’re installing or configuring a plugin, a recent backup means you can restore a working version of your site in minutes.
To back up your site, you need three things:
- The WordPress core code
- The
wp-contentfolder (themes, plugins, uploads) - Your database
Understand Why Backing Up Is Important
The database is the most crucial part of your site—it stores pages, posts, users, settings, and other content you’ve entered in the admin.
The wp-content folder holds themes, plugins, images, and documents. If you lose files there, you can often re-upload them, but it’s time-consuming. The WordPress code itself is publicly available, so that’s the least painful piece to replace.
Which Plugin to Use
Many site owners find the easiest backup method is a plugin such as BackWPup. It can back up your database and files and store them on your server or in remote storage like Dropbox, Google Drive, Amazon S3, OneDrive, and more.
BackWPup is free, quick to set up, and reduces the risk of data loss.
If you need to restore a BackWPup backup, the process is straightforward—another reason to keep regular backups scheduled.
Bluehost
If you host your WordPress site on Bluehost, WordPress hosting plans include automatic daily backups with one-click restore in the control panel. Exact backup features and retention can vary by plan and promotions, so confirm what’s enabled on your account before relying on it as your only backup.
Step 2 – Download and Activate the WPS Hide Login Plugin
Once your backup is complete, you’re ready to change the login URL.
First, download the plugin you’ll use: WPS Hide Login.
Install the Plugin
Log in to WordPress and go to the Plugins directory. Search for “WPS Hide Login.”
When you find it, click Install Now to begin installation.
Activate the Plugin
After installation, click Activate. You can also activate it from your Plugins list in the admin dashboard.
Step 3 – Set Up the WPS Hide Login Plugin
With the plugin installed, it’s time to choose your new login URL and apply the settings.
Find the Plugin on Your Dashboard
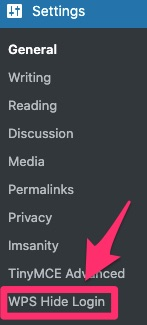
Navigate to Settings >> WPS Hide Login in your admin dashboard.
Change the Login URL
Enter a unique path in the “Login URL” box—avoid obvious words like “login,” “admin,” or your brand name. Choose something memorable to you but hard to guess.
Use the “Redirection URL” box to set where visitors are sent if they try www.yoursitename.com/wp-admin without being logged in. The default is your 404 page, which is a safe choice for most sites.
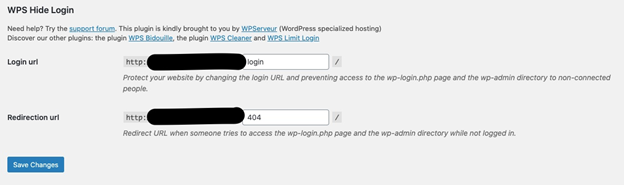
Save the Changes
When you’ve set your paths, click Save Changes to make them live.

After saving, your changes are active immediately—you can no longer use www.yoursitename.com/wp-admin to reach the login screen. Bookmark your new login URL and share it securely with any authorized users.
If you run into issues or need to revert, you can remove the plugin and regain access via the default login path. In practice, WPS Hide Login is stable and shouldn’t cause conflicts on well-maintained sites.
Step 4 – Test It Out
Finally, test the new way of logging in. Enter your new login URL in the browser, sign in with your username and password, and confirm you can reach your WordPress dashboard. Then open a private/incognito window, try the old /wp-admin path, and confirm it redirects to your chosen Redirection URL. If anything looks off, clear your site and browser caches and try again.