Figuring out how to make money from a website can feel mysterious—even to finance pros. But it doesn’t have to be complicated.
There are always fresh ways to start a profitable side hustle online—some more practical than others.
And since time is money, I’ll dive right in.
1. Affiliate Marketing
- Advantages: low startup cost, easy to get started, flexible, scalable, performance-based income, be your own boss
- Disadvantages: high competition, algorithm changes, low commissions in some niches, no guaranteed revenue
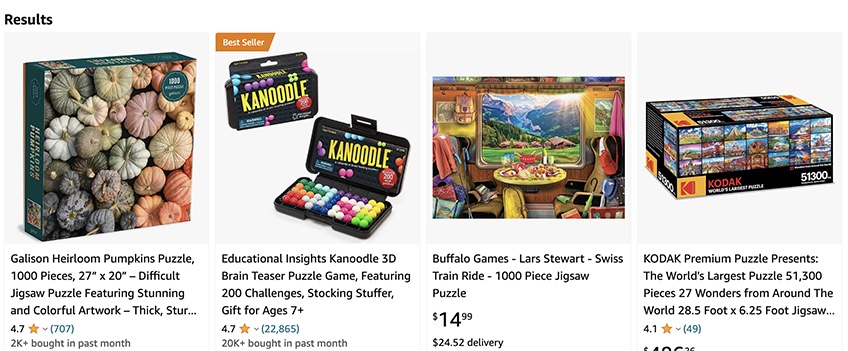
Affiliate marketing is a business model where you promote other companies’ products or services and earn a commission when someone makes a qualifying purchase or action through your unique affiliate link.
You’ll only earn when a user takes that qualifying action—like making a purchase—after clicking your affiliate link. These links are provided by affiliate programs run by major retailers like Amazon or Chewy.
This type of monetization is often called performance marketing since you only earn based on the performance of your content. Commission structures vary by industry and program—think low single digits on some retail categories to double-digit or recurring commissions on software and digital products.
The key to affiliate success? Pick a niche you actually understand, then create hands-on, trustworthy content: honest reviews, side-by-side comparisons, buyer’s guides, and tutorials that solve real problems for your audience.
You control how you market products—via blog posts, social media, email, YouTube, or paid ads—as long as you follow each program’s rules. That lets you choose a strategy and budget that fit your goals.
Affiliate marketing is one of the most affordable ways to start an online business. Typical costs include:
- Domain name: most standard domains run roughly $10–$20/year; premium names can be much higher
- Hosting: entry-level shared hosting can be under $10/month; higher-performance plans cost more
- Security: SSL is often free via your host; consider a firewall and backups as you grow
- Content creation: invest time or budget in original writing, photos, and testing
- Extra tools: SEO plugins, analytics, and legal pages (privacy, disclosures) as your site scales
Best practices in 2026:
- Add clear affiliate disclosures and use proper link attributes (e.g., rel=”sponsored” where appropriate)
- Demonstrate real experience—show photos, results, and testing notes where you can
- Organize content by intent (beginner guides, comparisons, “best of” lists, how-tos)
- Keep product info current—pricing, availability, and alternatives change often
Many beginners use affiliate marketing as a launchpad into full-time online business. Some even evolve into personal brands with their own products and services.
2. Online Advertising
- Advantages: precise targeting, real-time performance data, flexible formats, cost-effective reach
- Disadvantages: declining click-through rates, limited space, learning curve for beginners, increasing ad fatigue
Online advertising involves placing targeted ads on your website, social feeds, or email newsletters to generate income. Unlike print, digital ads let you reach specific audiences and optimize in real time.
The five main types of online ads include:
- Display ads: banners on your website or third-party platforms
- PPC (Pay-Per-Click): promoted listings in search results
- Social ads: sponsored posts in Instagram, Facebook, LinkedIn, or TikTok feeds
- Video ads: skippable or non-skippable clips on YouTube, Twitch, and more
- Native ads: promotional content that blends into articles or pages
Getting started isn’t just “paste some code.” Success depends on a few early decisions:
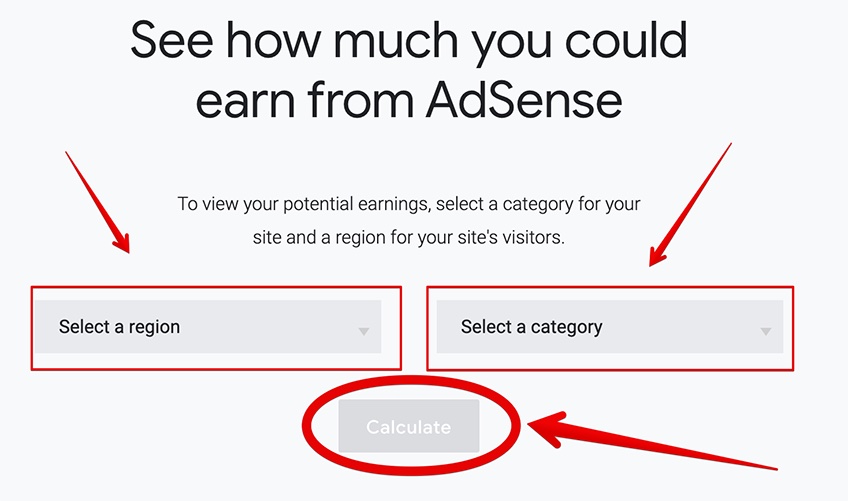
- Pick the right ad network: options include Google AdSense, Media.net, Ezoic, and Taboola (native). Premium networks have higher bars—e.g., Mediavine generally requires ~50,000 monthly sessions, while Raptive’s minimum is 25,000 monthly pageviews as of October 2026.
- Match ads to your niche and audience—use blocklists and placement controls to protect brand fit
- Design smart layouts—optimize size, density, and placement to preserve user experience and Core Web Vitals
After approval, you’ll embed network code that serves ads and pays by click (CPC) or by impression (CPM). Rates vary by niche, seasonality, and geography.
Because of banner blindness, ad blockers, and privacy changes, you’ll need to monitor results and keep ads useful and non-intrusive. When done well, ad revenue can evolve from a side stream into a meaningful income source.
3. Dropshipping
- Advantages: minimal upfront costs, location flexibility, no inventory to manage, payment only on successful sales
- Disadvantages: limited product control, difficult returns, low profit margins, reliance on third-party logistics
Dropshipping is an ecommerce model where you act as the middleman between the customer and the supplier. You don’t keep inventory—you take orders on your site and forward them to a third-party vendor who fulfills and ships the product.
Unlike traditional ecommerce, dropshippers don’t manage stock, warehouses, or fulfillment. Sites like AliExpress or private-label vendors handle logistics while you focus on marketing and customer service.
To start, you’ll need a computer, stable internet, and a modest budget for domain registration, web hosting, and a storefront (Shopify or WooCommerce). Expect learning time for product research, supplier vetting, and customer support.
Early tasks typically include:
- Setting up payment, tax, and shipping rules
- Managing orders and coordinating fulfillment with suppliers
- Handling customer support, returns, and replacements
- Tracking finances, fees, and cash flow to protect margins
As you scale, invest in CRO tools, analytics, and rigorous supplier quality checks. Test pricing and product copy frequently, and consider faster local suppliers to reduce shipping delays.
It’s not as easy as it looks: unreliable suppliers, chargebacks, or slow delivery can hurt your brand quickly. But with resilience and strong operations, dropshipping can become a steady income stream.
4. Premium Content
- Advantages: consistent revenue, boosts brand authority, more stable than ads, appeals to loyal readers
- Disadvantages: can slow audience growth, paywalls may turn off casual visitors, high-quality content is a must, risk of piracy
Premium content is gated material that readers pay to access—via one-off purchases, subscriptions, or access passes. Think in-depth guides, templates, calculators, or research reports.

This works best once you have traction and loyal readers. You can also run a freemium model: keep most content free, charge for advanced resources.
Implementation is straightforward with the right tools. A capable CMS or membership plugin (e.g., MemberPress, Restrict Content Pro) can manage tiers, payments, and access. Budget extra if you need design or developer support.
To succeed, your premium content must feel indispensable: evergreen material, expert-level tutorials, deep dives, or assets that save time (templates, scripts, swipe files). Poorly executed paywalls turn visitors away—prioritize value first.
Paired with email marketing and SEO, premium content can become a reliable, long-term revenue engine.
5. Pay-Per-Click (PPC)
- Advantages: fast results, measurable ROI, narrow targeting, real-time analytics, budget control
- Disadvantages: expensive in competitive niches, ad fatigue, potential for low trust if poorly implemented
PPC can play two roles in your strategy. As an advertiser, you can buy traffic to grow your list, promote products, or validate offers. As a publisher, you can monetize with contextual ads on your site (e.g., AdSense), earning from clicks and impressions.
With AdSense and similar networks, you embed a code snippet; the network serves relevant ads and pays based on your traffic quality and the advertiser’s bid. As an advertiser, you’ll run campaigns in Google Ads and other platforms to reach high-intent keywords or audiences.
Search and ad ecosystems continue to evolve alongside AI results and privacy rules, so keep testing formats and targeting.
Why PPC works:
- Target by intent, keyword, or audience to reach ready-to-buy users
- Control creative, copy, and scheduling—and A/B test everything
- Use platform guidance and analytics to improve click-throughs and ROI
Aim for a clean, fast site with at least modest organic traffic before enabling display ads. If you’re buying traffic, start small, measure conversions (not just clicks), and optimize landing pages to protect your budget.
Bottom line: PPC is highly customizable and data-driven, but competition and costs can be steep. Focus on sustainable growth, not overnight wins.
6. Selling Courses
- Advantages: high margins, passive income potential, scalable, broad topic selection, boosts brand credibility
- Disadvantages: significant upfront effort, slower initial traction, works best with an existing audience or strong marketing
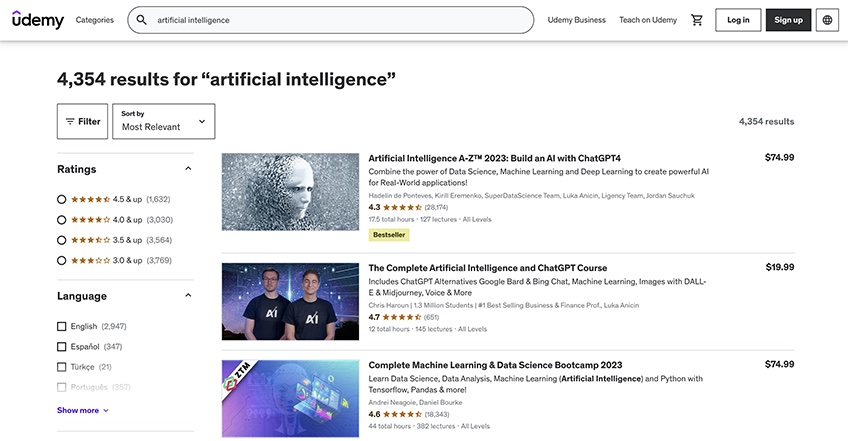
If you’re skilled in a topic and enjoy teaching, selling online courses is one of the most valuable monetization models. You can host courses on your own website or use third-party platforms like Udemy or Coursera.
Hosting on your own site gives you control over pricing, branding, and the customer relationship. Third-party marketplaces are great if you’re starting from zero traffic—just be aware of revenue splits and limited control.
To launch your first course:
- Choose a subject you know well—marketing, AI tools, personal finance, design, or your core specialty
- Use quality gear: webcam, microphone, screen recorder; optional teleprompter for smoother delivery
- Edit with tools like DaVinci Resolve or Final Cut Pro
- Set a price that reflects depth and outcomes—intro courses can be low-cost; flagship programs command more
- Host it yourself or upload to a trusted learning platform
Promote via email, social, partnerships, and webinars. Momentum builds over multiple launches; a single well-received course can drive revenue for years with periodic updates.
7. Building an Email List
- Advantages: fully owned channel, direct and personalized communication, low startup cost, high ROI
- Disadvantages: spam concerns, legal compliance (GDPR, CAN-SPAM), opt-in reluctance from cold traffic
An email list is a group of users who voluntarily subscribe to hear from you. It’s a durable marketing asset because you aren’t at the mercy of algorithms or platform changes.
Use tools like Klaviyo, HubSpot, or OptinMonster to capture leads and manage campaigns. For budget picks, see my guide to the best email marketing services.
Ways to monetize a list:
- Dedicated emails: single-sponsor sends to your list
- Classifieds: embedded ad blocks inside a newsletter
- Sponsored content: featured sections for brand partners
- Tripwire offers: low-priced, high-value products to convert new subscribers
- Your own products: ebooks, coaching, software, memberships, or courses
Avoid selling or sharing lists without explicit permission—it’s risky, often illegal, and damages your brand. Treat subscribers with respect and always provide easy opt-outs.
Bottom line: lists remain one of the most beginner-friendly, high-ROI monetization tools. The tech is simple; earning trust takes time and consistency.
8. Selling Your Site
- Advantages: quick cash-out, frees up time, avoids future risk, cash lump sum based on future potential
- Disadvantages: gives up future income, potential loss of community, non-compete clauses, emotional detachment
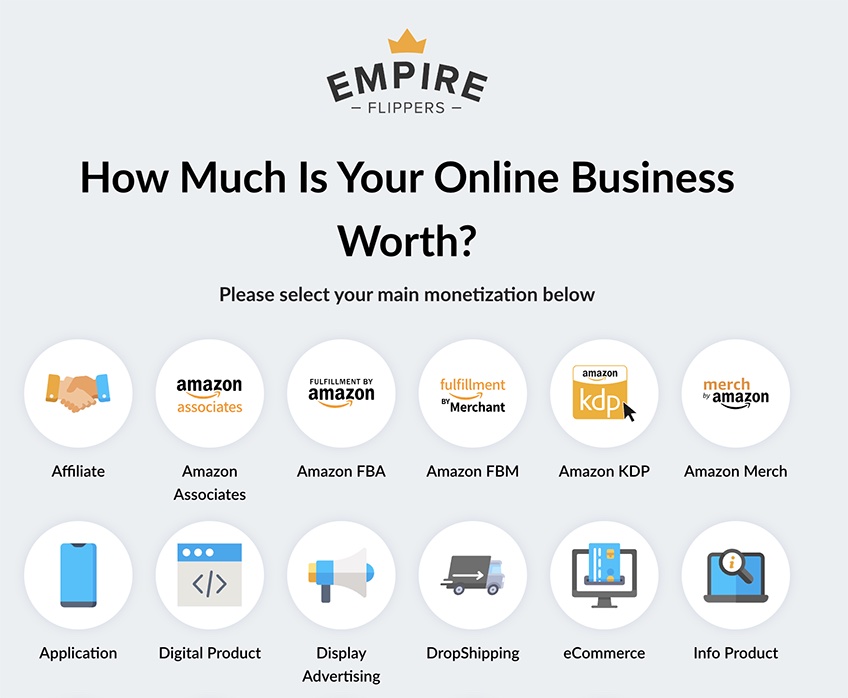
Selling your site is a legitimate exit strategy—especially if you have steady traffic, reliable revenue, and brand authority. Value the site carefully and list on reputable marketplaces.
Ballpark valuation: many content and ecommerce sites sell at a multiple of monthly net profit (for example, several dozen months’ profit), with the exact number influenced by risk and growth potential.
Valuation factors: traffic volume and quality, backlink profile, monetization methods, domain strength, niche volatility, and platform (Shopify, WordPress, etc.).
Where to list: Trusted marketplaces include Flippa, Empire Flippers, and FE International. Most offer free or paid valuations and due-diligence guidance.
Treat it like selling real estate: gather clean analytics, prepare your pitch, and screen buyers. Use escrow and grant access carefully to protect your assets.
To make your listing credible and attractive:
- Share accurate analytics—GA4 plus keyword tools (Ahrefs/Semrush) help validate performance
- Clarify operations—include a simple P&L, vendor list, and SOPs to smooth handoff
- Be transparent—disclose all monetization methods, costs, and growth opportunities
Recap
There are more ways than ever to make money with a website, but success rests on a few fundamentals:
- Treat your site like a real business with systems and clear goals
- Create content that helps, inspires, or solves problems—and keep it up to date
- Grow durable channels—SEO and email—so you’re less dependent on algorithms
- Build trust with transparency, evidence, and excellent user experience
Choose a monetization method that fits your skills and timeline, then layer in additional streams for diversification. There’s no one-size-fits-all model—but there’s definitely a path that fits you.