Every successful online store starts with a solid website foundation. If you’ve never built one before, don’t sweat it—most people haven’t. The key is to get moving, because your first sale won’t happen until the site is live. And with online shopping now the norm across nearly every category, there’s no better time to jump in.
Ecommerce keeps growing fast, which means there’s plenty of room to carve out your niche in a profitable, expanding market. The sooner you launch, the sooner you can start building your brand, earning trust, and compounding traffic.
Modern tools make building an ecommerce site easier than ever—even for beginners. You don’t need to code or hire a developer to create something fast, secure, and professional.
One of the most popular ways to launch a store on WordPress is WooCommerce. It’s free, powerful, and runs as a plugin on any WordPress site. All you need is reliable hosting to get started.
This guide walks you through the whole process step-by-step—from choosing a host to launching your WooCommerce store today.
7 Steps to Create an Ecommerce Website
Here’s a simple breakdown to launch a fully functional ecommerce site, even if it’s your first time:
- Sign up with an ecommerce builder
- Create your WordPress website
- Connect your WordPress site with WooCommerce
- Fine-tune your ecommerce website’s settings
- Add the products you want to sell
- Add plugins and extra content to boost conversions
- Make your ecommerce website public
The Easy Parts of Creating an Ecommerce Website
It’s a great time to enter ecommerce. Online shopping is second nature, the global market is massive, and buyers are actively searching for products like yours.
Your future customers are already browsing. Your job is to give them a clear reason to choose you.
Ecommerce also removes many traditional retail barriers. With the right fulfillment setup, you can sell worldwide without a physical storefront.
You don’t even need to hold inventory if you don’t want to. Dropshipping lets suppliers ship orders directly to customers while you focus on product selection, marketing, and support.
Your top priority is a well-optimized site that delivers value. If your products are good, your prices are clear, and your service is great, growth gets much easier.
Low Costs for Creating Your Ecommerce Website
Thanks to today’s top-rated website builders, getting started is fast and affordable. Platforms like Hostinger, WordPress, Wix, and Squarespace make launching a store simple—even for first-timers.
Create an account, pick a plan, and start customizing. No technical background or big budget required.
Current promo reality: intro hosting deals frequently land in the ~$2.49–$3.49/mo range on multi-year terms (renewals are higher). Many plans include ecommerce-friendly features and SSL. You can realistically be selling within hours on a small budget.
Creating Your Ecommerce Website
Using WooCommerce with a hosting provider like Hostinger keeps the process quick. You’ll install WordPress in a click, add the WooCommerce plugin, and your site instantly supports products, carts, checkout, and order management—no developer needed.
WooCommerce adds full store functionality to WordPress: product pages, secure checkout, inventory tracking, coupons, taxes, shipping, and more. It’s the most flexible way to sell online on WordPress.
Personalizing Your Ecommerce Website
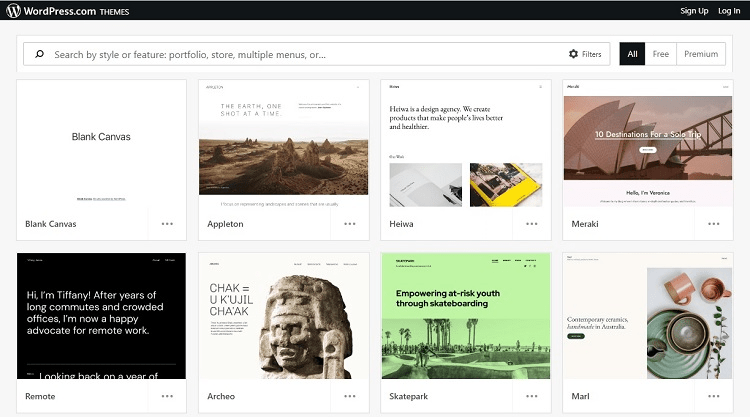
One of WordPress’s biggest advantages is its huge theme library. Whether you want bold, minimalist, or luxury, you’ll find a theme that fits—and you can tweak typography, colors, layouts, and templates as you go.
Other builders also offer industry-specific templates you can tailor to your brand. Starting with a theme gives you a strong design foundation so you can focus on your products and customers.
Don’t design from scratch unless you have to—templates save hours and keep your site consistent.
The Hard Parts of Creating an Ecommerce Website
Launching is easy. Turning the store into a real business is the challenge.
If your site is slow, clunky, or uses weak product photos, shoppers will bounce. Mobile responsiveness, fast load times, clear navigation, and crisp images are mandatory—most visitors browse on their phones.
Trust is another hurdle, especially for new brands. Shoppers need to know checkout is secure and customer service is responsive.
Always use an SSL certificate, display recognizable trust marks, and offer familiar payment methods. If customers can’t pay the way they prefer, they’ll leave.
Behind the scenes, plan for payment processing, taxes, returns, and shipping logistics. If you don’t choose reliable carriers or account for return costs, you’ll feel it quickly.
Offer multiple payment options—cards, PayPal, and digital wallets like Apple Pay or Google Pay via WooCommerce’s native gateway—to reduce checkout friction.
Shipping delays or damaged goods still reflect on your brand. Set delivery expectations clearly, use trackable services, and communicate proactively.
Customer support is non-negotiable. Even small shops should use customer service software to respond fast and keep conversations organized.
Finally, you have to promote the store. Ads, social campaigns, email capture, and a clear value proposition matter. Don’t expect instant sales—iterating is part of the job.
Step 1: Sign Up With an Ecommerce Builder
Before you sell anything, you need an ecommerce platform. This is where you’ll choose a host, secure your domain, and create your account.
Don’t rush this step. Picking the right stack early saves hours later. List your must-haves, compare options, and choose the best fit for your budget and growth plans.
I strongly recommend WooCommerce hosting from Hostinger. It bundles WordPress, WooCommerce, and performance/security features tailored for online stores.
WooCommerce is a powerful WordPress plugin that turns any site into an online store. Hostinger’s WooCommerce plans cost a bit more than basic shared hosting but include critical ecommerce tools out of the box.
Plans typically include a free domain, SSL, CDN, malware scanning, daily backups, and performance boosts tuned for WooCommerce. It’s one of the most affordable ways to launch a fast, secure store.
Here’s how to sign up and choose a plan.
Head Over to Hostinger’s Website
Visit the Hostinger WooCommerce hosting page. That link takes you to the correct plans, which don’t always appear in the main navigation.
You’ll see entry, mid, and top-tier options (names and promos vary by region). Choose based on traffic, catalog size, and growth plans.
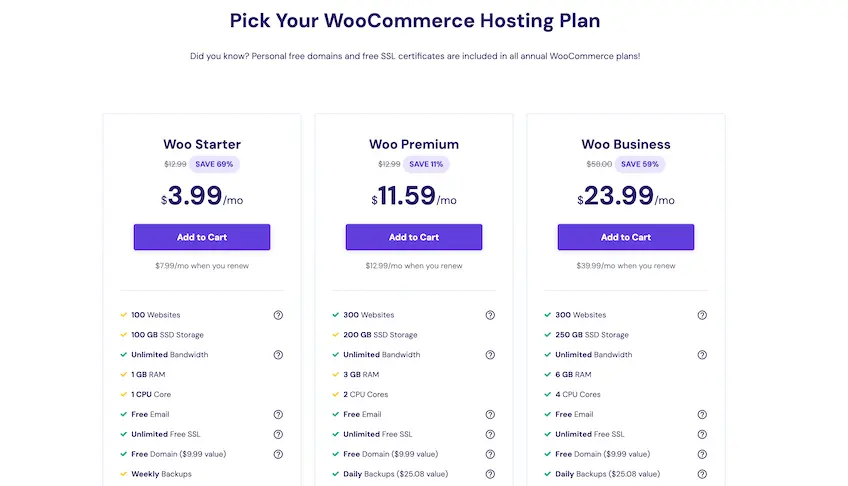
Entry tier: Essentials for running a fast, secure store—SSL, CDN, email, staging, and performance tooling.
Mid tier: Adds more resources and features like advanced caching and staging—great for growing catalogs and traffic.
Top tier: Highest resources (CPU/RAM/storage) for larger or high-traffic stores; often includes priority performance features.
Maximize Your Discount
Hostinger discounts are best on longer terms. It’s common to see entry WooCommerce or web-hosting promos in the low-$3/mo range on 48-month terms, with renewals typically around ~$10–$14/mo. Shorter terms cost a bit more up front and at renewal. Exact pricing varies by region and current promotion.
If you can, lock in a multi-year plan for the lowest effective rate. You’ll pay upfront but save substantially over renewing annually.
Once you’ve picked a plan, it’s time to create your domain and WordPress site.
Step 2: Create Your WordPress Website
Any Hostinger WooCommerce plan of 12 months or longer typically includes a free domain for the first year. After you create your account, claim it.
Enter your preferred name into the search tool. If it’s taken, Hostinger suggests alternatives.
Choose something short, easy to spell, brandable, and niche-aligned.
Aim for a .com when possible. Depending on availability and brand style, consider:
- .store
- .shop
- .gift
- .supply
If your first choice isn’t available, review extension and variation suggestions and pick the best brand fit.
Remember: the first year may be free, but domain renewals apply annually after that—standard for all registrars.
Install WordPress + WooCommerce
From your Hostinger dashboard, go to Websites > Manage and open the Auto Installer.
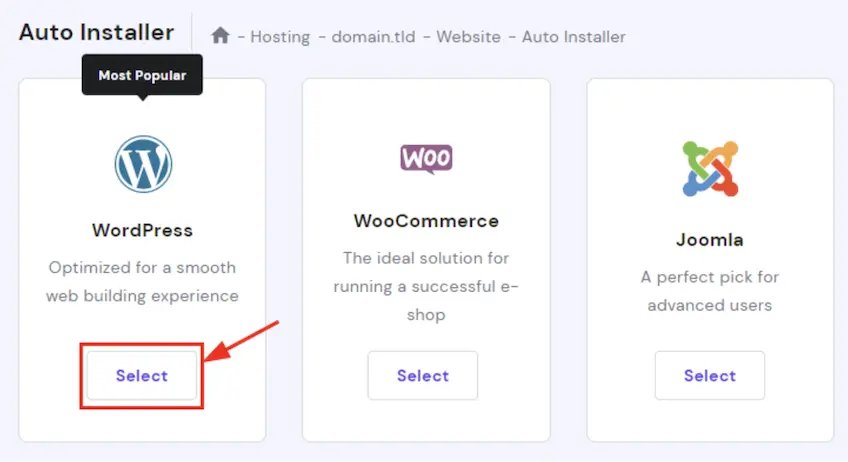
Install WordPress first, then add WooCommerce. (WooCommerce runs inside WordPress.)
Create your WordPress admin with a strong username and password and store them safely.
You can pick a free WooCommerce-ready theme now or change it later. You’re not locked in.
Before finalizing, double-check your domain spelling, contact email, and admin credentials.
Hostinger will provision your site. It typically takes just a few minutes.
Step 3: Connect Your WordPress Site With WooCommerce
After WordPress is live, Hostinger guides you through enabling SSL, entering your dashboard, and installing WooCommerce.
Log in to your WordPress admin using the credentials you created.
Install WooCommerce Plugin
In your dashboard, go to Plugins and search for “WooCommerce.” Click Install, then Activate.
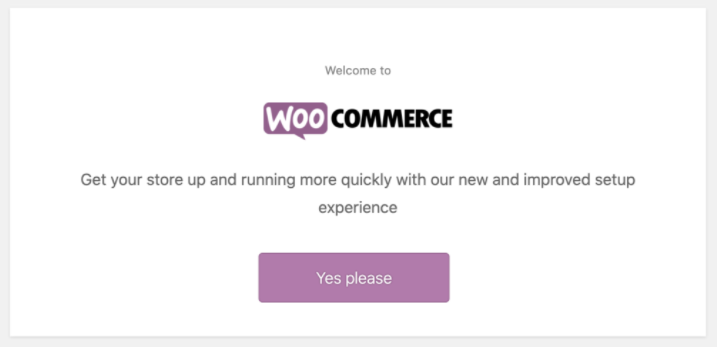
WooCommerce launches a setup wizard that walks you through the essentials.
WooCommerce is the most widely used ecommerce plugin for WordPress: open-source, customizable, and capable of everything from simple products to advanced tax and shipping automations.
Next, add your store information.
Add Your Basic Information
Enter your business name, industry, address, and the types of products you’ll sell (physical, digital, subscriptions, or combinations).
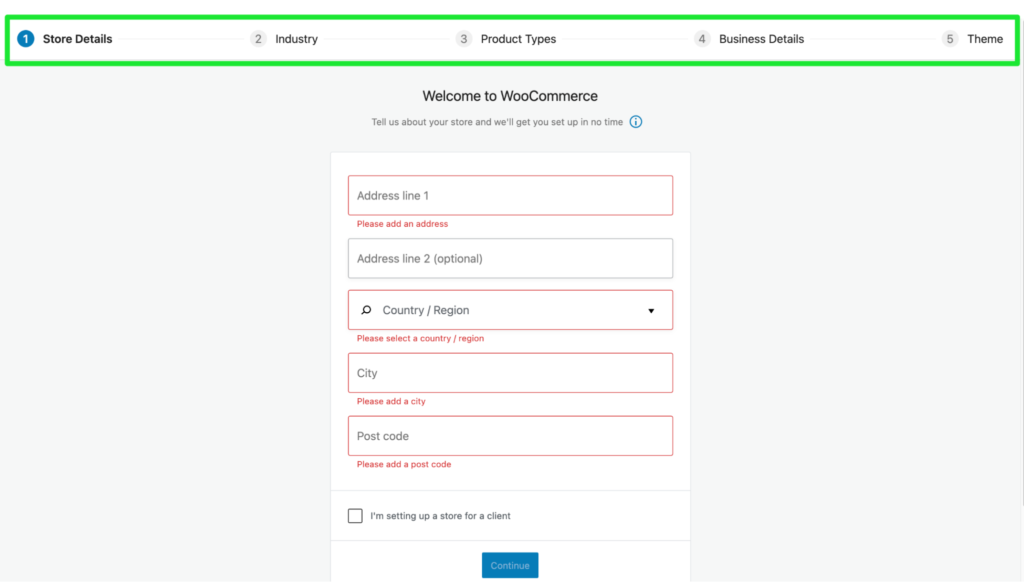
This helps WooCommerce tailor the setup and recommend extensions that match your store model.
Choose Your Ecommerce Website Theme
Pick a theme for your store. If you already selected one during WordPress installation, keep it—or browse WooCommerce-compatible themes now.
In this example, I’ll continue with Astra by clicking Continue with my active theme.
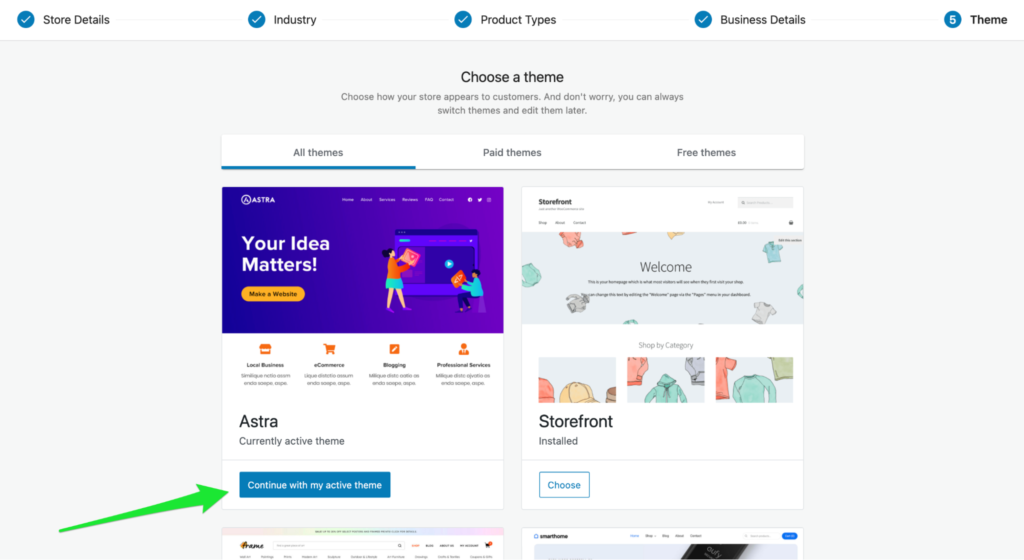
Once finished, WooCommerce will take you to your ecommerce dashboard—your central hub for orders, products, and settings.
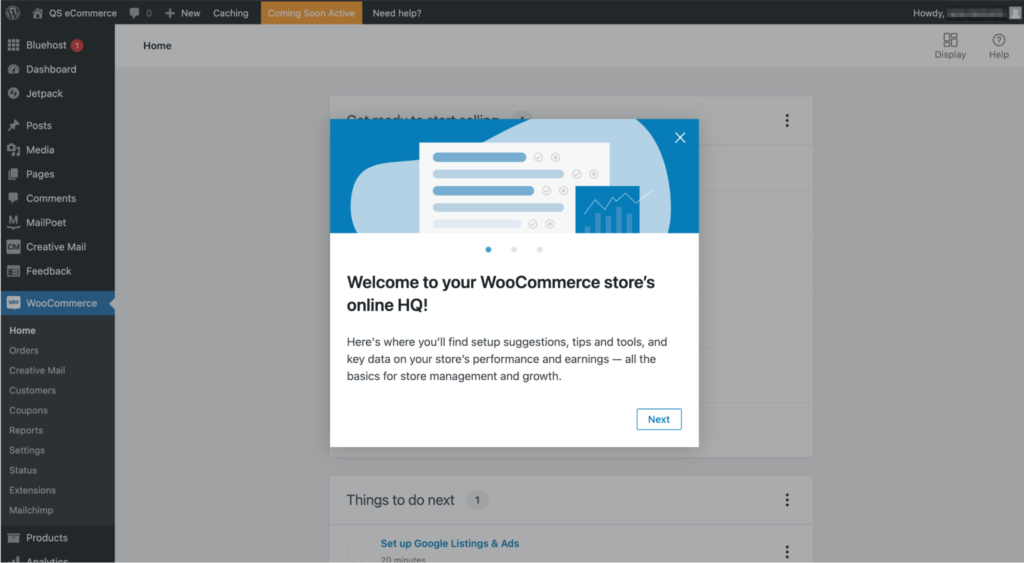
Step 4: Fine-Tune Your Ecommerce Website’s Settings
Before selling, configure payments, taxes, shipping, and basic design. WooCommerce provides a guided checklist so you don’t miss anything.
Each step is beginner-friendly—follow the prompts and you’ll be ready to take orders.
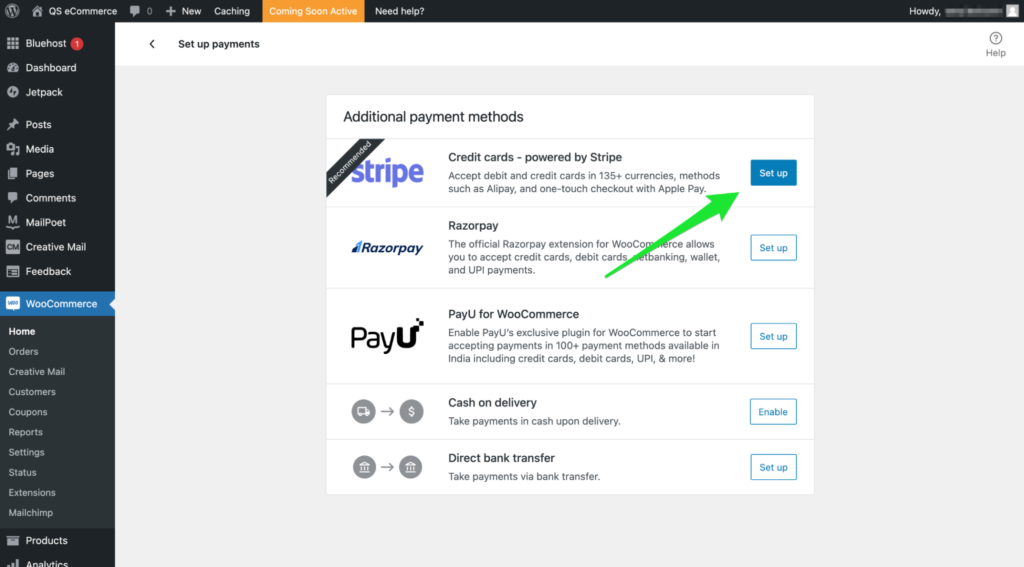
Set Up Payment Options
In your WooCommerce dashboard, click Set up payments under “Get ready to start selling.”

Enable the gateways you want. For the smoothest experience, start with WooPayments (the native WooCommerce gateway powered by Stripe) for cards and digital wallets, and add PayPal for customers who prefer it. With WooPayments you can also offer express buttons like Apple Pay and Google Pay where supported.
Click Set up for each method and connect your accounts. Follow the on-screen verification to enable wallets and other features in eligible countries.
Optional: support cash on delivery only if your fulfillment workflow can handle it reliably.
Configure Your Tax Rates
From the dashboard, click Set up tax and then Configure.
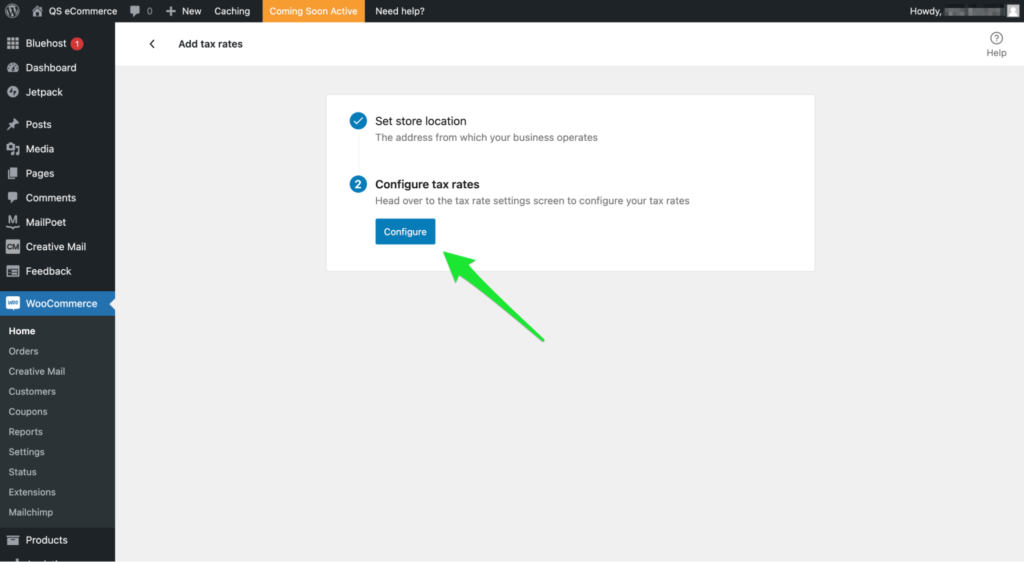
Use the Tax tab to manually add rates or enable automated tax calculation via the official WooCommerce Tax service. Automated taxes save time and reduce errors as you grow.
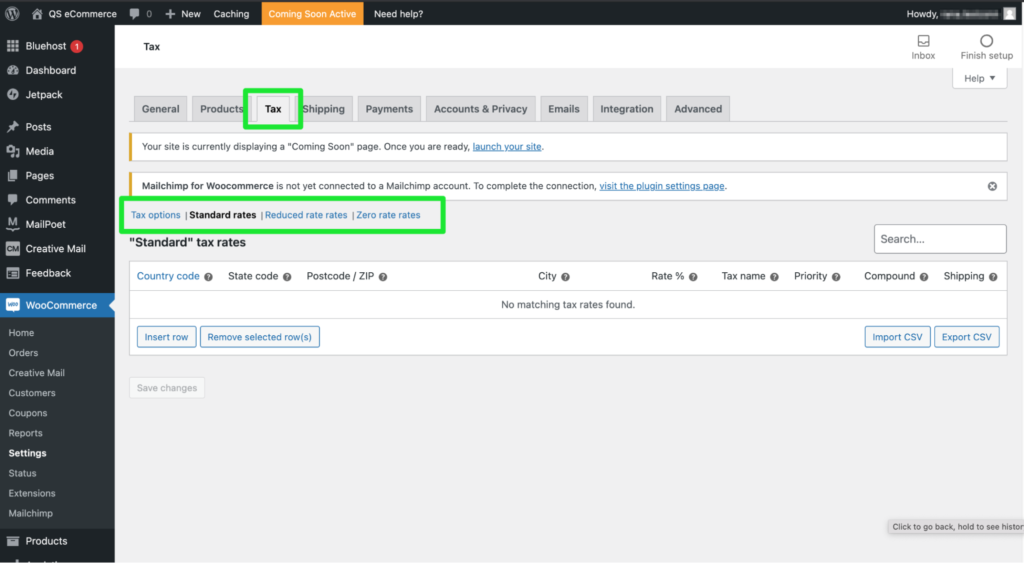
Make sure your tax settings match your country/state rules—compliance matters even when you’re just starting out.
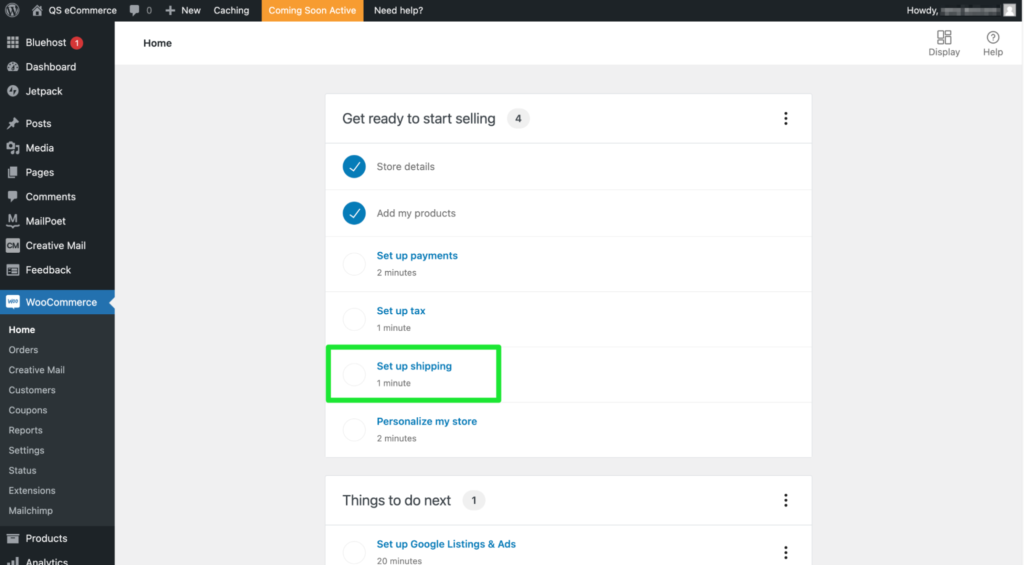
Set Up Shipping Options
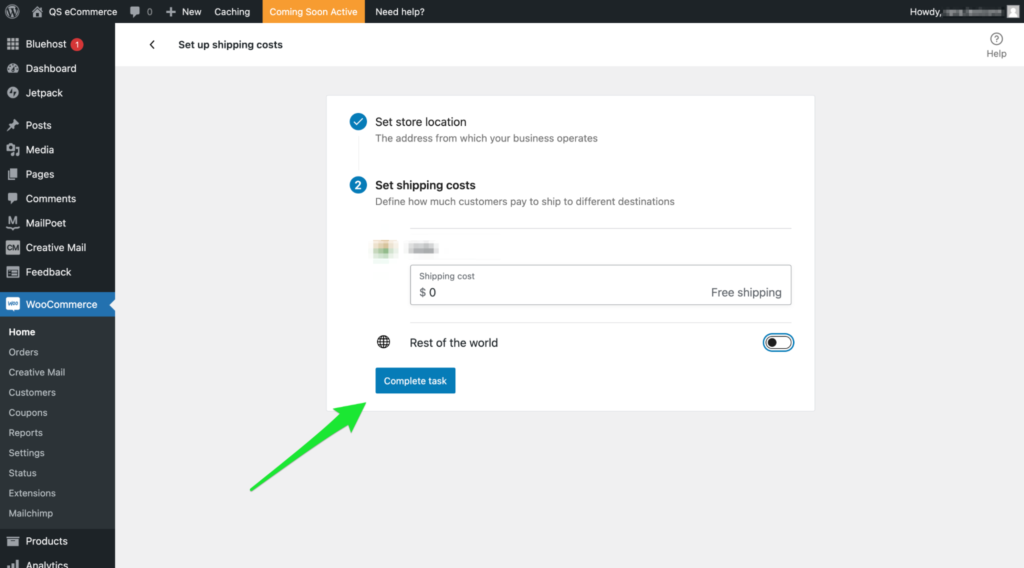
Open Set up shipping. WooCommerce detects your store location; you can add shipping zones (e.g., domestic vs. international) and methods (flat rate, free shipping, local pickup).
For live carrier rates and label printing, install the official WooCommerce Shipping extension (discounted USPS/UPS/DHL labels in eligible regions) or a carrier plugin. This lets you buy labels and offer accurate rates at checkout.
When you’re done, click Complete task to save your shipping setup.
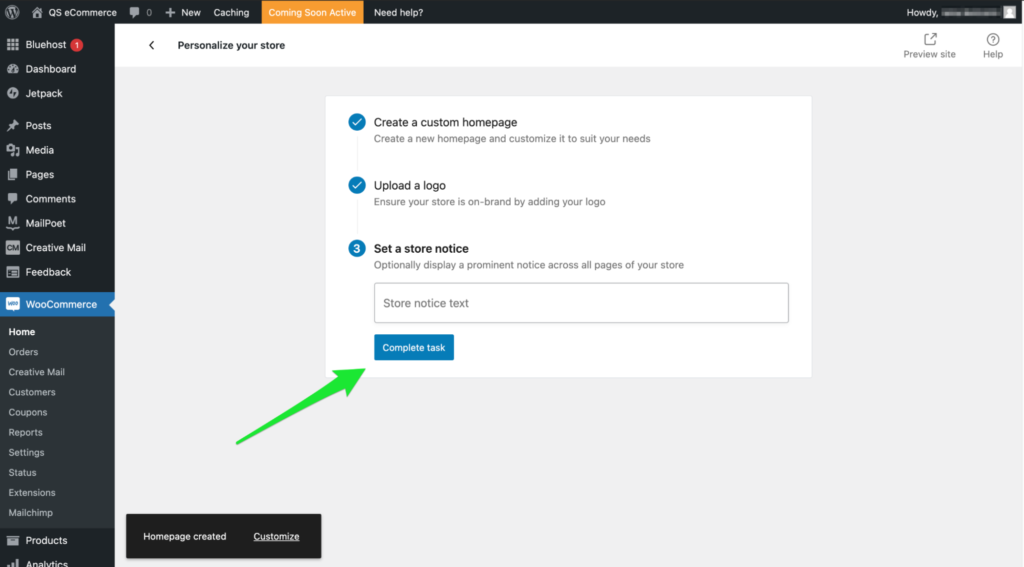
Personalize Your Ecommerce Website
Click Personalize my store to customize your homepage, upload your logo, choose colors, add a store notice, and configure menus and footers.
Consistent branding builds trust and reduces friction—especially for new stores. Keep fonts readable, colors accessible, and CTAs obvious.
When you’re happy with the basics, click Complete task to save your design.
Step 5: Add the Products You Want to Sell
Your store shell is ready—now add the products you’ll sell. This is where conversions are won or lost.
From WordPress, go to Products > Add New.
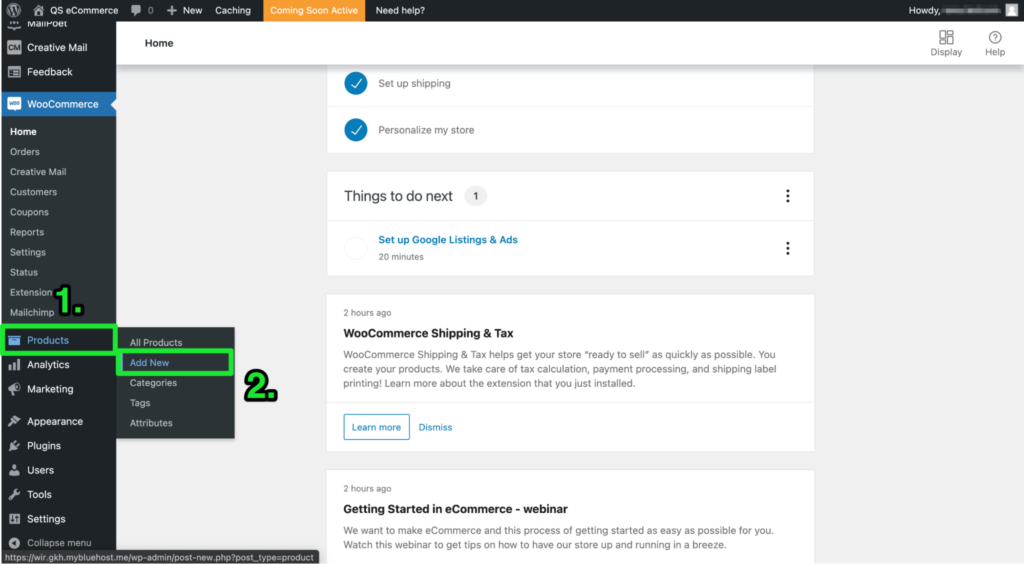
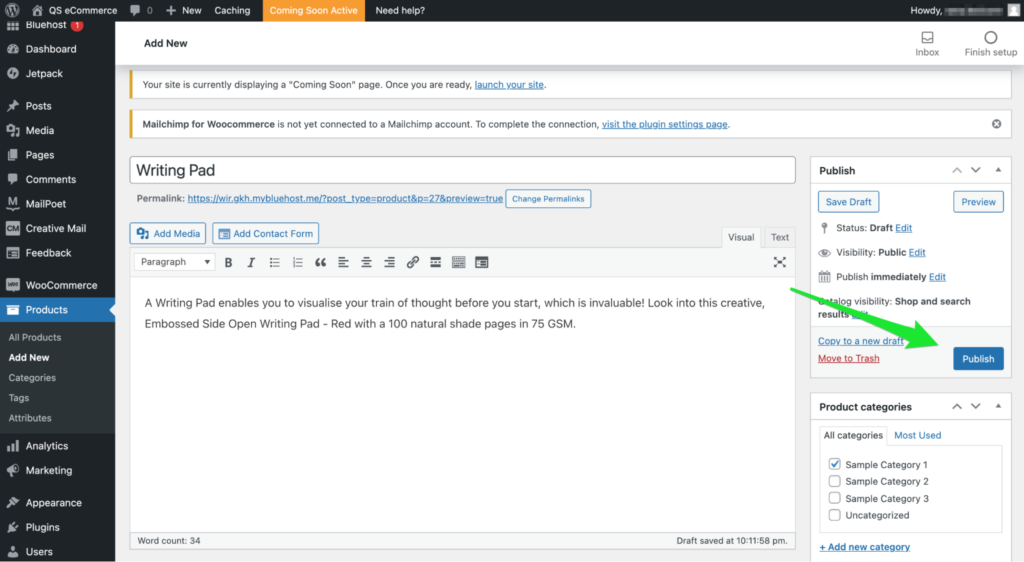
A blank product page opens. Add:
Title, detailed description, short description (used in listings), pricing, and a product category. Upload a high-quality featured image and gallery images.
Use the data tabs below the editor to configure:
- General – price, sale price, tax status
- Inventory – stock status, SKU, backorders
- Shipping – weight, dimensions, shipping class
- Linked Products – upsells and cross-sells
- Attributes – size, color, material, etc.
Selling digital products or subscriptions? Switch the product type to “Virtual,” “Downloadable,” or use a subscription extension.
For more detail, see this step-by-step product management guide from WooCommerce.
Click Publish to push the product live.
View your catalog at Products > All Products to confirm everything looks right.

Quick checklist before you move on:
- Clear, keyword-informed product titles and descriptions
- Strong featured image + optional gallery
- Accurate price, stock, and tax settings
- Correct category and attributes (size, color, etc.)
- Published and visible on the storefront
Step 6: Add Plugins and Extra Content to Boost Conversions
With products live, optimize for performance, marketing, and trust. Smart plugins and helpful content will increase traffic and sales.
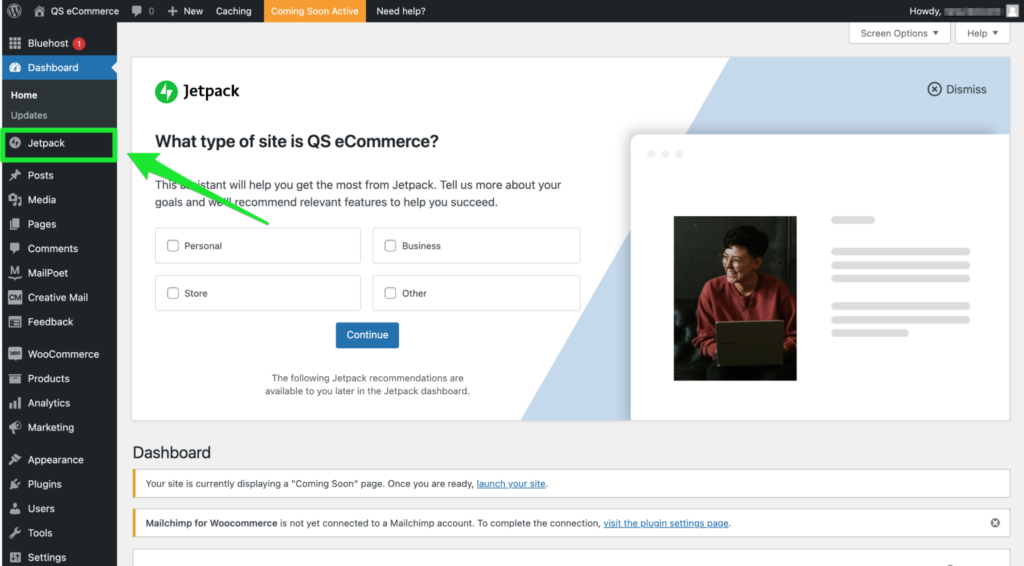
Install Plugins
Your dashboard may already show the Jetpack tab—that’s one option among many. Activate only what you need to keep the site lean.
Recommended essentials:
- Yoast SEO (or a comparable SEO plugin) – Titles, meta, sitemaps
- Site Reviews – Customer reviews and social proof
- Sucuri (or a similar security plugin) – Hardening and alerts
- WooPayments or Stripe – Simple, secure payments + wallets
- WooCommerce Tax – Automated sales tax calculations
- Performance cache (e.g., LiteSpeed Cache on Hostinger) – Faster pages and better Core Web Vitals
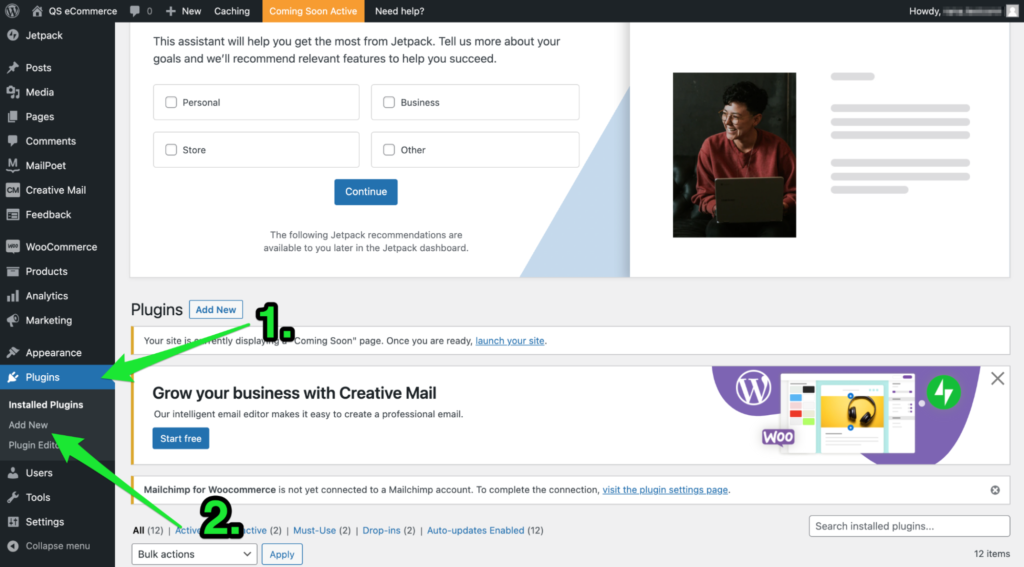
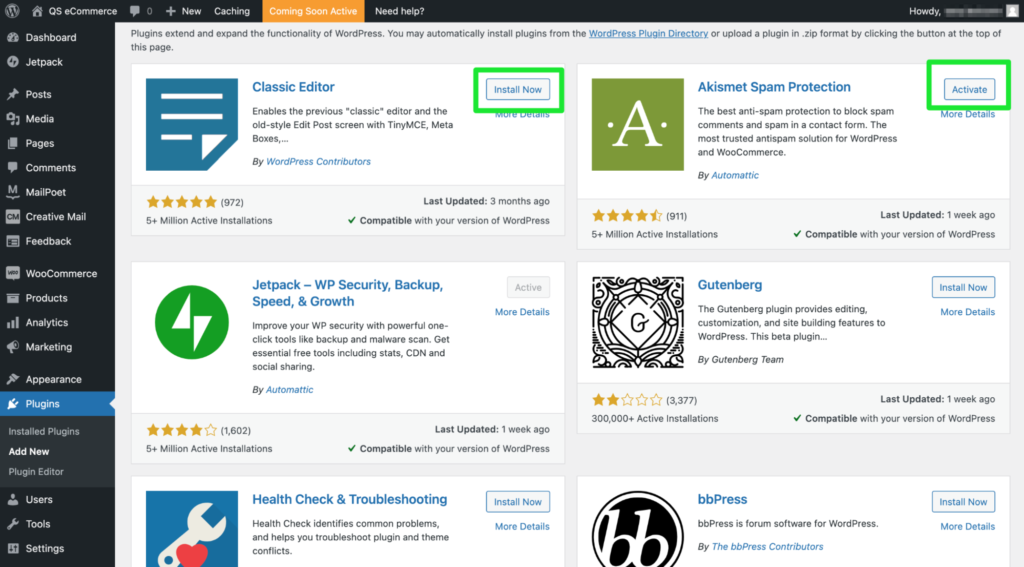
To install any plugin:
- Go to Plugins > Add New
- Search for the plugin name
- Click Install Now and then Activate

After activation, many plugins launch a setup wizard. Follow it to configure best-practice defaults.
Add Necessary Content
Publish core pages that build trust, answer questions, and guide shoppers.
- UX microcopy – Clear CTAs, form labels, error messages; match wording to the buying stage (e.g., “Learn More” vs. “Add to Cart”)
- Product descriptions – Benefits first, specs in bullets, sizing/fit details, care instructions, and what’s included
- About – Your story, team, and why you exist
- Contact – Simple form plus email and business info
- Policies – Returns/refunds, shipping, privacy, and terms (required in most regions)
- Category pages – Short intros that explain who the products are for and how to choose
Step 7: Make Your Ecommerce Website Public
When your store looks right and core pages are in place, it’s time to go live.
Launch Your Website
On self-hosted WordPress (like Hostinger), your site is publicly reachable as soon as your domain and DNS are connected and SSL is active. There’s no separate “Launch” button. To control search visibility, go to Settings > Reading and ensure Search Engine Visibility is not set to “Discourage search engines from indexing this site.”
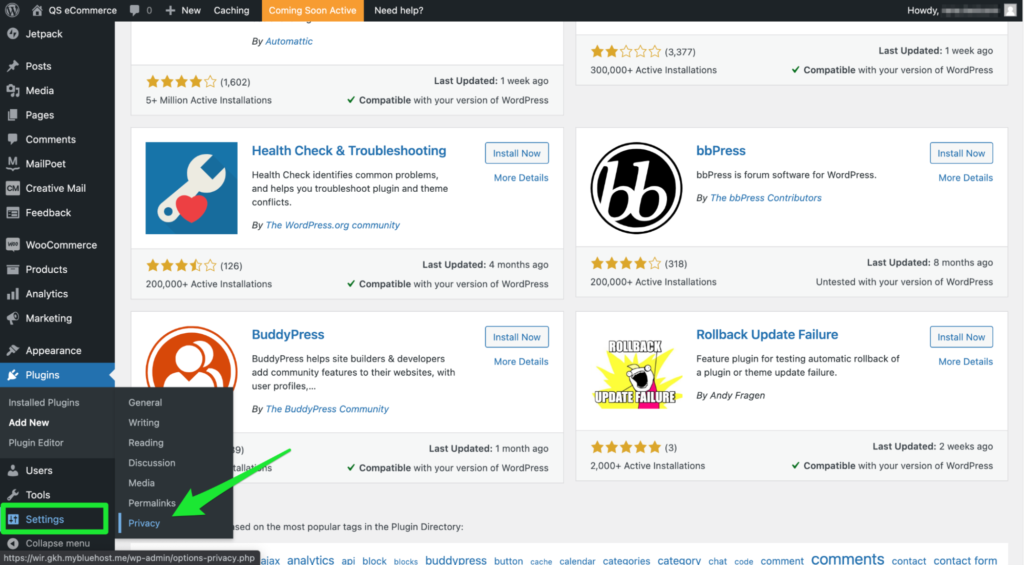
Publish (or update) your privacy policy using the built-in template if you need a starting point, then double-check your homepage, About page, product pages, cart, and checkout. Fix any broken links, images, or forms.
Congrats! Your store is live and ready for customers.
Sign up at Hostinger if you haven’t already and get started today.
Monitor and Update
Launch day isn’t the finish line—it’s the starting gun. Keep improving your store to raise conversions, speed, and customer satisfaction.
Watch these metrics closely:
- Bounce rate and time on site (are pages answering intent?)
- Cart and checkout abandonment (optimize payment methods and shipping)
- Conversion rate and revenue per visitor
- Average order value (use bundles, tiered pricing, and cross-sells)
- Shipping-related drop-offs (adjust rates, delivery estimates, or carriers)
- Site speed/Core Web Vitals on mobile
Example: If add-to-cart is healthy but drop-off spikes at shipping, test free shipping thresholds or clearer delivery timelines.
Small tweaks—cleaner navigation, stronger CTAs, better images—can produce outsized gains. Test, analyze, and iterate.
After launch, thoroughly test on desktop and mobile. Confirm buttons work, images load, variant selectors behave, and checkout is friction-free. Broken elements frustrate users and can hurt visibility in search results.