When you’re trying to grow search visibility, use the tactics that make discovery and indexing easier—not just “more keywords.”
One of the highest-impact, low-effort moves is setting up an XML sitemap. While a sitemap isn’t a direct ranking factor, it helps search engines find your important pages faster and crawl your site more efficiently—often leading to better coverage and more traffic over time.
In this guide, you’ll learn exactly how to create a sitemap for your website, step by step, plus modern best practices that work in 2025.
Good news—it’s simpler than it sounds.
What is a sitemap?
An XML sitemap is a machine-readable file that lists the canonical URLs you want indexed, along with optional metadata like when the page was last updated. Search engines use it as a roadmap to understand what exists on your site.
Many people assume sitemaps are “developer-only.” They’re not. Most modern CMSs and plugins generate them for you, and you can review or fine-tune them without writing code. As you’ll see below, the process is straightforward.
Why do you need a sitemap?
Search engines aim to serve the most relevant content for each query. To do that, they crawl the web and build an index of pages they can discover and render.
XML sitemaps make that discovery more efficient—especially for large sites, new sites, sites with deep navigation, or content that’s hard to find through links alone (like faceted pages). Better discovery improves your chances of earning visibility in search.
A good sitemap should list only indexable, canonical URLs that return HTTP 200, and include accurate lastmod dates where possible. Don’t include noindex, redirected, 404, or duplicate parameter pages. Also note: the old changefreq and priority fields are largely ignored by major search engines today, so focus on clean URLs and accurate lastmod.
If you want your site indexed quickly and accurately, follow these five simple steps to build a high-quality sitemap.
How To Create a Sitemap for a Website
Quick tip for WordPress users: WordPress 5.5+ outputs a basic sitemap at /wp-sitemap.xml. For more control, the All In One SEO Plugin can enhance this with image and video sitemaps, per-post exclusions, and smart splitting for large sites—so your sitemap stays clean without manual editing.
Step 1: Review the structure of your pages
Start by evaluating how your content is organized. A clear, shallow structure helps both users and search engines discover what matters most.
Skim a sitemap template and imagine how your pages would be laid out visually—home at the top, then key sections, then supporting pages.
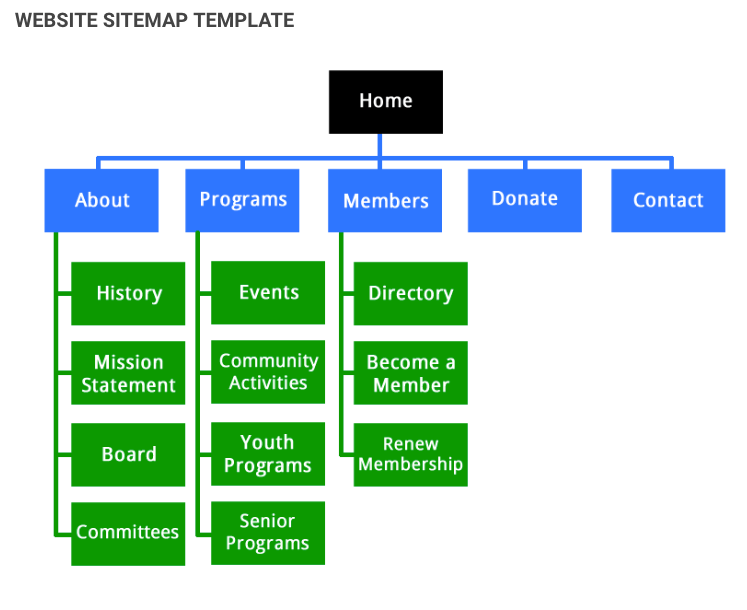
It’s a simple diagram, but it illustrates the point: keep your architecture easy to navigate.
Your structure starts with the homepage. The primary navigation typically defines your top-level categories, which should map to your most important topics.
Not every page deserves the same prominence. The deeper a page sits in your hierarchy (and the fewer internal links it has), the less likely it is to be crawled frequently or to rank.
According to Search Engine Journal, making any page reachable within about three clicks of the homepage improves crawlability and often correlates with better SEO performance.
Group content into a logical hierarchy by relevance and priority. Use hubs for key topics, with supporting pages nested beneath.
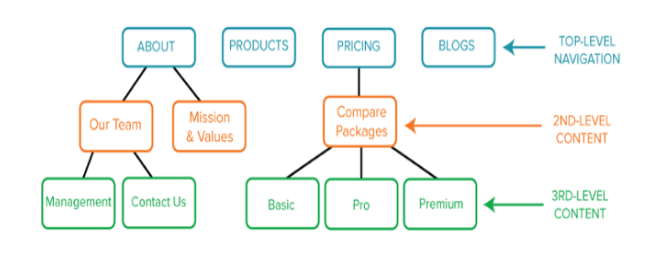
Notice how the About page connects to Our Team and Mission & Values, while deeper pages like Management and Contact Us are nested logically to reflect importance.
Putting “Management” at the same level as “Pricing” or “Blog” would muddy the structure and confuse both users and crawlers.
Use visual sitemap templates to spot gaps, orphan pages, or sections that need consolidation. Often your hierarchy just needs a few tweaks.
The goal: every important page should be reachable in three clicks or fewer and supported by internal links from relevant pages.
Step 2: Code your URLs
With your structure mapped, turn it into an XML sitemap. In 2025, most teams generate sitemaps automatically via their CMS or a plugin and then review the output periodically. If you need to build or edit one by hand, the same principles apply.
You’ll do this with simple XML tags (similar to HTML). Only a few fields really matter today, and accuracy is more important than volume.
Open a text editor to review or craft your file. Sublime Text works well for quick edits, but any plain-text editor is fine.

For each page, include the essentials and skip legacy noise:
- URL location (
<loc>) — the canonical, absolute URL using HTTPS. - Date of last modification (
<lastmod>) — accurate ISO-8601 timestamp when content meaningfully changed. - Update frequency (
<changefreq>) — optional; generally ignored by modern search engines. - Page priority (
<priority>) — optional; widely disregarded, so don’t rely on it.
Here’s how a minimal entry might look conceptually:
- https://www.examplesite.com/page1 — loc
- 2025-07-01T10:15:00+00:00 — lastmod (use real timestamps)
- weekly — changefreq (optional; not used by Google)
- 0.8 — priority (optional; safe to omit)
Be meticulous: include only 200-OK, indexable, canonical URLs; keep each file under 50,000 URLs or 50MB uncompressed; use a sitemap index if needed; prefer gzip compression; and consider separate image or video sitemaps when media is a major traffic source.
Step 3: Validate the code
Manual work invites mistakes. Even a single unclosed tag or a typo in lastmod can cause problems.
Validate your XML sitemap before submitting it. A quick web search for “sitemap validator” turns up several free options. You can also spot issues simply by loading the file in your browser—well-formed XML will render cleanly.
One handy option is the XML Sitemap Validator.
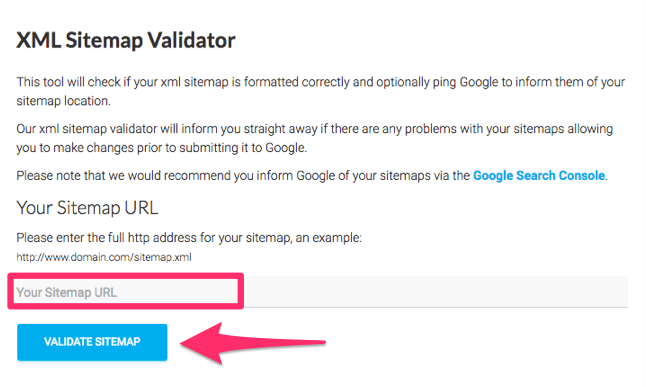
Fix any syntax errors, then check for SEO issues: remove noindex URLs, redirects, 404s, and duplicates. Consistency between canonical tags and listed URLs matters.
This quick QA step saves headaches later.
Step 4: Add your sitemap to the root and robots.txt
Upload your sitemap to your website’s root directory so it’s accessible at a stable URL—commonly /sitemap.xml, /sitemap_index.xml, or for WordPress core, /wp-sitemap.xml.
This creates a public address like yourwebsite.com/sitemap.xml. Many sites follow this pattern—try appending “/sitemap/” or “/sitemap.xml” to well-known domains to see examples.
Here’s what that looks like on the Apple website:
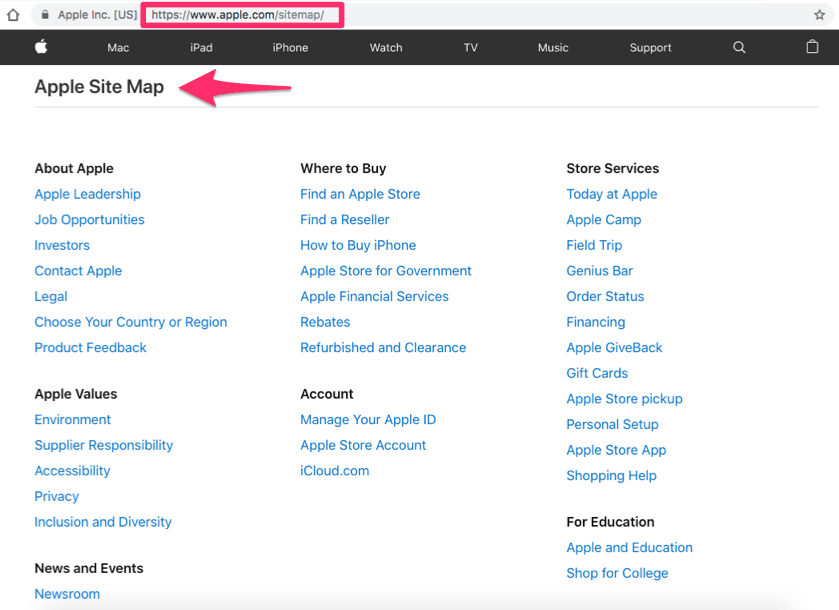
It shows a clear hierarchy—proof that organization and discoverability go hand in hand.
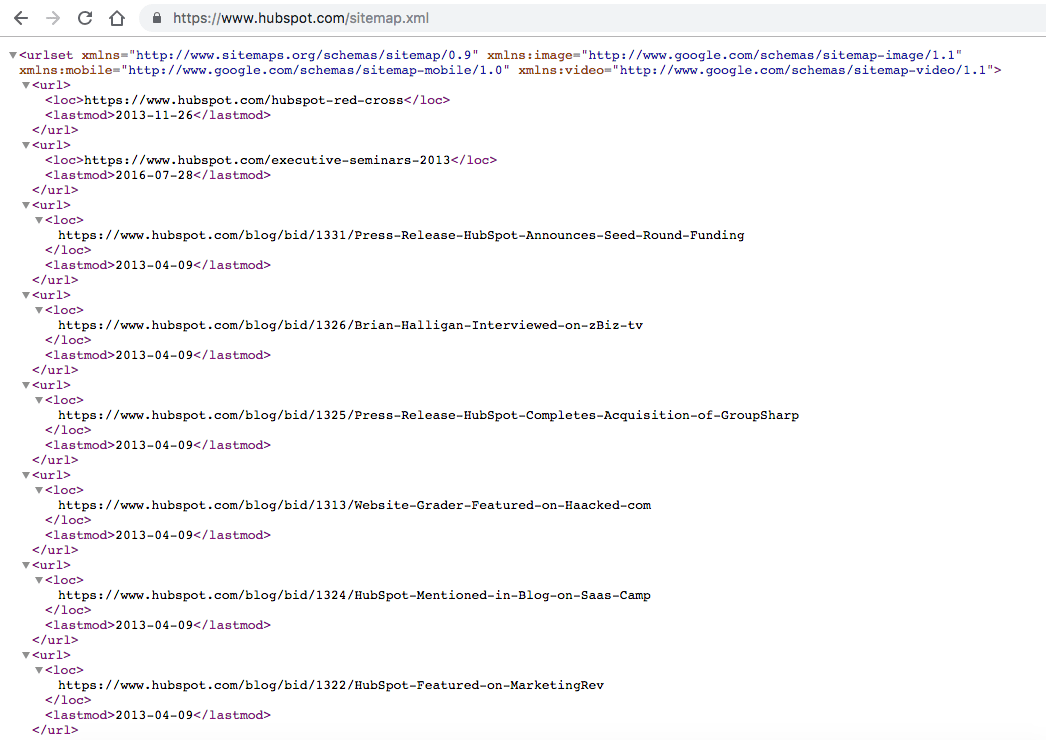
You can also view the raw XML by visiting a site’s /sitemap.xml. Here’s how it looks on HubSpot:
Next, reference your sitemap in robots.txt (also in the root). This file gives crawlers basic rules and can include a “Sitemap:” directive pointing to your sitemap URL.
For example, you might block admin or system folders while allowing content directories to be crawled.
See Apple’s robots.txt for a real-world reference.
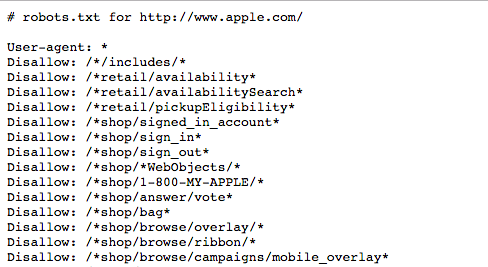
Notice how certain internal paths are disallowed to focus crawl budget on valuable content.

They also list the sitemap location, making it trivial for bots to find and crawl.
Adding your sitemap to robots.txt is optional (engines can discover it other ways), but it’s a tidy best practice—especially when you have multiple sitemaps.
Step 5: Submit your sitemap
After your sitemap is live and referenced in robots.txt, submit it to search engines—starting with Google.
Open the Google Search Console “Sitemaps” report (you’ll need a verified property first). It’s free and only takes a few minutes to set up if you haven’t already.
In the Sitemaps report, add the path to your sitemap (or the sitemap index if you have multiple files) and click Submit.
Google will attempt to fetch the file and surface any errors. Once accepted, monitor coverage to ensure the URLs you submitted are being indexed. You don’t need to resubmit after routine edits—accurate lastmod dates are enough for recrawling.
That’s it—your sitemap is live, submitted, and working for you.
Alternative options
If the five steps above feel too technical, use a tool that automates the heavy lifting. The right generator will create compliant sitemaps, let you exclude low-value URLs, and keep everything updated as your site changes.
Below are easy, proven options that avoid hand-coding.
All In One SEO plugin
Running WordPress? The All In One SEO Plugin (AIOSEO) can generate an optimized sitemap automatically and keep it in sync with your content.
Enable the sitemap with a toggle, then choose what to include or exclude (specific pages, post types, taxonomies, authors). AIOSEO can split large sitemaps into an index, add image/video sitemaps, and respect per-page “noindex” settings—giving you precise control without editing XML directly.
Screaming Frog
Screaming Frog is a desktop SEO spider that can crawl your site and output a clean sitemap. The free version works up to 500 URLs; the paid license supports larger sites and more advanced config.
It’s a strong alternative to manual coding. Point it at your domain, apply simple filters, and export a compliant sitemap without touching XML.
You can configure crawl depth, decide which URL patterns to include or exclude, and let the tool handle lastmod values for you. Here’s the general feel of the interface:
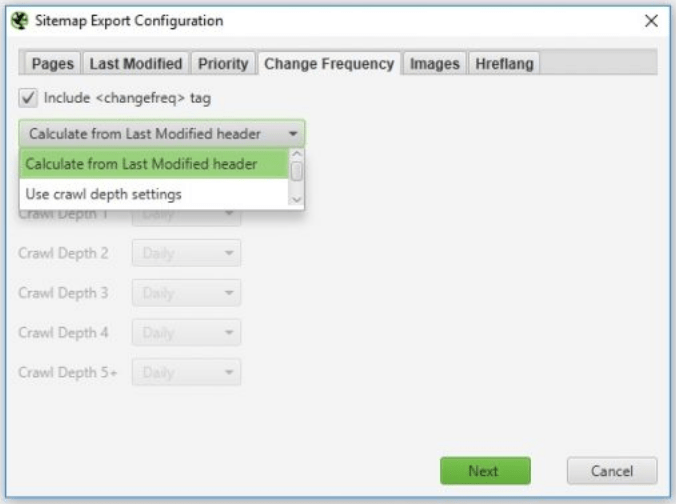
Adjust a few settings, export your sitemap or sitemap index, upload to your root, and you’re done.
Conclusion
If you’re serious about SEO, a well-maintained sitemap is a must. It streamlines discovery and indexing—key prerequisites for earning rankings and traffic.
And as you’ve seen, it’s not difficult. Whether you build it manually, use your CMS, or lean on a tool, creating a sitemap comes down to five steps:
- Review your pages and site structure to minimize depth and orphan content.
- Generate or code the sitemap with accurate canonical URLs and real
lastmoddates. - Validate the XML and remove non-indexable or duplicate URLs.
- Host the sitemap at the root and reference it in
robots.txt(optional but tidy). - Submit it in Search Console and monitor coverage as your site evolves.
That’s the whole playbook.
If hand-editing XML isn’t your thing, tools like All In One SEO and Screaming Frog make the process fast and code-free. Whichever route you choose, keep your sitemap focused on clean, canonical URLs with accurate updates—and you’ll set yourself up to rank stronger in 2025 and beyond.