Blogging is one of the best ways to drive targeted traffic and build a loyal audience—but pairing great writing with video is how you stand out in 2026.
Those of you who keep up with the newest marketing trends know that video has exploded across every platform and format—from long-form YouTube to Shorts, Reels, and TikTok.
Industry reports consistently estimate that video makes up a large share of global internet traffic, and survey after survey shows marketers rate video among their highest-ROI formats. That aligns with why more than half of marketing executives have called video a top performer for years.
Blog posts that incorporate relevant video tend to attract more traffic and shares than text-only posts. If you’re considering starting a video blog (vlog) or leveling up the one you have, you’re on the right track.
Based on all of this, it’s safe to say people love consuming video content. Still, establishing yourself as a standout video blogger can feel daunting—especially if you’re starting from scratch.
There are a lot of moving parts. What gear is worth buying? How do you look and sound good on camera? How do you promote episodes and actually grow?
If you need practical pointers to launch a new video blog—or improve an existing one—you’re in the right place.
Below are 12 battle-tested tips for running a successful video blog in 2026.
1. Invest in a high-quality microphone
Audio quality makes or breaks viewer retention. People will forgive an occasional soft focus; they won’t sit through muddy, echo-filled sound.
A dedicated mic ensures you’re not wasting takes. Even if a clip’s visuals miss the mark, clean audio can be repurposed for a podcast, voiceover, or narration.
Skip built-in laptop mics. Entry-level camera mics aren’t great either. A dependable USB or USB-C microphone (or a 3.5mm lavalier for on-the-go) is a smart first upgrade.
You don’t need to overspend. Solid starter options exist near the ~$100 range. Prioritize:
• Mic type & environment: Dynamic mics reject room noise (great for untreated rooms). Condensers capture detail (great for quiet, treated spaces). Lavs are ideal when you move around. Shotgun mics focus on what’s right in front of them.
• Position & levels: Place the mic 6–10 inches from your mouth, use a pop filter, and record around ?12 dBFS to avoid clipping. Wear headphones to monitor.
• Room sound: Reduce echo with rugs, curtains, and soft furnishings. Even a blanket off-camera helps.
Always run a quick test before you hit record. Balance levels, check for hiss or hum, and confirm your mic is actually selected in your recorder or camera.
2. Make sure you have proper lighting
Nothing screams “amateur” like harsh shadows or dim, noisy footage. Learn a basic three-point lighting setup for an instant upgrade.
It’s unrealistic to carry a full kit everywhere, but if much of your filming happens at home, set up lights once so you can hit record anytime.
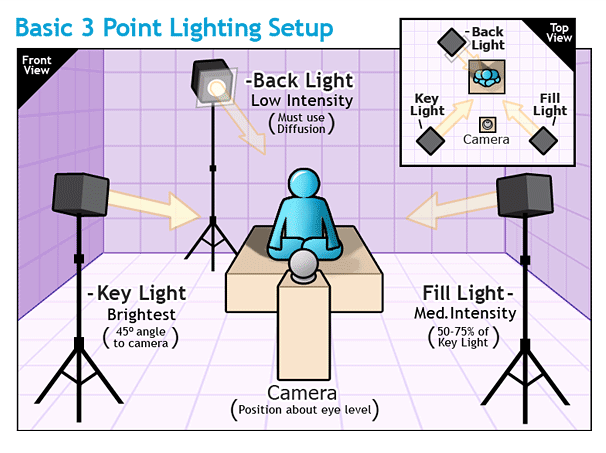
Get familiar with these three lights:
- Key light
- Fill light
- Back light
Your key light is the primary light, typically placed to one side of the camera, slightly above eye level. Angle it down for a natural, “sun-like” feel.
The key will create shadows. Use a fill light on the opposite side to soften them (usually 1/2 to 1/4 the key’s intensity).
Add a subtle back light behind you to separate you from the background. Keep it diffused so it doesn’t create hot spots on hair or shoulders.
LED panels and softboxes are affordable and long-lasting. Match color temperature (e.g., 5600K daylight) and set the same white balance across cameras to avoid odd color casts. When you’re outdoors, use the sun like a giant key light and position yourself accordingly.
Tip: If your lights are too harsh, diffuse with a softbox, umbrella, or even a thin white sheet. A cheap reflector can act as a fill in tight spaces.
3. Add captions to your videos
Many people watch on mute at work, on transit, or late at night. Captions make your content accessible and keep viewers engaged when audio isn’t an option.
On major platforms, upload or edit auto-generated captions. Clean up punctuation, fix names/terms, and add key timestamps. Sidecar files like .srt or .vtt let viewers toggle captions on/off without burning them into the video.
Captions also help with search and comprehension, especially for complex topics or non-native speakers. Whenever possible, add multi-language subtitles for your top geographies.
4. Get yourself a decent camera
You don’t need a cinema rig to look great. Modern smartphones shoot excellent 1080p and 4K. If you want dedicated gear, weigh battery life, storage, autofocus, stabilization, and low-light performance.
Consider how and where you’ll film. If outlets are scarce, carry spare batteries or a power bank. Keep large, fast memory cards on hand so you never miss a moment.
Compact, lightweight cameras are easier to carry daily—meaning you’ll capture more footage. Know your recording formats (.mov, .mp4, etc.) so you can edit and export without conversion headaches.
Frame rate and orientation matter: use 24/30 fps for talking-head videos, 60 fps for action or smooth B-roll; shoot horizontal for YouTube and vertical for Shorts/Reels/TikTok when repurposing.
5. Find the right screen-capture software
You won’t always need a camera. For tutorials, demos, and walkthroughs, record your screen.
On Mac, ScreenFlow is a strong option with editing built in.
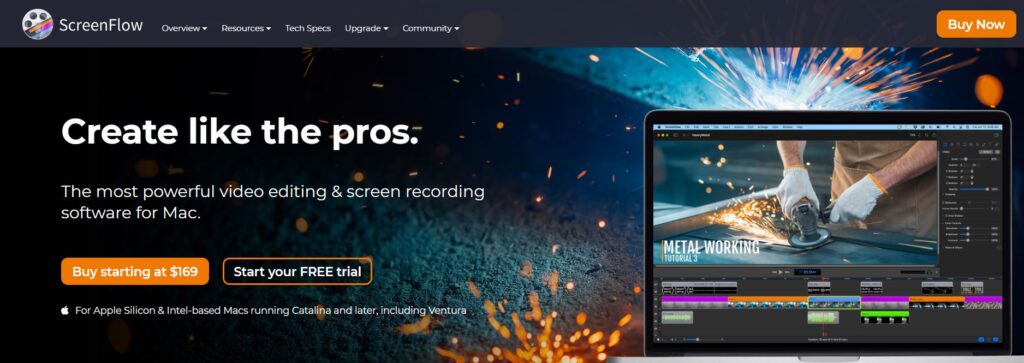
It’s paid software, but worth it if you plan to publish a lot of instructional content on macOS.
PC users can use Camtasia. Free alternatives also exist (for example, OBS Studio) if you’re testing the waters.
Quick tip: Both macOS and Windows include native screen recorders for simple tasks—on macOS use the Screenshot tool (Shift–Command–5) or Control Center; on Windows use Snipping Tool (for screen recording) or Xbox Game Bar. For advanced editing, choose tools that let you capture system audio, webcam overlays, and individual application windows.
6. Be personable and engaging
Great vlogging is part information, part performance. Bring energy. Speak clearly. Look into the lens like you’re talking to one person.
If humor is your style, use it. If you’re more analytical, lean into clarity and structure. Authenticity beats imitation every time.
Plan a strong hook for the first 5–10 seconds, then move quickly into the value. Use B-roll, cutaways, or on-screen graphics to break up talking heads and keep viewers watching.
Stay mindful of your brand. Controversial topics can drive views but may hurt long-term trust. Choose wisely.
And vary your formats: how-tos, behind-the-scenes, challenges, case studies, Q&As, live sessions, and Shorts can all fit your channel.
7. Give your audience a reason to watch
Define your value proposition before you press record. What problem are you solving? What’s the takeaway? Why should someone trust you to teach it?
Entertainment, education, or both—it’s your call. Just make the benefit explicit in the title, thumbnail, intro, and description. Establish credibility with quick proof points (experience, results, or clear research).
Unless you’re a world-class storyteller, avoid rambling monologues about your day. Focus on what your audience wants and deliver it fast.
Consider creating recurring series (e.g., “Tool Tuesday,” “Creator Q&A,” “30-Day Challenge”) so viewers know what to expect and subscribe for the next episode.
8. Learn how to edit effectively
Edit your videos to remove dead air, tighten pacing, and add captions or callouts—but resist the urge to over-edit with flashy effects.
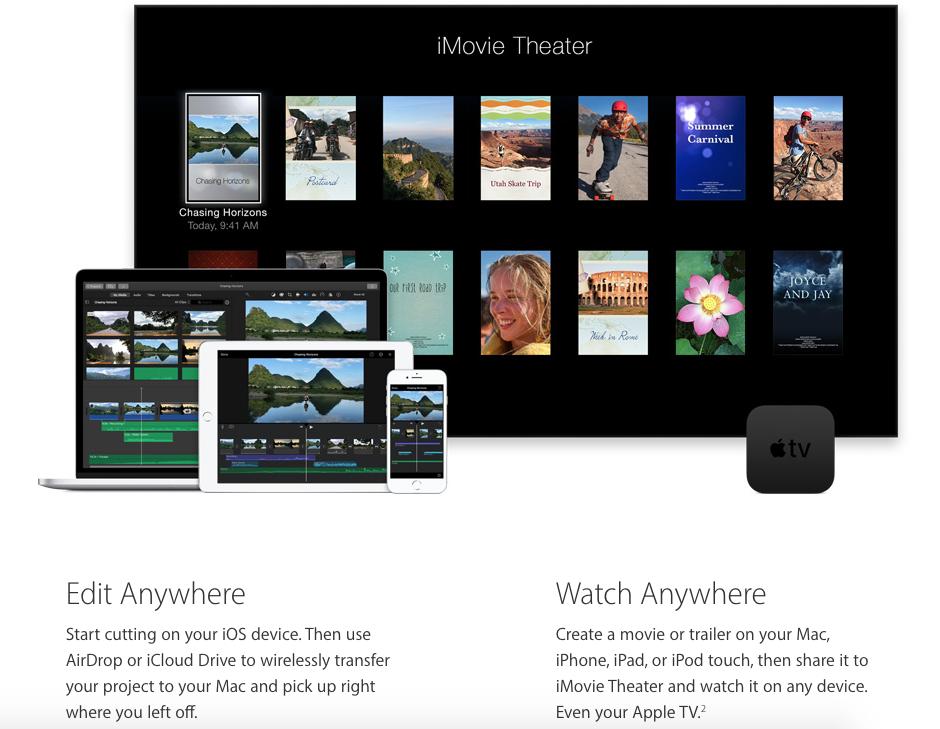
If you’re on a Mac, iMovie handles most basics and syncs well across iOS devices:
On Windows, Clipchamp is the modern built-in editor for most users and is a better choice than legacy “Movie Maker” tools. If you want more power on either platform, consider free options like DaVinci Resolve for advanced color and audio.
Core editing checklist: trim filler words and long pauses; add jump cuts sparingly; normalize audio; use tasteful background music with proper rights; apply light color correction and consistent white balance; export in 1080p or 4K with platform-recommended bitrates.
Level up with on-screen chapters, lower-thirds for names and topics, and end screens that point to the next video in your series.
9. Encourage users to comment
Engagement boosts reach. Ask a specific question in every video and in the description to spark discussion.
Invite differing opinions, then moderate respectfully. Pin a top comment (yours or a viewer’s) to guide the conversation. Use polls and community posts between uploads to keep the feedback loop alive.
Most importantly, reply. Viewers who feel seen are far more likely to return, share, and binge your backlog.
Old videos can stay active for years—your thoughtful responses keep them alive in recommendations.
10. Host an interview
When your content feels repetitive, bring in guests. New perspectives and personalities refresh your channel and attract new viewers.
Invite subject-matter experts, creators in adjacent niches, or simply charismatic friends. Remote interviews are easy with modern recording tools; capture separate audio tracks so you can balance levels later.
Prep a tight outline, ask open-ended questions, and capture B-roll or screen shares to illustrate key points. Consider releasing the audio as a podcast to reach new audiences with minimal extra work.
Remember: it doesn’t always have to be about you—your audience cares most about the value they get.
11. Distribute your content
Publishing is step one; distribution is where growth happens. YouTube remains the best home base for search, subscriptions, and monetization.
Repurpose each upload: cut vertical clips for Shorts/Reels/TikTok, pull quotes for social, embed videos in related blog posts, and include them in your newsletter. Add UTMs to links so you know what’s working.
Optimize the video page itself: compelling titles, clear descriptions with resources and timestamps, eye-catching thumbnails, and playlists that keep viewers watching more. (Tags help with organization but have minimal impact on discovery compared to titles, thumbnails, and descriptions.)
If you’re also publishing articles, write about your videos and embed them to capture both search and watch time.
YouTube should be your first stop, but some creators add secondary distribution via platforms like Vimeo for portfolios or client work.
12. Keep recording
You won’t use every second you shoot—and that’s fine. Record generously so you can choose the best moments in the edit.
Carry a camera (or at least your phone) often. Capture B-roll of your process, workspace, travel, and product shots. Build a library you can drop into future videos.
Work in batches when possible: outline multiple scripts, film several intros in one session, and edit on a schedule. Back up your footage to external or cloud storage with a clear naming system.
Showing your audience what happened beats telling them about it later. Be ready to roll.
Conclusion
With video still surging, now is a great time to start—or reboot—a video blog. The hard part isn’t pressing record; it’s consistently delivering value and getting that content in front of the right people.
Use the tips above to set yourself up: get the right mic and lights, learn basic editing, plan engaging formats, and distribute like a pro. Then let your personality and expertise do the rest.
Stick with it and focus on helping your audience. You’ll see growth in traffic, watch time, and engagement—and your videos will compound in value over time.
Hit record. Your next great video blog is waiting.