First impressions matter—and one of the fastest ways to make your website look polished is with a custom favicon. A favicon (short for “favorite icon”) is the tiny image that appears next to your site’s name in a browser tab. It’s a small but powerful branding element that makes your site instantly recognizable among a sea of open tabs and saves returning visitors a beat of cognitive effort.
If you’re new to favicons, creating one might seem intimidating—but it’s not. You don’t need a designer or even a finished logo. You can make a clean, on-brand favicon yourself in minutes.
You can create a brand-aligned favicon in under an hour—even if you’re starting from scratch.
This guide explains what a favicon is, why it matters, and exactly how to design and upload one—step by step, without guesswork.
What’s a Favicon and Why Is It Important?
A favicon is a small icon—commonly served at 16×16 or 32×32 pixels—that represents your website and brand. You’ll see it in browser tabs, bookmark lists, history, shortcuts, and even on mobile home screens. That tiny image works like a visual signature for your site. Modern browsers also support SVG favicons, which scale cleanly and look sharp on high-density displays.
Here’s an example of favicons as they appear in the tab section of a web browser:
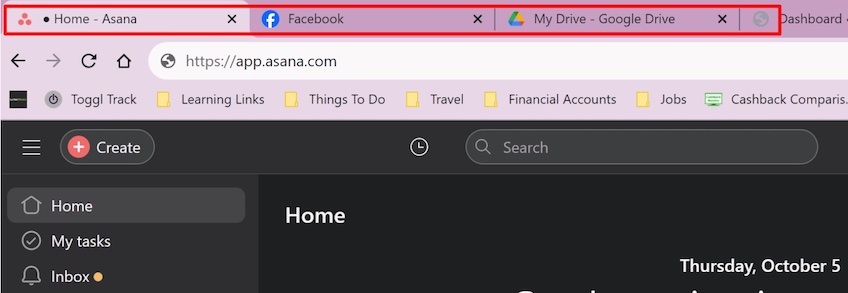
In the image above, the gray globe on the far right is the default browser icon. If you don’t set a custom favicon, that’s what shows by default.
That generic icon doesn’t help users distinguish your site or build trust.
When people scan through many tabs, a strong favicon acts as a visual shortcut. Without one, your tab blends in—so users may overlook it, switch away, or close it by mistake.
Favicons also appear in bookmarks, making your site easier to spot among saved pages.
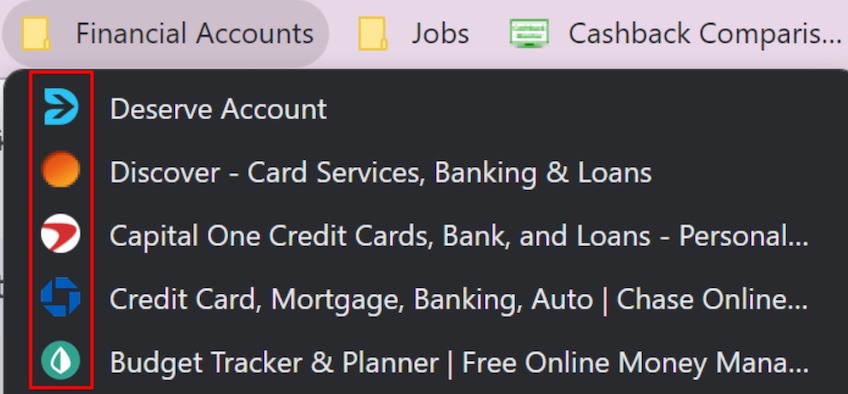
As you can see above, favicons make bookmarks scannable and instantly recognizable—so they’re a usability upgrade and a branding win.
Benefits of Using a Favicon
Still on the fence? Here’s why adding a favicon is worth it:
- Helps users quickly identify your brand in tabs, bookmarks, and mobile shortcuts
- Adds polish and professionalism that visitors subconsciously notice
- Sets you apart from sites that rely on the default browser icon
- Improves recognition, which can reduce accidental bounces and tab churn
How to Make a Free Favicon From Scratch
Building a site can be expensive, but your favicon doesn’t have to be. You can design one for free using a tool like RedKetchup’s Favicon Generator. It’s fast, flexible, and beginner-friendly.
RedKetchup lets you customize text, colors, and shape, and it can export a full favicon package with the HTML you need for broad browser support.
This works especially well for text-based favicons using initials or short brand names—perfect if you don’t have a logo yet.
Here’s the step-by-step workflow.
Step 1: Open a Free Favicon Generator
If you’re starting without a logo, we’ll build a favicon from your brand initials.
Go to the RedKetchup Favicon Generator and click “Generate the favicon icon from text.”

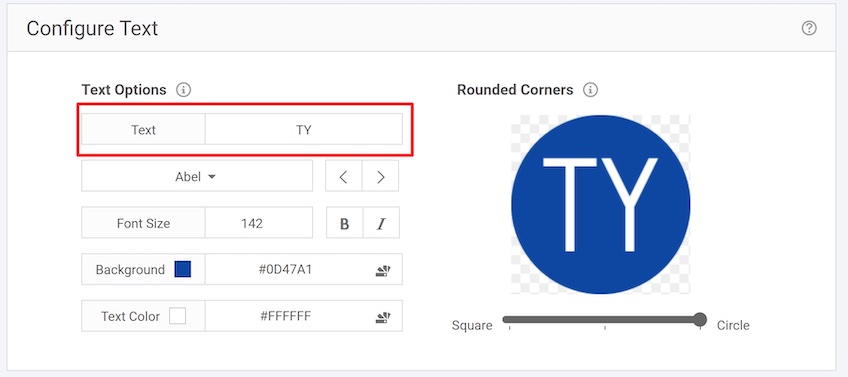
Step 2: Add Your Text
Text-based favicons are easy to make and scale well. In the text field, enter the letters or initials you want to use.
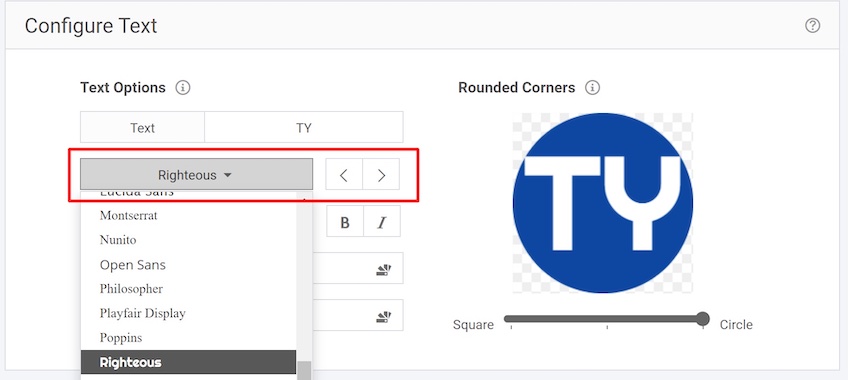
Step 3: Choose Your Font
Open the font menu and pick a style that matches your brand—modern, elegant, playful, or bold. Avoid overly thin fonts that vanish at small sizes.
Step 4: Adjust Your Font
Use the controls below the font menu to tweak size, weight, and letter spacing for maximum legibility.

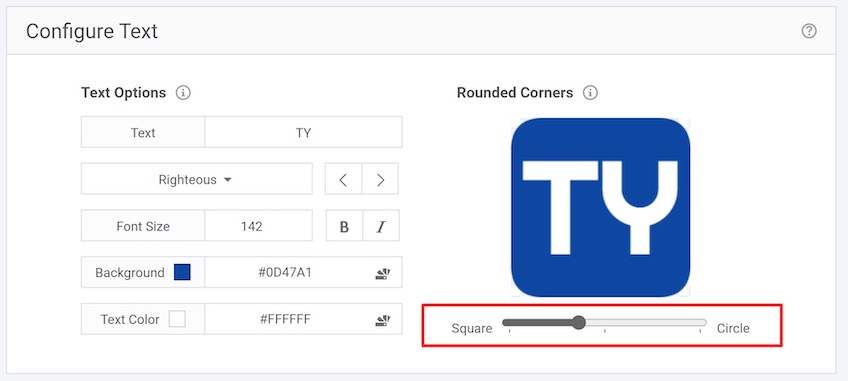
Step 5: Change the Shape of Your Favicon
Drag the corner-radius slider to switch between square and circular shapes. If needed, resize or reposition your text to fit the layout cleanly.
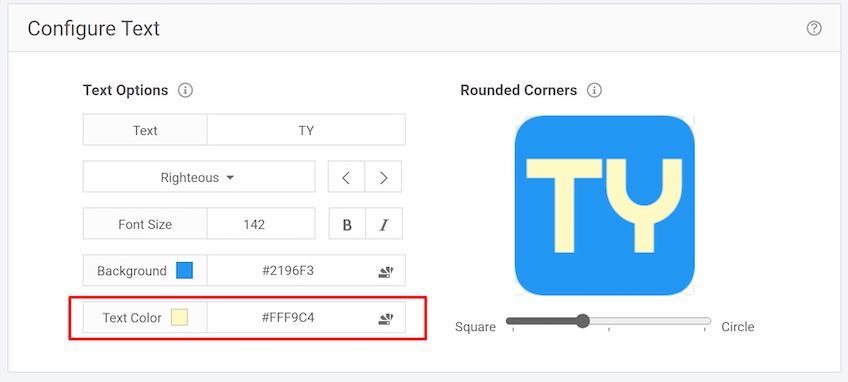
Step 6: Set the Background and Text Color
Pick colors that reflect your brand. For consistency, use your site’s HEX codes. Aim for strong contrast (e.g., dark text on a light background or vice versa) so the icon stays readable on any tab color.
Click the color-palette icon to browse or manually enter color codes.
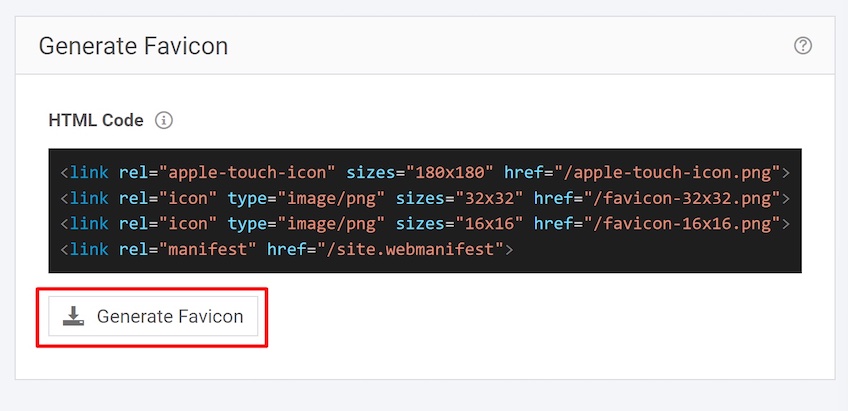
Step 7: Download Your Favicon
When you’re happy with the design, click “Download Favicon.” You’ll get a .zip file with the icon files (multiple sizes) and an HTML snippet for broad browser support.
How you implement it depends on your setup. If you manage code directly, unzip the package, upload the files to your site’s root, and add the provided HTML to your site’s <head>. If you use WordPress, you can usually skip the HTML and upload the icon as a Site Icon from the dashboard (details below).
Using an Image or Logo as a Favicon
If you already have a logo or custom mark, you can use it instead of a text icon. Just make sure it remains legible at small sizes—simple shapes beat tiny details every time.
While 16×16 is the classic minimum, modern sites ship a small set of sizes for full compatibility and high-resolution display. Include at least a multi-size favicon.ico for tabs and bookmarks, a 180×180 apple-touch-icon for iOS, and larger PNGs (e.g., 192×192 and 512×512) if you use a web app manifest. Where possible, also include an SVG favicon for sharp scaling in modern browsers.
Exporting a larger source image (e.g., 1024×1024) and generating the smaller sizes from it helps keep everything crisp.
Follow these best practices for image-based favicons:
- Keep it simple: Avoid intricate marks. Favor bold shapes and minimal detail.
- Use compatible formats: PNG or ICO for broad support; add an SVG favicon for modern browsers and an SVG
mask-iconfor Safari pinned tabs.
- Choose strong contrast: Your icon should be visible on light and dark UI.
- Stay on-brand: Use your core colors and consistent styling.
- Preview before finalizing: Test in multiple browsers and on mobile. Iterate if details blur.
How to Add a Favicon to Your Site
To add a favicon manually, upload the icon files to your site’s root directory (where your main index.html lives) and include the relevant tags inside the <head>.
Here’s a modern example that covers common scenarios:
<!-- Modern favicon setup --> <!-- SVG for modern browsers (optionally provide a dark-mode variant) --> <link rel="icon" href="/favicon.svg" type="image/svg+xml"> <link rel="alternate icon" href="/favicon-dark.svg" type="image/svg+xml" media="(prefers-color-scheme: dark)"> <!-- PNG fallbacks for legacy contexts --> <link rel="icon" href="/favicon-32x32.png" sizes="32x32" type="image/png"> <link rel="icon" href="/favicon-16x16.png" sizes="16x16" type="image/png"> <!-- Classic ICO fallback (browsers auto-discover /favicon.ico) --> <link rel="icon" href="/favicon.ico"> <!-- iOS home screen --> <link rel="apple-touch-icon" href="/apple-touch-icon.png" sizes="180x180"> <!-- Progressive Web App (optional) --> <link rel="manifest" href="/site.webmanifest"> <!-- Safari pinned tab (monochrome mask with brand color) --> <link rel="mask-icon" href="/safari-pinned-tab.svg" color="#5bbad5"> <!-- Optional UI colors --> <meta name="theme-color" content="#ffffff"> <meta name="msapplication-TileColor" content="#2b5797">Adjust filenames and colors to your setup. If you generated multiple sizes, include the ones you exported. After publishing, clear caches (including any CDN) and hard-refresh your browser to see the new icon.
Some hosting dashboards (including cPanel) also offer favicon upload options—check your provider’s docs if you prefer a UI-based approach.
How to Add a Favicon to Your WordPress Site
On WordPress, you can set a favicon (called the “Site Icon”) without editing code.
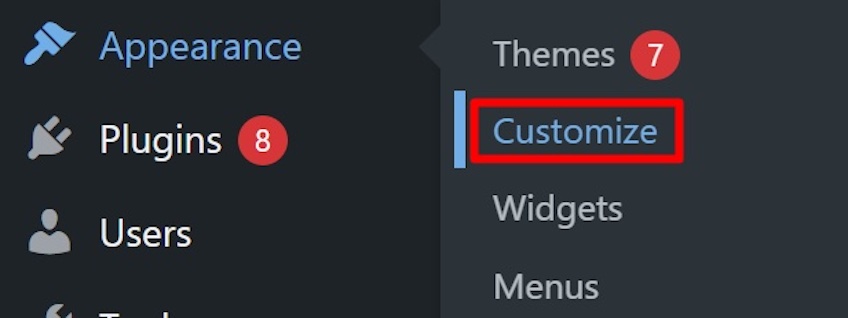
Step 1: Go to Appearance Settings
Log into your WordPress dashboard. From the left menu, go to Appearance. In classic themes, choose Customize and open Site Identity. In block themes (Site Editor), go to Appearance > Editor, open your header (or click the Site Logo block), and use the Use as site icon option.
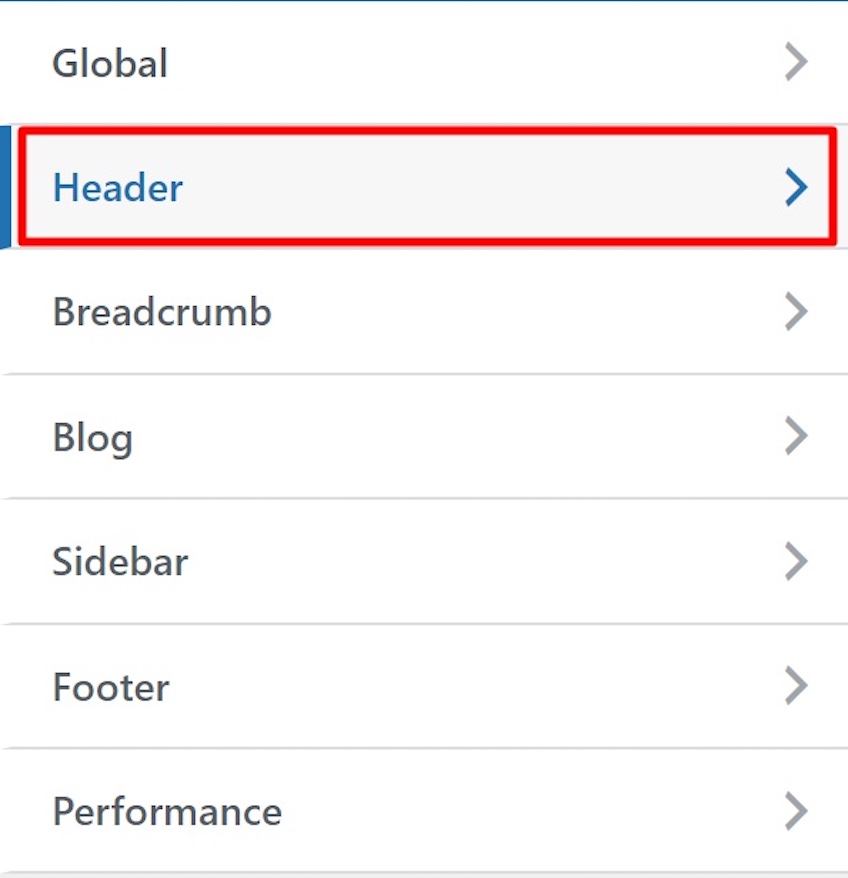
Step 2: Select Header or Site Settings
In the Customizer, open Header (or your theme’s equivalent) to access brand settings. In the Site Editor, select your header template part or the Site Logo block to access its settings, then jump to Site Icon settings if prompted.
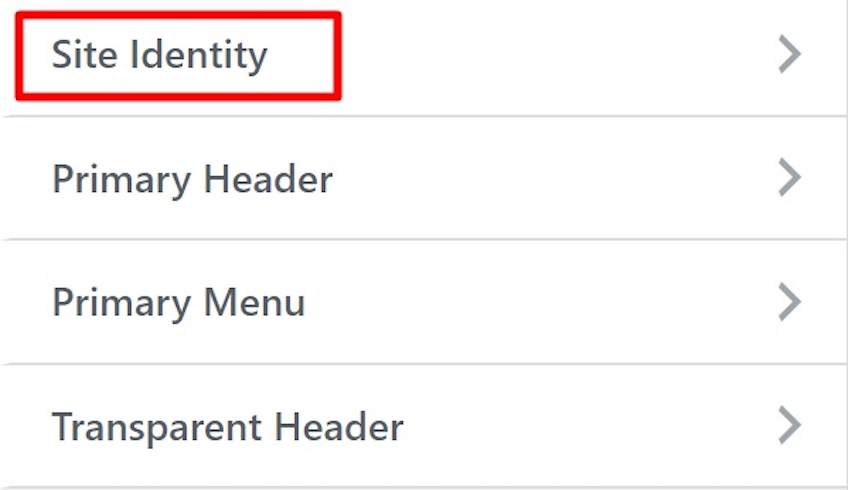
Step 3: Choose Site Identity
Open Site Identity (classic) or the Site Logo settings (block) to manage your logo, tagline, and Site Icon.
Step 4: Upload or Change Your Site Icon
Scroll to Site Icon and upload a square image that’s at least 512×512 pixels. WordPress will generate the required sizes automatically. Preview the result, then publish to go live.
This walkthrough uses the Astra theme, but the process is nearly identical in most modern WordPress themes (classic or block-based).
If your theme doesn’t expose a Site Icon setting, use RealFaviconGenerator to generate and manage the full icon set. (Older “all-in-one” favicon plugins are largely unnecessary today and may be outdated.)
Key Takeaways for Making Your Own Favicon
A custom favicon boosts brand recognition, elevates your site’s polish, and helps users find you faster in tabs and bookmarks.
You don’t need a designer—or even a logo—to make one. With a free generator and a few clicks, you can launch a clean, on-brand favicon in under an hour. Keep it simple, high-contrast, and square; export the common sizes (16×16, 32×32, 180×180, 192×192, 512×512), include an SVG favicon and a Safari mask icon, and implement via WordPress Site Icon or the HTML snippet above. Test on multiple devices, clear caches, and you’re done.