Imagine a world where you don’t have to worry about distributing checks correctly.
All your employees are paid on time, regardless of their location. Your payroll process is streamlined and straightforward, and you don’t have to deal with issues, lack of supplies, or being non-compliant.
This dream can be yours if you switch to direct deposit for paying your employees.
4 Steps to Set Up Direct Deposit for Employees
Setting up direct deposit is simple. Just follow the step-by-step instructions below:
- Choose an online payroll service
- Set up your account
- Set up direct deposit with your payroll service
- Enable direct deposit
The Easy Parts of Setting Up Direct Deposit for Employees
Running payroll is difficult enough without jumping through hoops to set up direct deposit. And this process can be a lot easier than you first imagine. Opting to use an online payroll service as your direct deposit provider eliminates much of the manual work you’d otherwise have to do when switching to direct deposit payments.
For one, you won’t have to go through the headache of sifting through numerous direct deposit providers to find one to support your payments. The online payroll service will handle this for you.
The verification process is also a lot easier with an online payroll service. You can also edit and update payment information instantly and at any time, which can’t be said for your bank.
Also, the payroll service will help you with the payroll process from start to finish. Not even a bank with the best customer service team can provide you with the kind of support these online payroll services offer.
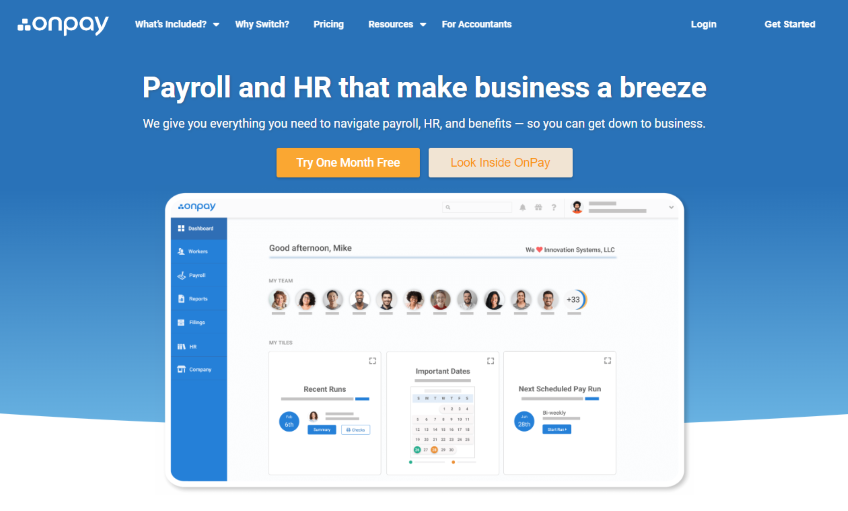
OnPay is an excellent online payment service that supports direct deposits. It’s one of our top recommendations.
The signup process and opting-in to direct deposit are straightforward and hustle-free. Besides direct deposits, OnPay comes with awesome payroll features, including automated tax filing and payments, multi-state payroll, and multiple pay rates and schedules.
This platform also comes with HR features, including self-onboarding and employee offer letters, HR auditing, PTO approvals and tracking, org charts, and company rosters.
And if you’re on the market for a different payroll service, we’ve got a handy guide where we review the six best online payroll services to make it easier for you to choose the best one for your needs.
The Difficult Parts of Setting Up Direct Deposit for Employees
An online payroll service will make processing payroll easier. But, there is work to do before you can start paying employees via direct deposit.
A lot of the difficulty involves collecting and verifying different types of business and employee information. This will mean sifting through employee records, asking HR or executives for assistance, or tracking down individual employees to gather or update information.
On the upside, you’ll only need to go through the process once. You can later update the information as required on a case-by-case basis.
Step 1 – Choose an Online Payroll Service
An online payroll service handles every aspect of your payroll, including setting up direct deposits for your employees. For this guide, we chose OnPay. It’s affordable, works for specialized small business needs like restaurants or non-profits, and setting up direct deposit is super easy.
Jump to step 3 if you’ve already set up your account with an online payroll service.
Choose a Plan
OnPay has a transparent pricing model. You know exactly how much you’re going to pay and when. The service costs $40 per month and an additional $6 per person per month. That’s all there is to it. And there’s a handy calculator to let you know precisely how much the service will cost your business before you purchase.

Whatever payroll service you choose, make sure you understand the pricing model. Things can get very expensive with hidden fees, which most people only realize after being locked into the service.
Enter Your Payment Information
The payment information you’ll need to provide when setting up your payroll account may vary depending on the online payroll service you choose. Generally, you’ll need to provide:
Federal Employer Identification Number (EIN) – You’ll need a FEIN number from the IRS. You can complete an application on the IRS website and receive your number via e-mail the same day.
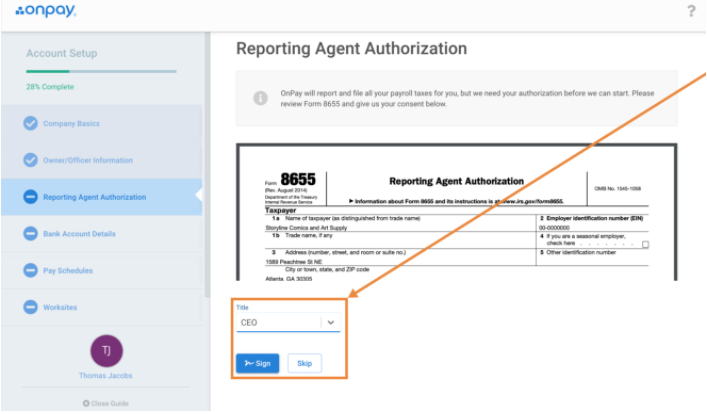
Form 8655 – This form authorizes your online payroll service to file taxes on your behalf. OnPay automatically fills in the required Form 8655 based on the information you provide when creating your account. All you need to do is sign the document.
Company Bank Account Details – Get the account number and routing number for the bank account you use to pay employees.
Step 2 – Set Up Your Account
OnPay will guide you through the entire process, prompting you to enter your information step-by-step. It’s very straightforward. And don’t worry if you don’t know some of the details we outlined in the previous section. You can always skip a step and go back to it later.
However, you’ll need to fill in all this information before you can set up direct deposits for employees.
Provide Your Company Information
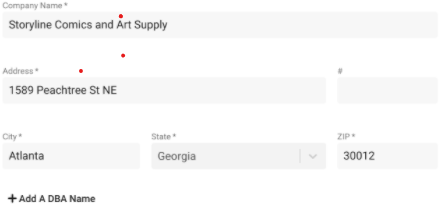
You must get all your details right during the signup process. Some of this information is required when setting up direct deposits for your employees and for tax purposes.
Provide Your Payment Information
First, you will enter your federal tax information, the EIN.
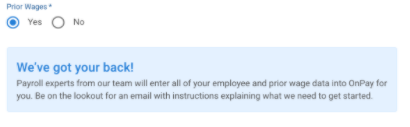
You’ll also be asked to enter reports for your employee’s prior wages. This step is essential and will save you a lot of time and energy down the line. OnPay uses this information to add employees and their prior wages for you. Otherwise, you’d have to enter all your employee details manually.
Sign Form 8655. OnPay will let you do this electronically.
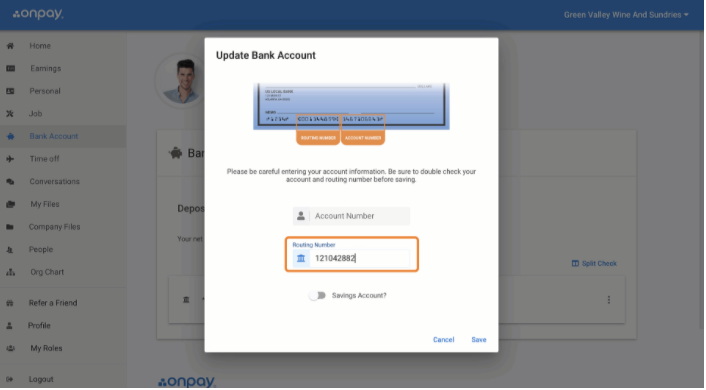
Then, enter your company bank account details. These include your routing number and bank account number. Remember, you are entering the details for the account you use to pay your employees.
Set the Employee Payment Schedule
Next, choose a payment schedule. The best option is to do it according to your pay frequency. This strategy makes it easy to track payroll. This might also be an excellent time to review your payment schedule. If you haven’t already, look up your state’s minimum pay period allowed.
Some states like Iowa, California, and Connecticut have a weekly minimum pay period. Once you have this information right, go ahead and select the payment schedule that applies to your business.
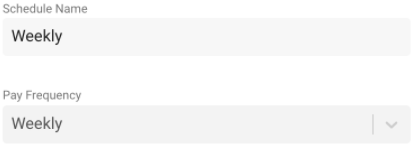
As with most other online payroll services, OnPay also lets you pay different teams on different schedules. In this case, you can use the team name as the name for your payment schedule. For example, you could use “Management” as the schedule name if you’re paying management and executive staff on a different schedule than other employees. Again, this strategy will make it easier to scan and pick the proper schedule in the future.
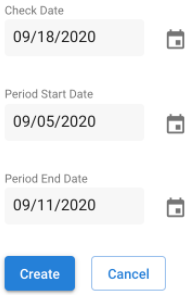
Finally, set up the date you want your employees to receive their first payment. Also, you’ll need to enter the period that this first payment covers. Enter the start and end of the pay period. The end of the pay period will be the day before the next pay period. So if the new pay period starts on the 12th, your pay period end date will be the 11th.
The online payroll software will use these dates as the default when scheduling future pay frequency.
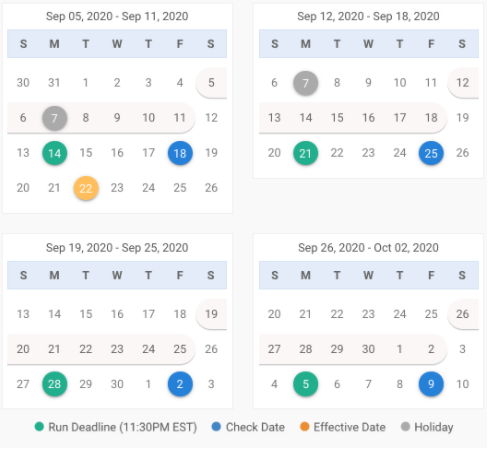
Your pay schedule will look something like this:
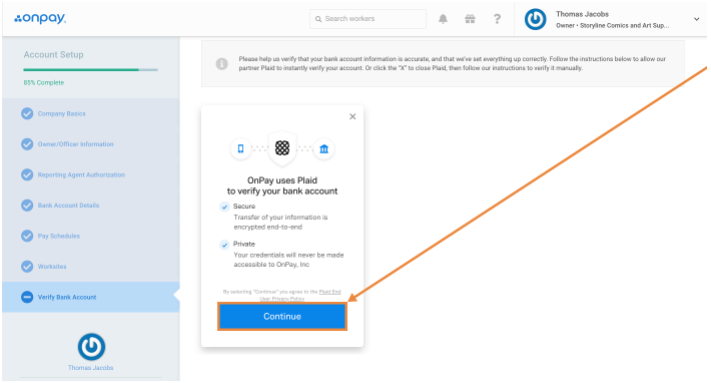
Verify Your Bank Account
You’ll need to verify your company bank account before you can process your first payroll. You’ll be prompted to confirm your account in the last step of your account setup.
OnPay uses Plaid for the verification process. This is the easiest way to verify your account. Simply click Continue, and the software will take care of the process for you.
Step 3 – Set Up Direct Deposit With Your Payroll Service
Now comes the fun part, setting up direct deposit. This step will make paying your employees so much easier and cheaper. The maximum turnaround time for OnPay is four days, so you know your employees will be paid on time. Be sure to confirm the maximum turnaround time if you choose a different online payroll service.
Apply for Direct Deposit
Online payroll services don’t come with direct deposit as the default option. You’ll typically have to apply to use the service, which is true for OnPay, too. You’ll receive an email from OnPay’s Financial Operations team to provide details of how you’d like to pay your employees. Simply reply with direct deposit, along with any other required information.
Verify Your Bank Account
If you haven’t already, you’ll be required to verify your company bank account in this step of the process. You can do this manually by going to My Company from your dashboard.
OnPay will make two small debit charges to your account.
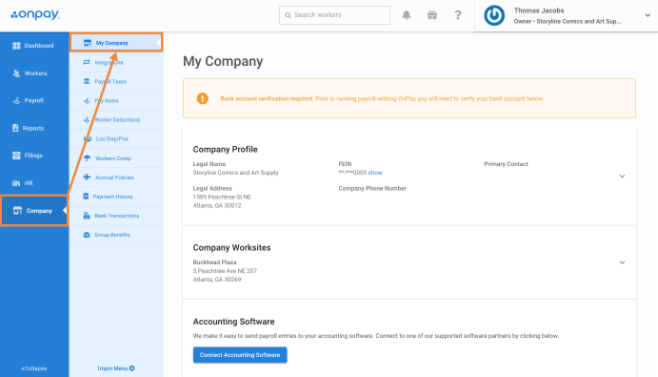
Next, scroll down to Company Bank Account.
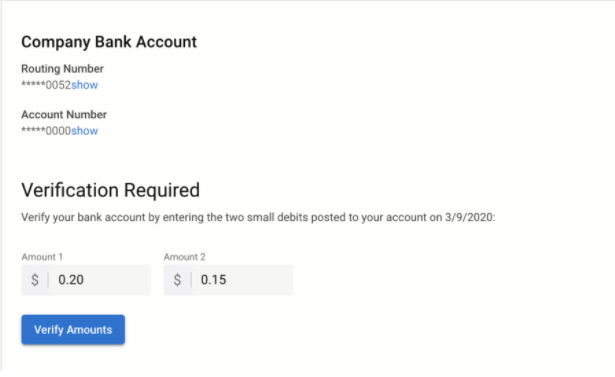
Finally, click Verification Required and fill in the values for the two debit transactions in your company account. Complete the process by clicking Verify Amounts.
Now you can use your OnPay account to pay employees. However, You’ll be limited to cutting checks if you stop here. There are still a few more steps before you can process payroll with direct deposit.
Wait for a Risk Assessment
OnPay’s Automated Clearing House (ACH) team will have to conduct a risk assessment before you are eligible to use the platform’s direct deposit feature. You’ll receive an email with the outcome. If approved, OnPay will let you know your direct deposit turnaround. This may be either a two-day turnaround or a four-day turnaround, depending on the risk assessment results.
Step 4 – Enable Direct Deposit
Once you’re approved for direct deposit, it’s time to add your employee’s information. Again, make sure that you get all the details correct. You can have HR double-check your entries just to confirm everything is correct.
Collect Employee Account Information
You’ll need your employee’s account numbers, routing numbers, and account type for the bank account they want their salary to go into. Ask each employee to provide this information. In many cases, HR personnel will have a direct deposit authorization form for employees to fill out, usually during the onboarding process.
Add Employee Account Information
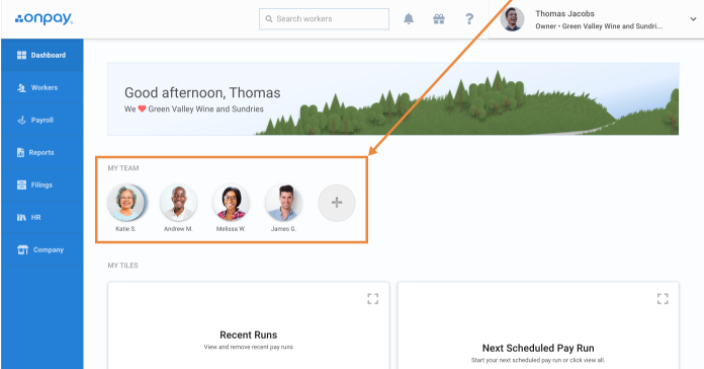
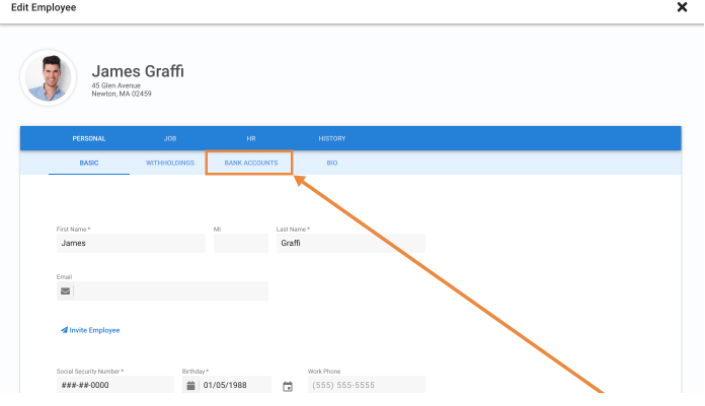
Go to your dashboard and select an employee to view their profile.
Next, select Bank Accounts in the employee’s profile.
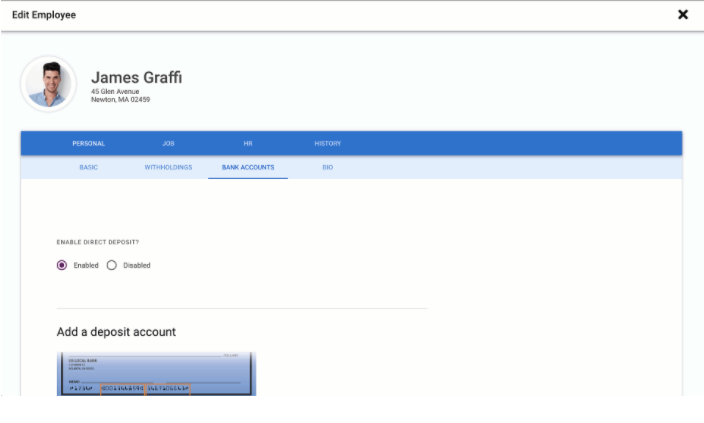
Go to “Enable Direct Deposit?” and click Enabled.
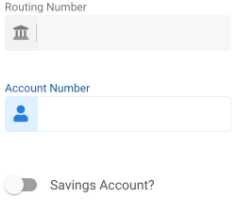
Enter the employee’s account number and routing number in the provided fields. Also, be sure to indicate if it’s a savings account. In most cases, it will be a checking account.
OnPay also gives you the option to let employees enter their own bank information. This option can save you the time and hustle of entering employee information, especially if you’re running a large operation. Employees enter this information during signup. They can also change their bank information any time from their employee dashboard.
You’re now ready to pay your employees using direct deposit!
How To Add A Contractor
You’re now ready to pay your employees via direct deposit. You can also start paying contractors via direct deposit if you have a mixed workforce.
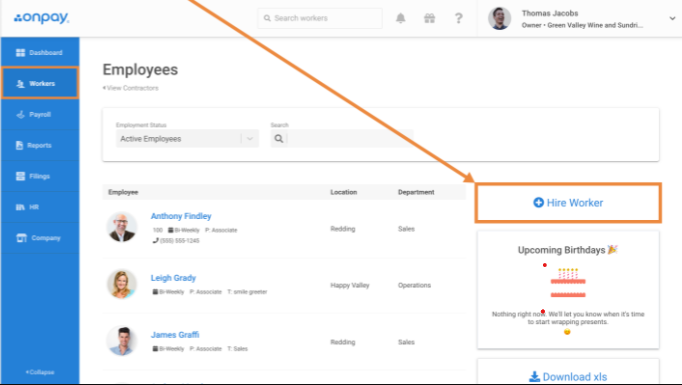
Add the Contractor
Go to Workers and click +Hire Worker.
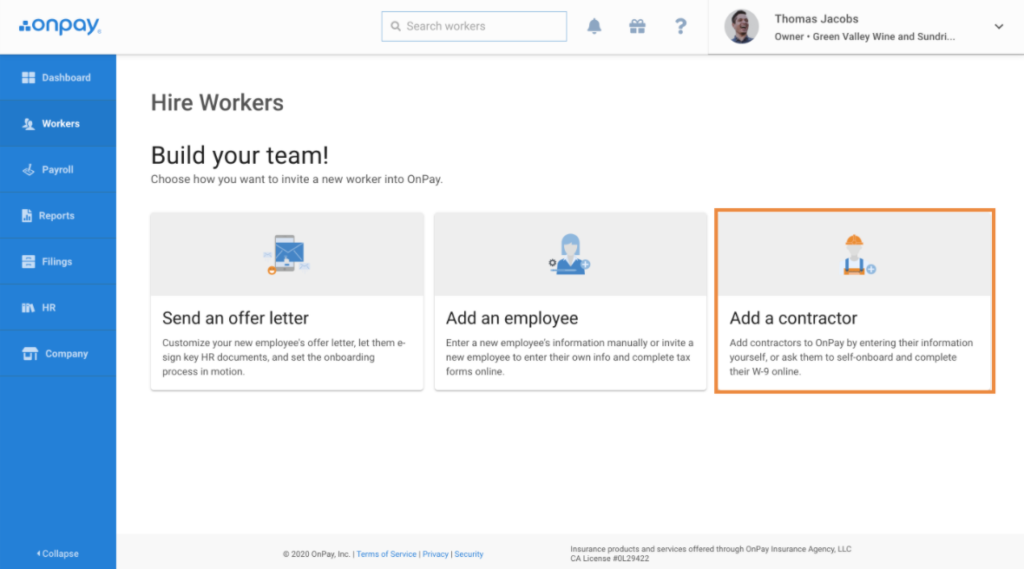
Click Add a Contractor.
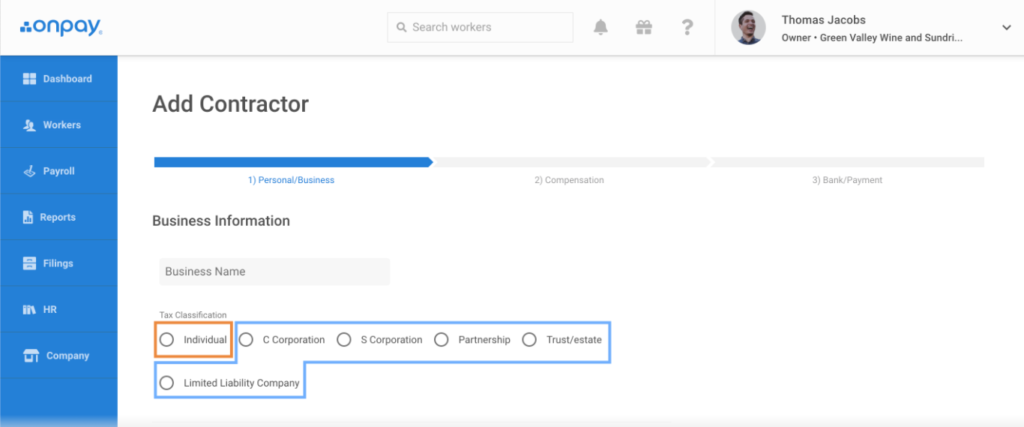
Enter the Contractor’s Business Information
Next, enter the contractor’s personal or business information. This includes the contractor’s business name.
The tax calculation section can be a little tricky since not all contractors are taxed the same. The information you enter here depends on whether the contractor is registered as an individual, a corporation, LLC, trust, or partnership.
If the contractor is an individual, you’ll need to enter their Social Security Number (SSN). If they’re registered as a business, enter their Federal Employer Identification Number (EIN).
Enter Personal and Contact Information
You’ll be prompted to enter the contractor’s personal and business information. This includes their name, gender, birthday, phone number, home address, and emergency contact information. Please note that you’ll be entering the contractor’s home address, not their business address.
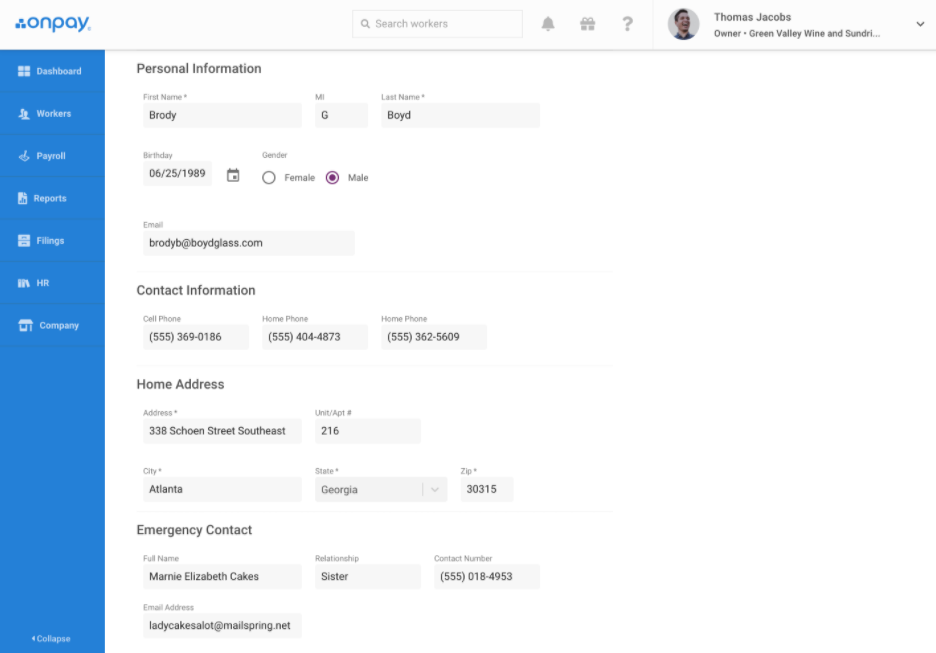
Finally, click Save & Continue to lock in your information.
Enter Compensation Information
You’re almost done adding the contractor. Now it’s time to enter compensation information, including the contractor’s location, position, and department. Also, select the contractor’s pay rate, compensation pay item, and any deductions.
You’ll be free to enter as many pay items as you please for your contractor. You can also choose between the pay items when you run payroll.
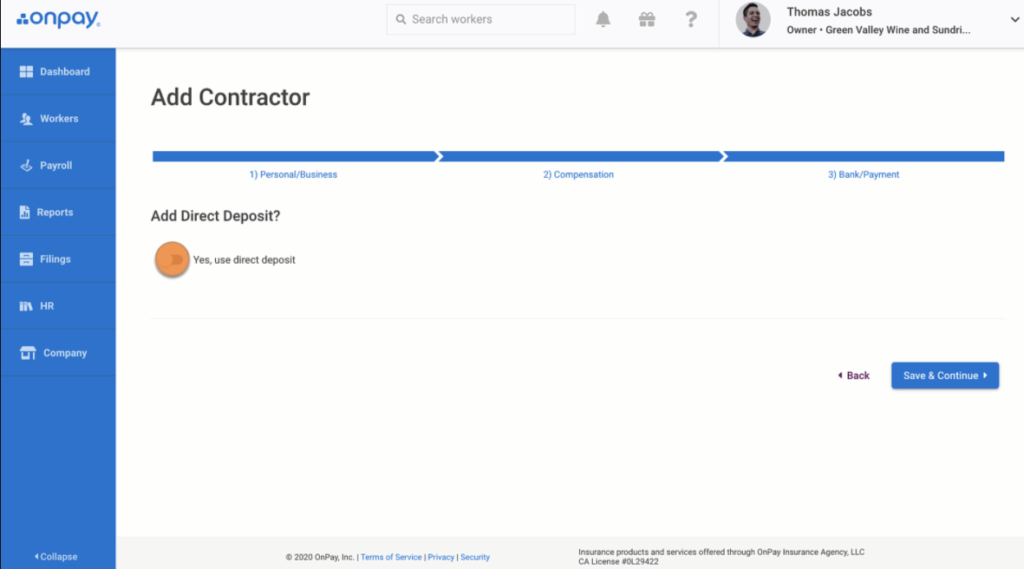
Enter Bank and Payment Details
Now you’re finally ready to wrap up adding your contractor. You only need to add the contractor’s payment information. You’ll require proof of their bank account information. Ask the contractor to provide a voided check to complete this step.
As usual, be sure to indicate if the bank account is a savings account.
Select Direct Deposit and click Save & Continue to complete the process. You can now pay contractors via direct deposit, along with your employees!