If your current host is holding you back—slow load times, inconsistent uptime, weak security, or lackluster support—moving to a better host can immediately improve performance and reliability.
Feeling intimidated is normal. “Migration” sounds technical, but with the right process it’s very manageable—even if you’ve never done it before.
With the proper tools and a clear checklist, you can migrate a WordPress site in a few hours, end to end.
This guide walks you through every step to move your WordPress website to a new host or server. Before you start, ask your new hosting provider if they offer free or assisted migration—many do (and some have one-click import tools), even if it isn’t clearly advertised.
6 Steps to Move WordPress to a New Host or Server
Here’s the high-level plan:
- Back Up Your WordPress Website Files
- Import Your WordPress Website to the New Host
- Eliminate Downtime by Changing the Hosts File
- Create MySQL Database on Your New Host
- Start the Website Migration Process
- Update Your Domain Name Servers (DNS)
What to Expect When Moving WordPress to a New Host or Server
Migration isn’t complicated if you follow the correct sequence. Stick to the steps and you’ll avoid the most common pitfalls.
The Good
The biggest upside is better speed, uptime, security, and support—especially if your previous host struggled under traffic spikes or outdated infrastructure.
On a stronger platform, you can expect faster page loads, higher availability, and modern features like staging environments, built-in caching or CDN integration, daily backups, and hardened security tools.
You might even lower costs if the new plans bundle more value. Choosing a reliable web hosting provider pays off quickly in performance and peace of mind.
Many hosts also simplify the process with free transfers or guided migrations—use them if available to skip manual steps.
With a checklist, most sites move within a few hours. If you get stuck, support can usually nudge you across the finish line.
Some providers will do everything for you. If that’s an option, accept it and focus on testing the new site.
The Bad
Migrations carry risk. Pick the wrong host and you’ll still face performance bottlenecks, security gaps, or poor support.
Do your homework: decide between shared, managed WordPress, cloud, VPS, or dedicated. Check bandwidth policies, uptime SLAs, feature sets (backups, staging, CDN), security practices, and support quality.
If you’re new to site management, the terminology can feel unfamiliar. Precision matters—skipping a small step (like database credentials or cleanup) can cause headaches.
Take it one step at a time and use this guide as your checklist.
Step 1 — Back Up Your WordPress Website Files
Before you move anything, create a complete backup—files, media, themes, plugins, and the database. This is your safety net if anything goes wrong.
Quick prep before you back up: update WordPress core, themes, and plugins; clear any page/server cache; and ensure you have enough disk space for the archive.
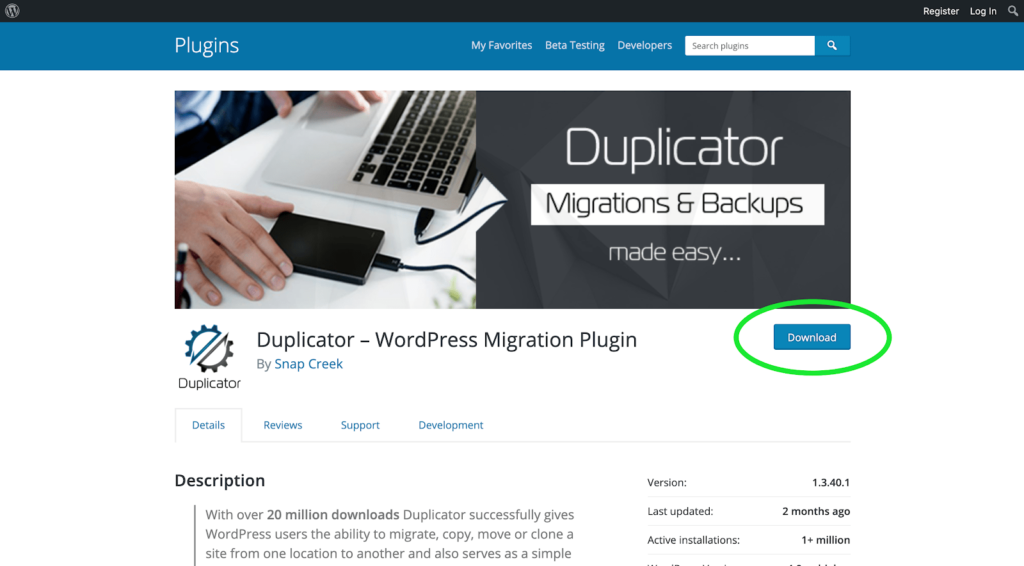
Installing the Duplicator Plugin
Install and activate the free Duplicator plugin on the site you’re moving. Duplicator streamlines migration and preserves your site structure, links, and SEO settings.
Download the Archive and Installer Files
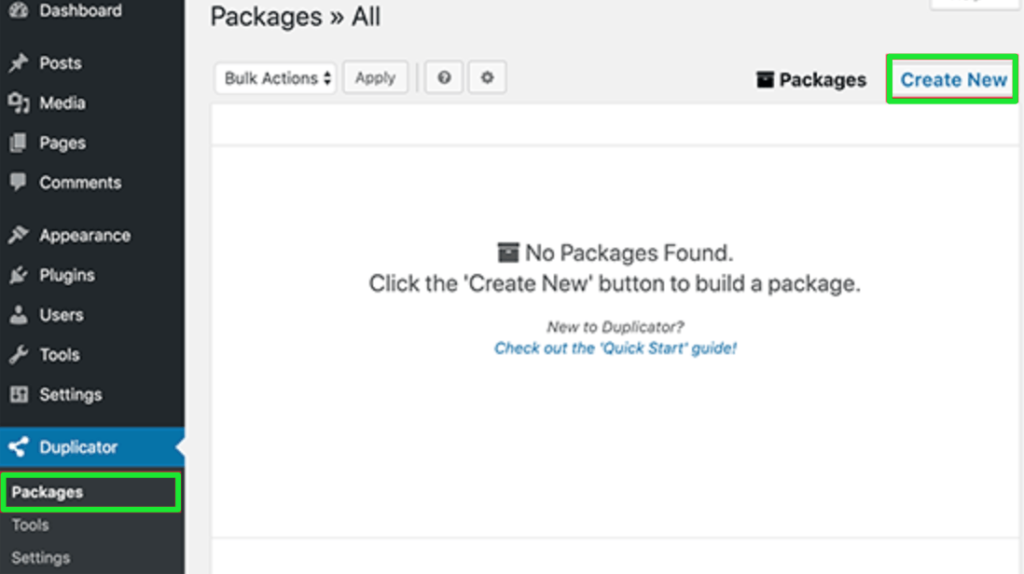
In the WordPress admin, go to Duplicator > Packages and click Create New to build a package of your site.
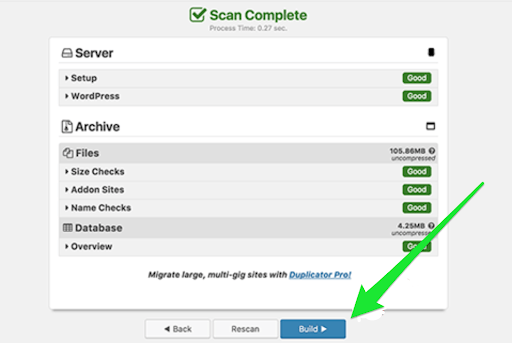
Click Next and review the scan. All checks should show “Good” before proceeding.
Click Build to generate the package. This can take several minutes on larger sites—don’t close the tab.
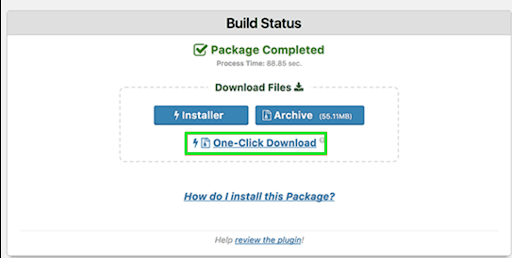
When it’s finished, you’ll see download links for two files: Installer and Archive. The archive is your entire site; the installer rebuilds it on the new server.
Use One-Click Download to save both to your computer.
Step 2 — Import Your WordPress Website to the New Host
Next, upload your two files to the new hosting account.
Use SFTP/FTP to connect. If you’re not familiar with it, tools like FileZilla make it straightforward.
Find Out Your Server’s IP Address and Hostname
Your domain still points to the old host, so use the new server’s IP address or hostname for the connection rather than your domain name.
If you don’t see it in your dashboard (in cPanel or your host’s panel), ask support for the SFTP host, username, and port.
Upload both installer.php and the archive .zip to the site’s web root, typically /username/public_html/ (or the relevant document root for your domain).
Important: If WordPress is already present in that directory, remove it first to avoid file conflicts. You’re restoring the site from the archive.
If you’re unsure about the correct path or permissions, your host can confirm the right directory. Many managed hosts also provide a temporary preview URL so you can skip manual hosts-file edits—use it if available.
Step 3 — Eliminate Downtime by Changing the Hosts File
To run the installer before DNS changes, you need a way to load the new server privately. Editing your computer’s hosts file lets you do that—no downtime, no public switch yet.
Attempting to visit https://www.example.com/installer.php won’t work until DNS points to the new host, so you’ll temporarily map your domain to the new IP locally.
Add an Entry for Your Domain Name in the Hosts File
The hosts file overrides DNS. By mapping your domain to the new server’s IP, your browser will load the new copy while everyone else still sees the old site.
Find the server IP in your hosting control panel under an area like Account Information or Shared IP Address.
Open your hosts file:
- Windows: Open Notepad as Administrator, then go to
C:/Windows/System32/drivers/etcand openhosts. - Mac: Open Terminal and run
sudo nano /private/etc/hosts.
Add a line like this (replace with your real IP and domain):
146.168.1.23 www.example.com
Save the file. Your computer will now load the new server when you visit your domain—without affecting the public site. If pages don’t switch immediately, flush your local DNS cache (macOS: sudo dscacheutil -flushcache; sudo killall -HUP mDNSResponder, Windows: Command Prompt as Admin > ipconfig /flushdns).
Reminder: You’ll remove this hosts file entry in Step 6 after updating DNS.
Step 4 — Create MySQL Database on Your New Host
Duplicator needs a database to import into. If you already created one, move on; otherwise, set it up now.
Create a Database in cPanel
Log in to cPanel. Under Databases, click MySQL® Databases (or use the MySQL Database Wizard to be guided through the steps).
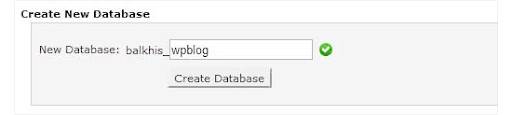
Under Create New Database, name the database and click Create Database.
In MySQL Users, create a new user (username and password) and click Create User.
Add User to Your Database
Under Add User to Database, select the new user and database, click Add, then grant All Privileges.
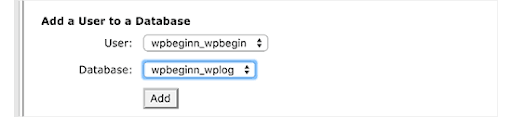
Copy the database name, username, and password—you’ll enter them in the installer next.
Step 5 — Start the Website Migration Process
Now you’ll run Duplicator’s installer to deploy the archive onto the new server.
Connect to Duplicator
In your browser, visit https://www.example.com/installer.php (replacing example.com with your domain). The hosts file you edited will route you to the new server.
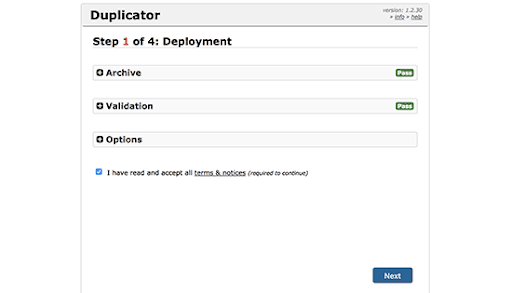
Review the system checks, accept the terms, and click Next.
Enter the database name, user, and password from Step 4. For many hosts the database host is localhost, but some provide a different hostname—use whatever your host specifies.
Click Test Database. You should see “Pass.”
Allow Duplicator to Import WordPress Database
Click Next to import the archive into the database.
If you’re not changing domains, keep the site URL and path as is. Click Next to finalize.
When you see the Login button, sign in to your WordPress dashboard to verify the site is working on the new server.
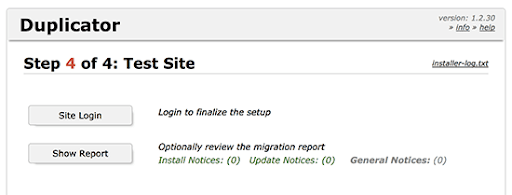
After logging in, complete these quick checks: go to Settings > Permalinks and click Save (to refresh rewrite rules), test critical forms and checkout, browse a few posts and media, and run the plugin’s Remove Installation Files cleanup to delete installer.php and the archive.
Step 6 — Update Your Domain Name Servers (DNS)
Your site now lives on the new server. The final step is pointing your domain so visitors reach the new copy.
You’ll do this by updating DNS nameservers (or, if you manage DNS elsewhere, by updating A/AAAA records). Nameserver changes are simplest if the new host will manage DNS for you.
Change Your DNS Nameservers
If your domain was purchased through your old host, you can transfer it to the new host for one-account management. If your domain is at a third-party registrar like Domain.com, leave it there and just update the nameservers.
Your new host will provide two nameserver addresses, for example:
- ns1.yourhostname.com
- ns2.yourhostname.com
How to update:
1. Log in to your domain registrar account
2. Open your domain’s DNS or nameservers settings
3. Replace the current nameservers with the ones from your new host
4. Save changes
If you keep DNS at a service like Cloudflare or your registrar, you can alternatively update the A/AAAA records to the new server IP instead of changing nameservers.
DNS propagation usually completes within a few hours, but allow up to 24–48 hours depending on TTL and networks. During this window, some visitors will see the old site while others see the new one—this is normal.
When traffic consistently resolves to the new host, remove the hosts file entry you added earlier so your computer uses public DNS again.
Once DNS is fully propagated, your migration is complete.
Congratulations! You’ve successfully moved your WordPress website to a new hosting provider. Whether you did it yourself or used host assistance, you’ve set the stage for better performance, stability, and growth.
Post-Migration SEO & Performance Checklist (Recommended)
Run through these quick tasks to lock in results and protect rankings:
- Verify SSL: ensure HTTPS is active, no mixed-content warnings.
- Resubmit sitemaps in Google Search Console and confirm the correct preferred domain and HTTPS are indexed.
- Check
robots.txtand your SEO plugin’s settings (make sure “Discourage search engines” is off on production). - Test critical user flows (signup, contact forms, checkout) and confirm transactional emails are delivered (SPF/DKIM).
- Enable/confirm caching and CDN (object/page caching, image optimization, HTTP/2 or HTTP/3 support).
- Set up automated daily backups on the new host and store at least one off-site copy.
- Monitor logs and analytics for 24–48 hours to catch broken links, 404s, or plugin conflicts.