Hiring new employees can be energizing—and it can also introduce real challenges if you don’t set up a clear, compliant process from the start.
Employees can make or break your company. And sometimes, finding the right people isn’t as simple as posting a job and holding a few interviews.
There are practical steps in the hiring process that minimize the risk of a bad hire and maximize your odds of bringing in people who thrive. Following these steps also helps you cover the legal bases of hiring and avoid costly missteps.
To help you navigate hiring with confidence, I created this how-to guide. Follow it to hire your next employees successfully—with less stress and better results.
6 Steps to Hire Employees
If you’re ready to hire new employees, follow the six steps below:
- Get an employer identification number (EIN)
- Prepare for recruiting
- Find your candidates
- Conduct interviews
- Make an offer
- Take care of the legal stuff
The Easy Parts of Hiring Employees
Don’t let hiring intimidate you. With a simple, repeatable process and the right tools, it can be a genuinely rewarding experience that strengthens your team.
Use the guide below to streamline each step—from writing a job post to onboarding a great new teammate.
Choose the right job title.
When posting roles on your website, LinkedIn, Indeed, Monster, or other boards, pick a title that accurately reflects the work and uses the same keywords your ideal candidates would search. Include clarity on level and modality (e.g., “Senior Product Designer – Remote/Hybrid”).
Clear, searchable titles rank and convert better because they match how candidates browse. Favor common terms over internal jargon so your post surfaces in more relevant searches.
Skip buzzwords like “wizard,” “rockstar,” or “ninja.” Candidates don’t search for them, and they don’t explain the role.
Keep titles concise—generally under 60–80 characters—so they display cleanly on job boards and mobile screens while capturing the essence of the role.
Find the best candidates.
This can feel daunting without a system. The overwhelm usually comes from manual steps—like sifting through piles of resumes—rather than from a lack of talent in the market.
Modern recruiting software streamlines sourcing, screening, and scheduling so you spend time with qualified people instead of paperwork and spreadsheets.
One strong option is Breezy HR.
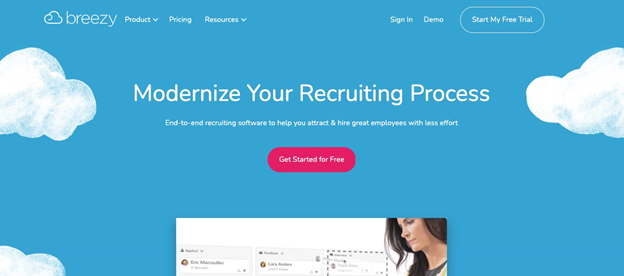
Breezy HR is an end-to-end recruiting platform with visual pipelines, one-click multi-posting, automated email/SMS, built-in scheduling, interview scorecards, and collaborative hiring tools—so you can move faster without sacrificing quality. Breezy’s paid plans currently include Startup, Growth, and Business tiers (with a free Bootstrap option), unlimited users, and distribution to 50+ job boards.
Run a background check.
Fast-forward to when you’ve identified a great candidate and made a contingent offer.
Running a background check helps protect your team, company, and customers. Obtain the applicant’s written authorization and make sure your process is fair, job-related, and consistent with applicable law.
Know the rules before you screen: U.S. employers must follow federal requirements for consumer reports, along with state and local laws (including “ban-the-box” timing rules and, in many jurisdictions, limits or outright bans on using credit reports in hiring). Check your state and city requirements before requesting sensitive reports.
To stay compliant and save time, many companies use a third-party service to manage screenings and the adverse-action process.
The Difficult Parts of Hiring Employees
To consistently hire well, you also need to anticipate common pitfalls. Addressing these early keeps strong candidates engaged and prevents bottlenecks later.
Here are frequent roadblocks and how to tackle them.
Long lead times.
Hiring can span weeks: posting, sourcing, screening, interviews, references, and approvals. Top candidates often move off the market in under two weeks, so slow processes lose great people.
Build a proactive pipeline. Don’t wait for openings to start the search. Keep a running bench of talent, pre-schedule interview panels, and set response-time SLAs for each stage so you can move decisively when the right person appears.
Improve forecasting, too. Annual and quarterly workforce plans help you identify roles you’ll need sooner, so you can start earlier instead of scrambling later.
Managing multiple job postings.
Great hiring managers post beyond one site—general boards, niche communities, and social channels. Juggling them manually is hard and error-prone.
Use your ATS to distribute postings to dozens of boards at once, track source performance, and refresh listings automatically so jobs stay active wherever candidates are browsing.
Social channels matter, too. Professional networks like LinkedIn consistently surface strong hires—but only if you share roles regularly and engage your employees to amplify them.
You’re not hiring for culture fit.
Skills and outcomes are critical, but so is how someone works. Rather than screening for “culture fit” (which can reinforce sameness), evaluate for “values add”—people who align with your core values and strengthen team perspectives.
If a new hire doesn’t feel aligned with how your company operates, they’re less likely to stay engaged. This applies to remote teams, too—culture isn’t tied to an office.
Use structured behavioral interviews, consistent scorecards, and job-relevant exercises to surface how candidates solve problems and collaborate. Background checks and references can also reveal potential red flags.
Step 1: Get an Employer Identification Number (EIN)
If you haven’t already, register your business with the appropriate federal and state agencies so you can hire, pay, and report taxes properly.
Every U.S. employer needs an Employer Identification Number for federal tax reporting. Think of it as the company equivalent of a Social Security number. You obtain your EIN directly from the IRS.
Check Your State’s Requirements
While your EIN comes from the IRS, you’ll also register at the state level for employer accounts such as unemployment insurance and state income-tax withholding. The process and portals vary by state, so consult your state labor and revenue websites for exact steps.
Some states process registrations online in minutes, while others require mailed forms or additional documentation—plan a little lead time.
Step 2: Prepare for Recruiting
With registrations handled, set up your recruiting foundation. A thoughtful setup improves candidate quality and shortens time-to-hire.
Use Recruiting Software
The best way to run a consistent process is with recruiting software. Breezy HR helps you attract and manage candidates whether you recruit in-house or via an agency.
Breezy HR includes features like:
- Reporting and analytics
- Candidate management
- Automation of candidate emails and SMS messages
- Scheduling of interviews
- Job advertisement
- Sourcing candidates
- Career portal
- Team collaboration
One standout: multi-posting. With Breezy HR you can publish to 50+ job boards with one click, centralize applications, and track performance by source—so you spend your time with top candidates, not copying and pasting job ads.
You can also spin up Employee Referral Sites to capture warm leads from your team. Studies consistently show referred candidates are more likely to be hired and stay longer—LinkedIn has reported higher conversion and multi-year retention for referral hires.
Breezy HR offers multiple tiers so you can start simple and scale as you hire more frequently.
- Bootstrap. Free for basic hiring on a single active position, with core pipeline tools to get you started.
- Startup. Adds enhanced automation and collaboration features suited to small teams hiring more regularly.
- Growth. Designed for expanding teams that need advanced workflows, reporting depth, and more customization.
- Business. Offers the most control and flexibility for high-volume or complex organizations, including expanded admin and security options.
Define the Role
Before you post, be crystal clear on what you need and why you need it.
List the critical outcomes for the role and the metrics that define success. Where is your team capacity constrained today, and how will this hire change that?
Decide on level (entry, mid, senior) and scope (individual contributor vs. manager). Clarity here drives better applicants and fairer compensation.
Set a pay range that reflects market data, level, and budget. Many jurisdictions now require posting pay ranges—transparency helps you attract serious candidates.
Finally, identify the must-have skills and experience versus nice-to-haves. Prioritize skills and outcomes over pedigree to widen your talent pool.
Write A Thorough Job Description
Use the inputs above to write a clear, inclusive job description. The more specific and transparent you are, the better your applicant quality.
Keep the title accurate, list core responsibilities and required skills, and share why your company is a great place to work. Call out benefits and perks, work location/arrangement, expected hours, and any unique tools or processes the role will use.
Remember: you’re evaluating candidates—and they’re evaluating you. Treat the job description as a candidate’s first experience with your brand.
Step 3: Find Your Candidates
With your tools and description ready, it’s time to source. Cast a wide but targeted net so the right people actually see (and act on) your post.
Employee Referrals
Referrals are consistently among the highest-quality sources. They save time because someone you trust vouches for the candidate, and referred hires typically onboard faster and stick around longer. Make it easy for employees to share roles and consider offering a simple, transparent referral bonus.
Job Boards
Post across multiple boards to increase reach, including niche or role-specific sites where your target talent actually hangs out. Breezy HR makes this simple with multi-posting and unified tracking so you can double down on sources that perform.
Social Media
LinkedIn remains a top sourcing channel. Review profiles for relevant experience and signals of impact before reaching out, and personalize your messages.
Upgrading to LinkedIn Recruiter expands search filters and network reach, and InMail lets you contact candidates you’re not connected to. You can also enable private profile viewing if you prefer to browse discreetly.
Step 4: Conduct Interviews
Once you’ve screened resumes and identified promising people, move into structured interviews to evaluate skills, values alignment, and decision-making.
Here is a simple, repeatable flow:
- Introduce yourself, the company, and the role’s purpose
- Set expectations for the conversation and stages to follow
- Review core responsibilities, expected outcomes, and success metrics
- Start with a few warm-up questions about the candidate’s goals
- Discuss relevant experience and walk through job-related examples
- Ask a consistent set of structured questions and use a scorecard
- Give candidates time to ask informed questions about the role and team
- Share your decision timeline and any next steps (e.g., take-home or panel)
After interviews, thank candidates and follow up when you say you will. Even if you pass, send a brief, respectful note—candidate experience matters to your brand.
Step 5: Make an Offer
After interviews and references, you’ll narrow to your top choice—your next hire.
Now make a compelling offer that covers total compensation and sets clear expectations.
Call First
Before sending the formal letter, schedule a call to extend a verbal offer and confirm terms such as:
- Salary (and any variable comp or equity, if applicable)
- Benefits (health, retirement, time off, stipends, and other perks)
- Start date (plus work location/arrangement and any contingencies)
Send Written Offer Letter
If the candidate accepts verbally, follow up with a written offer that restates compensation, benefits, work arrangement, manager, and contingencies (e.g., background check, employment verification). Include any required disclosures and a clear expiration date.
Next steps may include returning a signed offer, providing references or screening authorization, completing employment eligibility forms, and sharing information for payroll and onboarding.
Step 6: Take Care of the Legal Stuff
To comply with federal and state requirements, make sure the following are handled at the right times.
For Your First Hire Ever
If you’ve never hired before, do the following:
- Get an EIN (done in step one of this guide)
- Register with your state’s labor department (unemployment insurance and related employer accounts)
- Set up federal and state tax withholding accounts and forms
- Get workers’ compensation insurance if required in your state
For A New Hire
If you already have employees but are adding a new one, do the following:
- Run a background check (with written consent and a compliant, job-related process; follow any state/local “ban-the-box” rules and restrictions on credit checks).
- Have the new hire complete Form I-9 for employment eligibility (use the current USCIS version; E-Verify participants may use the DHS-authorized remote document examination alternative if they follow program requirements).
- Have the new hire complete Form W-4 for federal tax withholding
- Report the new hire to your state’s reporting agency within the required timeframe (federal law requires reporting within 20 days of hire; some states set shorter deadlines).