There are plenty of legitimate reasons to change your domain name—rebranding, resolving a legal conflict, entering a new market, or aligning your URL with a refined product offering. The tricky part is migrating without losing organic visibility, analytics history, or confused customers.
In this guide, you’ll get a clear, step-by-step plan to switch domains with minimal disruption—protecting your SEO, traffic, and data so you don’t feel like you’re rebuilding the site from scratch.
Read our guide to the seven best domain registrars for a full review of what we loved about each one.
Change Your Domain Name in 8 Easy Steps
Changing your domain name can feel overwhelming, but with the right checklist and tools it’s far more manageable than most people expect. Here are the eight steps this guide covers:
- Check the Domain Change Rules for Your Host Provider
- Back Up Your Current Site
- Choose a New Domain Name
- Purchase Your New Domain Name
- Set Up Migration
- Set Up Redirects
- Update Google Tools
- Contact Any Customers or Clients via Email
Step 1: Check the Domain Change Rules for Your Host Provider
Start by reviewing your host’s and registrar’s policies around domains and site moves. Hosts differ on whether you can simply assign a new primary domain to an existing site, add a second site under the same plan, or need to upgrade your plan.
Also clarify the difference between your registrar (where the domain is registered) and your hosting (where the site’s files and database live). A “domain change” is really a site move: you’ll put the same site on a new URL. You generally can’t rename an active domain—you buy the new one, point it to your site, and keep the old one active while you migrate and redirect.
If your current plan supports multiple sites, you may be able to add the new domain and manage the move in one account. If not, you can either upgrade or set up hosting with a new provider. Be aware of common constraints like ICANN’s 60-day transfer lock after new registrations/transfers, and check whether email, SSL, and CDN settings are tied to your current domain so you can plan updates.
Step 2: Back Up Your Current Site
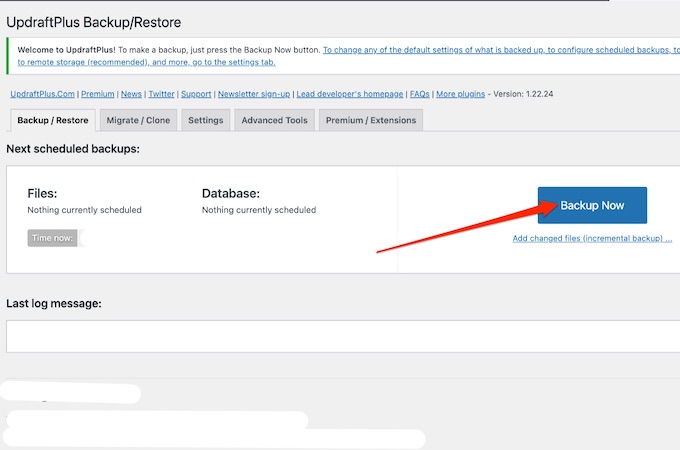
Before touching DNS or URLs, take complete backups. Migrations can fail for lots of reasons, and a restorable backup turns a worst-case scenario into a quick rollback.
Most hosts provide on-demand backups or snapshots you can download to local storage and the cloud. You can also use a backup plugin like UpdraftPlus or All-in-One WP Migration to capture your database and files. If email is hosted on the same domain, export mailboxes and DNS records (SPF, DKIM, DMARC) so you can reapply them later.
Keep copies in at least two places (local and cloud). It’s extra insurance and makes the move faster because you can restore to staging, test, and then go live with confidence.
Step 3: Choose a New Domain Name
Next, pick the new domain you’ll point traffic to.
You may already have a name in mind. Use the same criteria you’d use for your first domain:
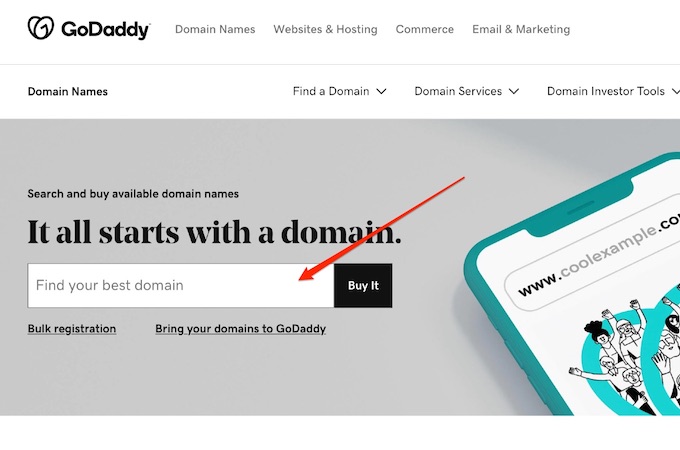
- Availability: Use your registrar’s search to confirm availability and possible alternatives.
- Originality: Avoid names that could cause brand confusion or trademark issues.
- Relevance: Make it obviously tied to your brand and memorable for customers.
- Accessibility: Keep it short, easy to spell, and easy to type on mobile.
- TLD strategy: Favor a trusted TLD (.com when possible) or a well-recognized alternative for your audience.
- Future-proofing: Check social handle availability and secure common misspellings or key ccTLDs to protect your brand.
Take your time. Changing a domain twice is painful and costly. When you’re ready, search and register through your registrar’s domain tool.
Step 4: Purchase Your New Domain Name
Once you’ve chosen your name, buy it. You’ve got three common paths:
If you’re using GoDaddy and your plan supports multiple sites, the easiest route is to purchase the domain during site setup. Go to your GoDaddy product page, select Websites + Marketing > Manage, choose Edit Website, open Settings, and select Manage next to your domain. Choose Get a New Domain, complete the purchase, and connect it to your site.
The second option is to purchase the domain as a second site through your current host and manage everything in one account.
The third option is to move to a new host and register the domain there (many plans include a first-year domain). This adds a few migration steps but can be the right call if you want better performance, support, or pricing. Whichever path you choose, enable domain privacy, set auto-renew, and provision an SSL certificate for the new domain so HTTPS works on day one.
Step 5: Set Up Migration
With the new domain in place, migrate your site to use it.
If it’s a secondary domain in the same account, this can be as simple as switching the site’s primary domain. In GoDaddy, go to your product page, open Websites + Marketing > Manage, choose Edit Website > Settings, click Manage next to your domain, select I Already Own the Domain, pick the new domain, save, and publish.
If you’re moving hosts or something goes sideways, you can migrate manually using your backup or a migration plugin. First, point DNS (nameservers or A/AAAA/CNAME records) to the new host. Consider temporarily lowering TTL a day before the change to speed up propagation.
After the site loads on the new domain, update internal references: WordPress Address/Site Address (Settings > General), hard-coded URLs in menus/widgets, image URLs, canonical tags, and any CDN configuration. Run a database-wide search-and-replace for the old domain (carefully) and test forms, logins, and checkout flows. Use a staging environment and keep it noindex until you go live.
DNS propagation typically completes within a few hours but can take up to 24–48 hours globally. Keep the old site and domain active during this window to avoid downtime.
Step 6: Set Up Redirects
Redirects are what preserve your SEO and users’ bookmarks. Implement 301 permanent redirects from every old URL to its closest new equivalent. Avoid “homepage-only” forwarding—map URLs one-to-one wherever possible to retain rankings and link equity.
In GoDaddy, go to Account Settings > your domains > select the old domain > Manage DNS, then find Forwarding. You can create forwarding for the root domain and subdomains.
Choose a 301 (permanent) redirect rather than 302 (temporary) unless this move is truly short-term. Also handle common edge cases: force HTTPS, pick either www or non-www, preserve trailing slashes, and eliminate chains (old ? interim ? new). For content you’re retiring, return a 410 (Gone) instead of redirecting irrelevant pages.
Once redirects are live, crawl the old domain to confirm every important URL lands on its exact new counterpart with a single hop.
Step 7: Update Google Tools
Now update Google’s ecosystem so it understands the move and continues attributing performance correctly.
Google Search Console: Log in, add and verify the new domain property (domain-level recommended), submit the new XML sitemap, and keep the old property verified. Use the Change of Address tool to signal the domain move, then monitor Indexing and Page indexing reports. If you used a disavow file or manual actions existed, manage them under the new property. Update URL parameters if you use them.
Google Analytics (GA4): In Admin, review your property & data stream settings. Update the website URL, enable cross-domain measurement if needed, refresh referral exclusions, and verify conversions, audiences, and Google Ads links. If you previously filtered by hostnames, include the new domain. Validate that your tagging (via gtag.js or Google Tag Manager) fires on the new domain.
Also update connected services that reference your URL: Google Ads final URLs, Merchant Center, Business Profile (website field), and any third-party analytics, CRMs, or marketing tools. Resubmit sitemaps, update robots.txt to reference the new sitemap location, and ensure canonical tags point to the new domain.
Step 8: Contact Any Customers or Clients via Email
Finally, tell your audience. A quick announcement reduces confusion and reminds people to update bookmarks and whitelists.
Post a short message on social and send an email explaining the new domain and why you made the change. Encourage readers to visit and bookmark the new URL. Update email signatures, support auto-replies, your site footer, social bios, marketplace profiles, and any customer portals. If you changed your domain for email, don’t forget to update SPF, DKIM, and DMARC to protect deliverability.
Final Thoughts About Changing Your Domain Name
Changing your domain name doesn’t have to tank your traffic. Back up, stage and test the new domain, implement clean 301s, and notify Google and your audience. Keep the old domain and redirects active for at least 12 months, monitor Search Console and GA4 for crawl errors and traffic shifts, and fix any stragglers you find. Follow this checklist and you can move without losing hard-won momentum.