It won’t happen overnight—but you can absolutely launch a profitable blog in 2026 if you focus on helping readers first, follow a repeatable process, and stay consistent over time.
There’s real money to be made if you publish regularly, follow proven SEO practices, and use the step-by-step plan below without cutting corners.
11 Steps to Starting a Blog in 2026
Making money from a blog takes more than writing when inspiration strikes. You’ll need a simple tech stack, people-first content, and a plan to grow and monetize. Here’s everything you need to get started, even if you’re new:
- Find a blog idea
- Choose the perfect domain name
- Sign up for Hostinger
- Install WordPress
- Pick a WordPress theme
- Install essential plugins
- Set up Google Analytics
- Start your email list
- Pick a blogging cadence
- Grow your audience
- Monetize your blog
Quickstart Guide to Blogging
If you already have a blog name and topic in mind, you can skip ahead and launch your blog today without hiring anyone.
Go to Hostinger and grab the Premium plan—intro pricing typically starts around $2.49–$2.99/month on longer terms (my discount sometimes drops it a bit lower). It’s the best starting point for most bloggers who want reliable hosting at a low cost with room to grow.
The list price on multi-year terms is usually lowest on 48-month plans, and annual plans often include a free domain, unlimited SSL, email accounts, and an easy site builder with modern templates. Renewal rates are higher after the first term—common across all hosts—so check the checkout page for your exact total before you finalize.
The signup process is streamlined and beginner-friendly. Hostinger walks you through each step. Here’s the quick version so you don’t miss anything:
- Go to Hostinger and choose a web hosting plan.
- Complete your purchase and log into your new account.
- Claim your free domain (on eligible annual terms) via the dashboard.
- Click Setup and follow the step-by-step wizard.
- Select Create a new website and choose WordPress as your CMS.
- Pick a theme (you can always change it later).
- Keep or skip the recommended plugins—you can add more later.
- Finish setup and review your choices. You’re ready to log in and publish.
You can now log into WordPress and start publishing content right away.
Before we get into monetization, I’ll go step-by-step through setup so you don’t miss anything important and avoid costly rework.
Step 1: Find a Blog Idea
This is one of the most important decisions you’ll make when starting your blog.
Your niche determines what you’ll write about—and ideally what you’ll eventually earn money from. Good news: there’s an audience for almost every topic if you match intent and provide real value.
That said, some niches are more profitable than others. The goal is to find a topic you care about that also has steady search demand and clear monetization paths.
Start by answering two questions:
What are you interested in?
What gets you excited? What’s something you could talk about for hours without getting bored—and that you already do in real life?
Your blog needs consistent content over time, so choose a topic you won’t burn out on.
Use these prompts to surface great ideas:
- Talents – Are you naturally good at something, like drawing, chess, or writing?
- Expertise – What subjects have you studied or worked in? Think school, certifications, or years on the job.
- Career – Your day job is a goldmine for topics if you can teach what you do.
- Hobbies – Restoring cars, baking gluten-free, speed-cubing, home labs—hobbies make excellent niches.
ACTION STEP: List 10–15 things you’re genuinely interested in. Don’t overthink it—capture anything you enjoy or know well, then circle the ones you can talk about from experience.
What are other people interested in?
Next, validate that people actually search for your topic. Passion + demand wins.
“My dog” is sweet; “puppy training schedule,” “best dog food for allergies,” and “how to stop leash pulling” can attract thousands of readers.
Think about the questions you had when you were learning. Those are likely the same questions your future readers are typing into Google.
Evergreen categories that tend to perform well include:
- Personal finance (budgeting, saving, side income)
- Fitness and health
- Online business and entrepreneurship
- Investing and fintech
- Productivity and time management
- Real estate
- Career advice and job hunting
- Education and test prep
- Freelancing and remote work
Pro tip: Use Google’s Keyword Planner (free) to check search volume and discover related questions you can answer. Pair it with the “People also ask” box to map subtopics for one post.
ACTION STEP: Compare your interest list with the categories above. Choose one topic you can publish about for the next 6–12 months.
Then niche down. “Health” or “business” is too broad. Go specific: “fitness for new dads,” “side hustles for teachers,” or “meal prep for college athletes.” Combining passions creates unique angles (e.g., personal finance for artists).
YMYL note: If your topic affects money or health, you’ll need to demonstrate experience and credibility (e.g., clear author bios, citing reputable sources, and accurate disclosures). This aligns with Google’s people-first guidance in 2026 and helps readers trust your advice.
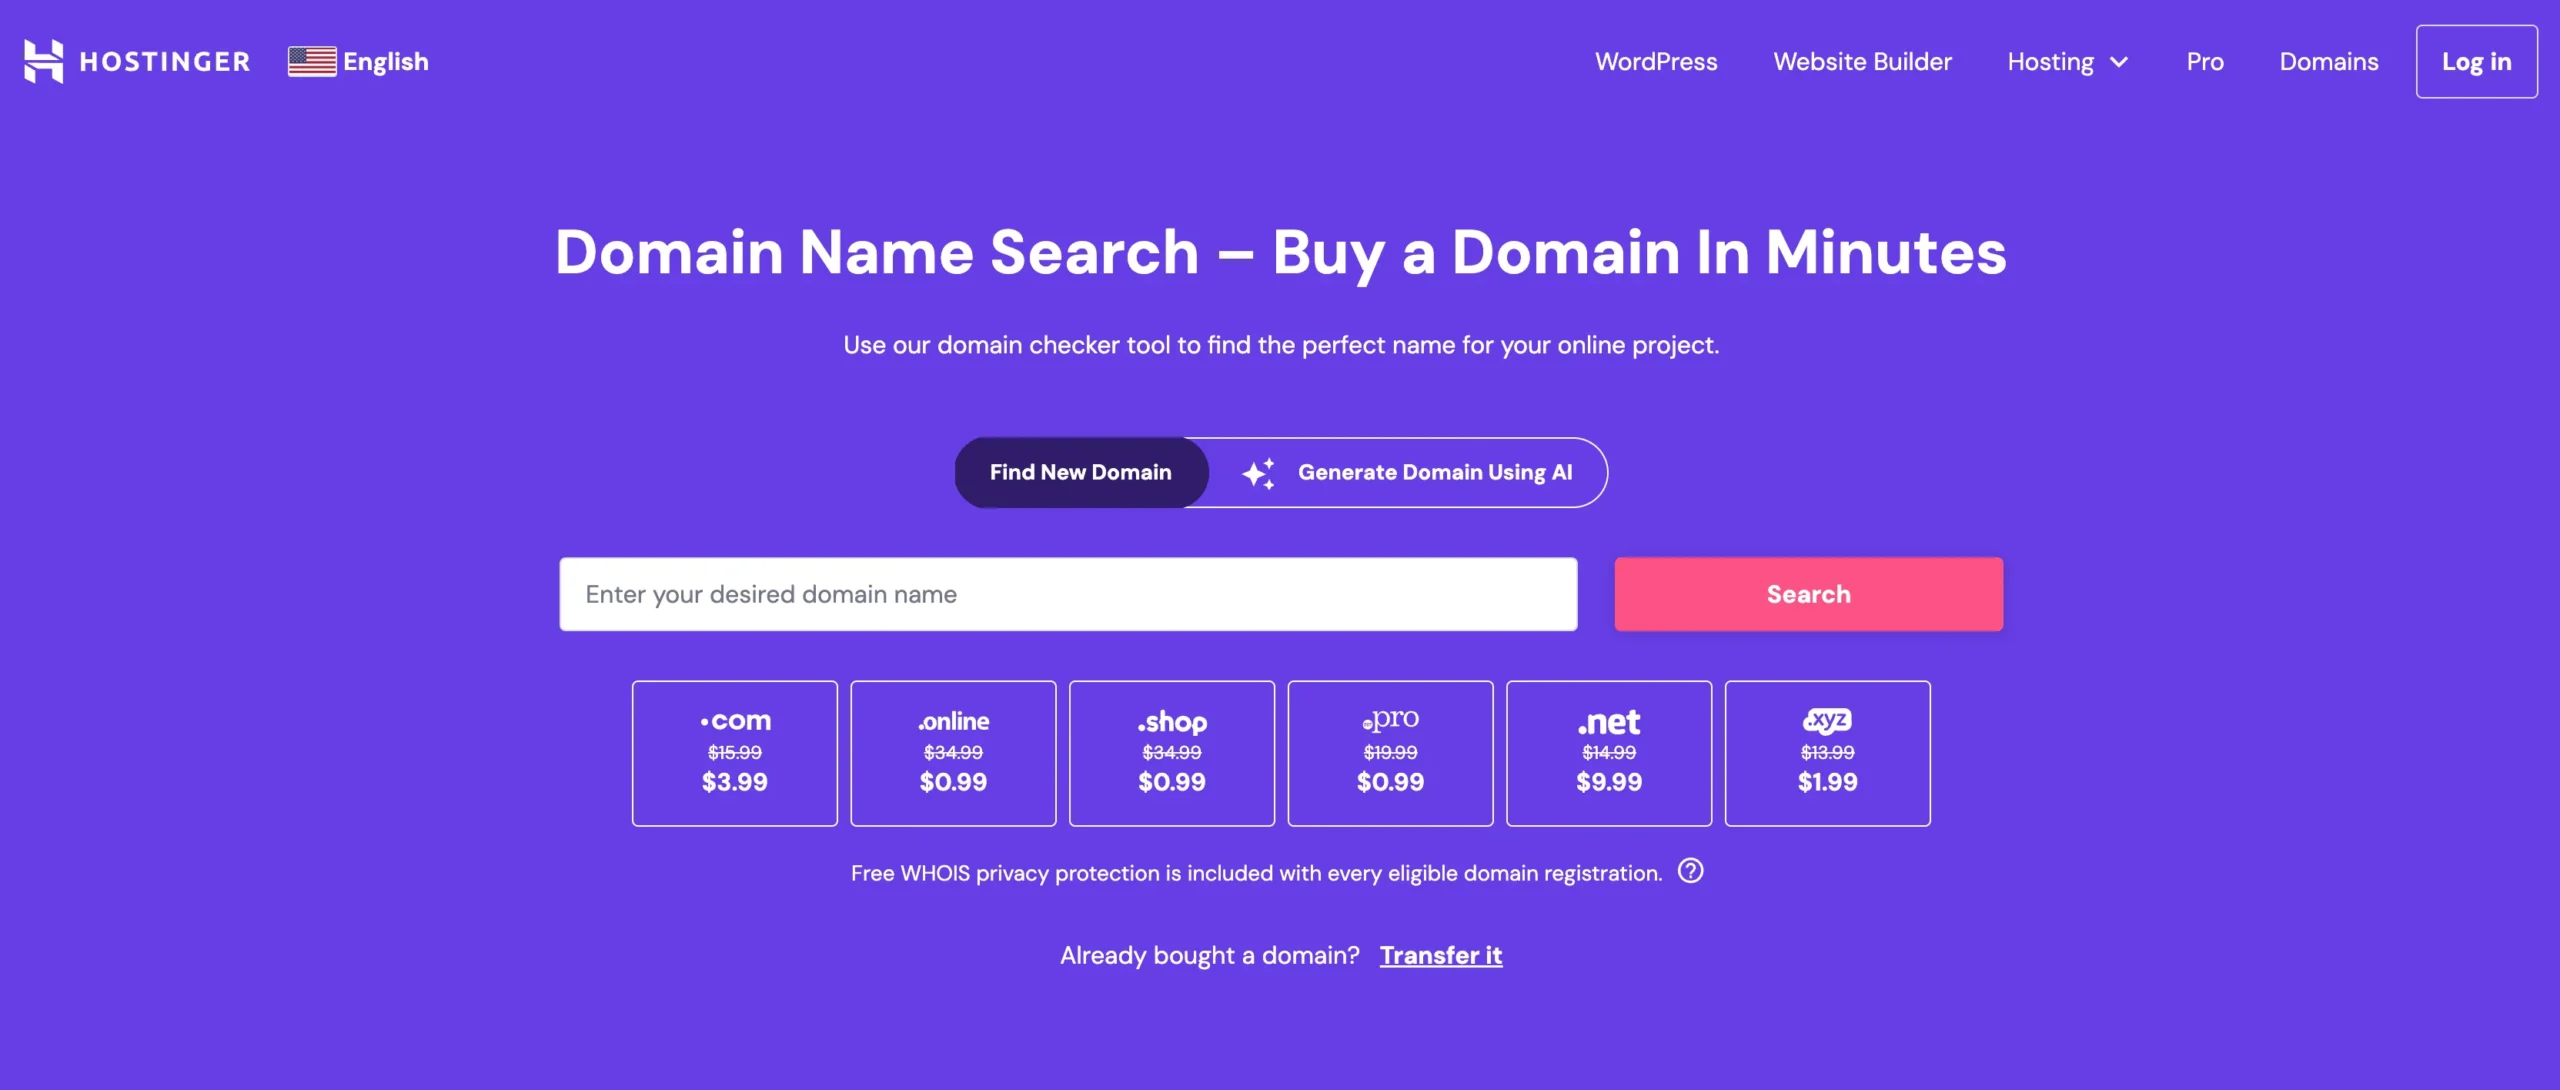
Step 2: Find the Perfect Domain Name
Now it’s time to choose your blog’s name. Fun—but tricky.
- Bad news: Many “perfect” domains are taken.
- Good news: You only need one great domain, and you can still find it with a little creativity.
Follow these tips while brainstorming:
- Keep it short: Under ~14 characters if you can.
- Stick with .com, .org, or .net: These extensions are familiar and credible.
- Make it easy to spell and say: Avoid quirky spellings you’ll have to explain.
- Avoid numbers and hyphens: They’re forgettable and often mistyped.
- Consider your name: Great for personal brands and flexible if you pivot later.
Once you have options, go to Hostinger to check availability.
If your first choice is taken, try this:
- Brainstorm variations: Use synonyms, shorten words, or add a simple modifier like “hq,” “tips,” or “lab.”
- Buy an existing domain: Possible, but often pricey and time-consuming.
- Use an AI name generator: Hostinger includes one on the domain page.
Ideally, you’ll snag a solid domain for around $10–$15 via a registrar like Hostinger or Namecheap.
Want to go deeper? Read my guide to the best domain registrars to choose the right provider.
Using Your Personal Name as the Domain
If this is your first blog and you’re not committed to a specific niche, using your name can be a smart move.
Switching domains later often means starting over with SEO, backlinks, and brand recognition. A personal domain lets you pivot topics without changing URLs—just prune irrelevant posts and keep publishing.
Downsides to consider:
- Scalability: It’s harder to bring on other authors under a personal brand.
- Resale value: Personal domains are tougher to sell.
Still, if you’re overthinking the name, go with your own and get moving.
ACTION STEP: Pick a domain that’s available and commit.
Don’t get stuck in analysis paralysis. Publishing beats perfection.
Want more help? See my guide on how to buy the right domain name.
Step 3: Sign Up For Hostinger
Every blog needs web hosting—the service that stores your site and makes it accessible on the internet.
Your host directly impacts speed, uptime, and security. Choose well, and you’ll avoid headaches later.
I’ve reviewed dozens of options, and Hostinger is my go-to recommendation for new bloggers. It’s affordable, easy to use, and fast—often beating higher-priced competitors for entry-level sites.
If you’re unsure which host to pick, compare options in my complete guide to the best WordPress hosting providers.
Why Hostinger is great for beginners:
- Low pricing: Intro plans typically start around $2.49–$2.99/month on longer terms.
- Free domain: Included on most annual plans.
- One-click WordPress install: No manual setup.
- Fast performance: LiteSpeed servers, solid uptime, and caching.
- Beginner-friendly dashboard: Clean, simple, and well-documented.
Sign up for the Premium plan to get the best overall value. Pricing varies by term; the longest term locks in the lowest monthly rate, and you can upgrade later without migrating.
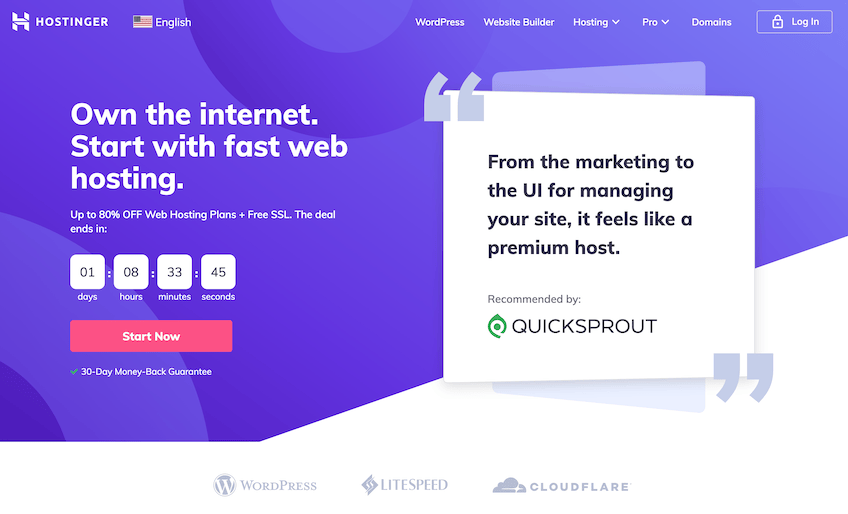
Hostinger also scales easily—upgrade plans as your traffic grows without migrating providers. And there’s a 30-day money-back guarantee if it’s not a fit.
Step 4: Install WordPress
Every blog needs a content management system (CMS). This is the software you’ll use to write, edit, and publish posts.
I strongly recommend WordPress. It’s free, flexible, and powers about 43% of all websites worldwide.
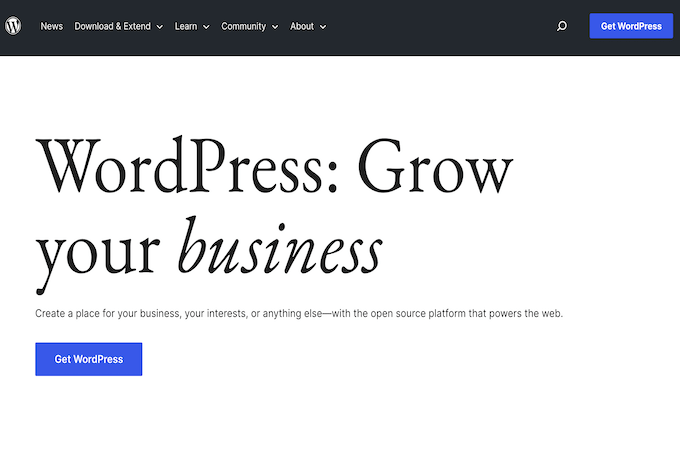
Other platforms (Wix, Squarespace, Medium) are fine for simple sites, but none match WordPress for control, SEO options, and long-term scalability.
Why WordPress is the best choice:
- Free and open-source: No CMS license fees; customize anything.
- Massive plugin and theme ecosystem: Add features without coding.
- SEO-friendly: Clean structure and powerful SEO plugins.
- Scalable: From a single-author blog to a multi-author publication.
Publishing on LinkedIn or Medium can build authority, but monetization and control are limited. For a blog that can grow into a business, choose WordPress.
ACTION STEP: Install WordPress on your hosting account.
Hostinger’s setup wizard can install WordPress automatically. If you skipped that, open your Hostinger dashboard and choose the one-click WordPress install.
Pro tip: Hostinger’s WordPress plans are priced similarly to shared hosting but add extras like automatic updates, improved security hardening, and staging—handy as you scale.
Click here to get started with WordPress hosting on Hostinger.
Step 5: Pick a Fitting WordPress Theme
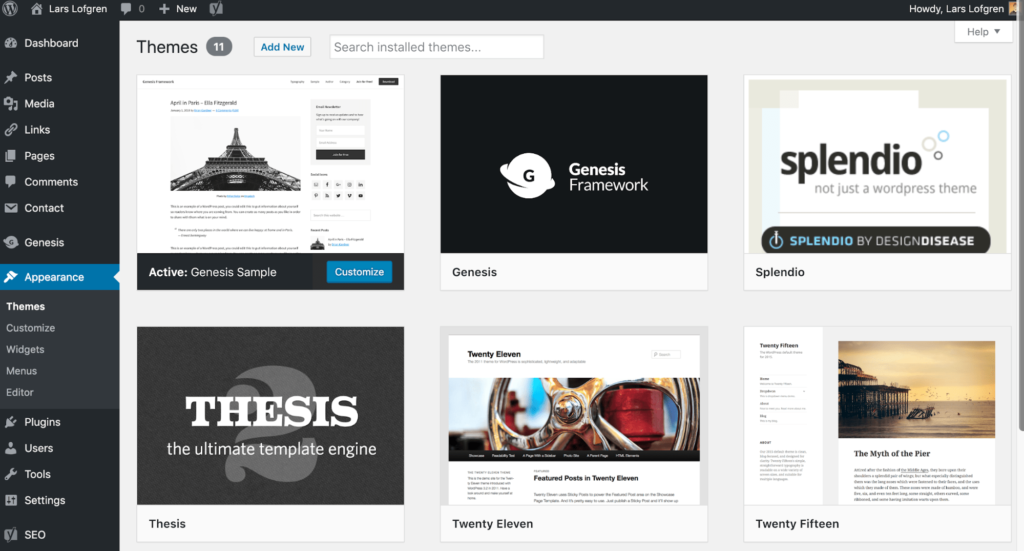
One of WordPress’s superpowers is that you can change your site’s look without touching code.
Themes are prebuilt designs you can install in seconds. Swapping themes won’t affect your posts or pages, so feel free to experiment.
Hostinger offers modern, mobile-optimized themes to start with. Pick a clean design that fits your topic—you can change it later.
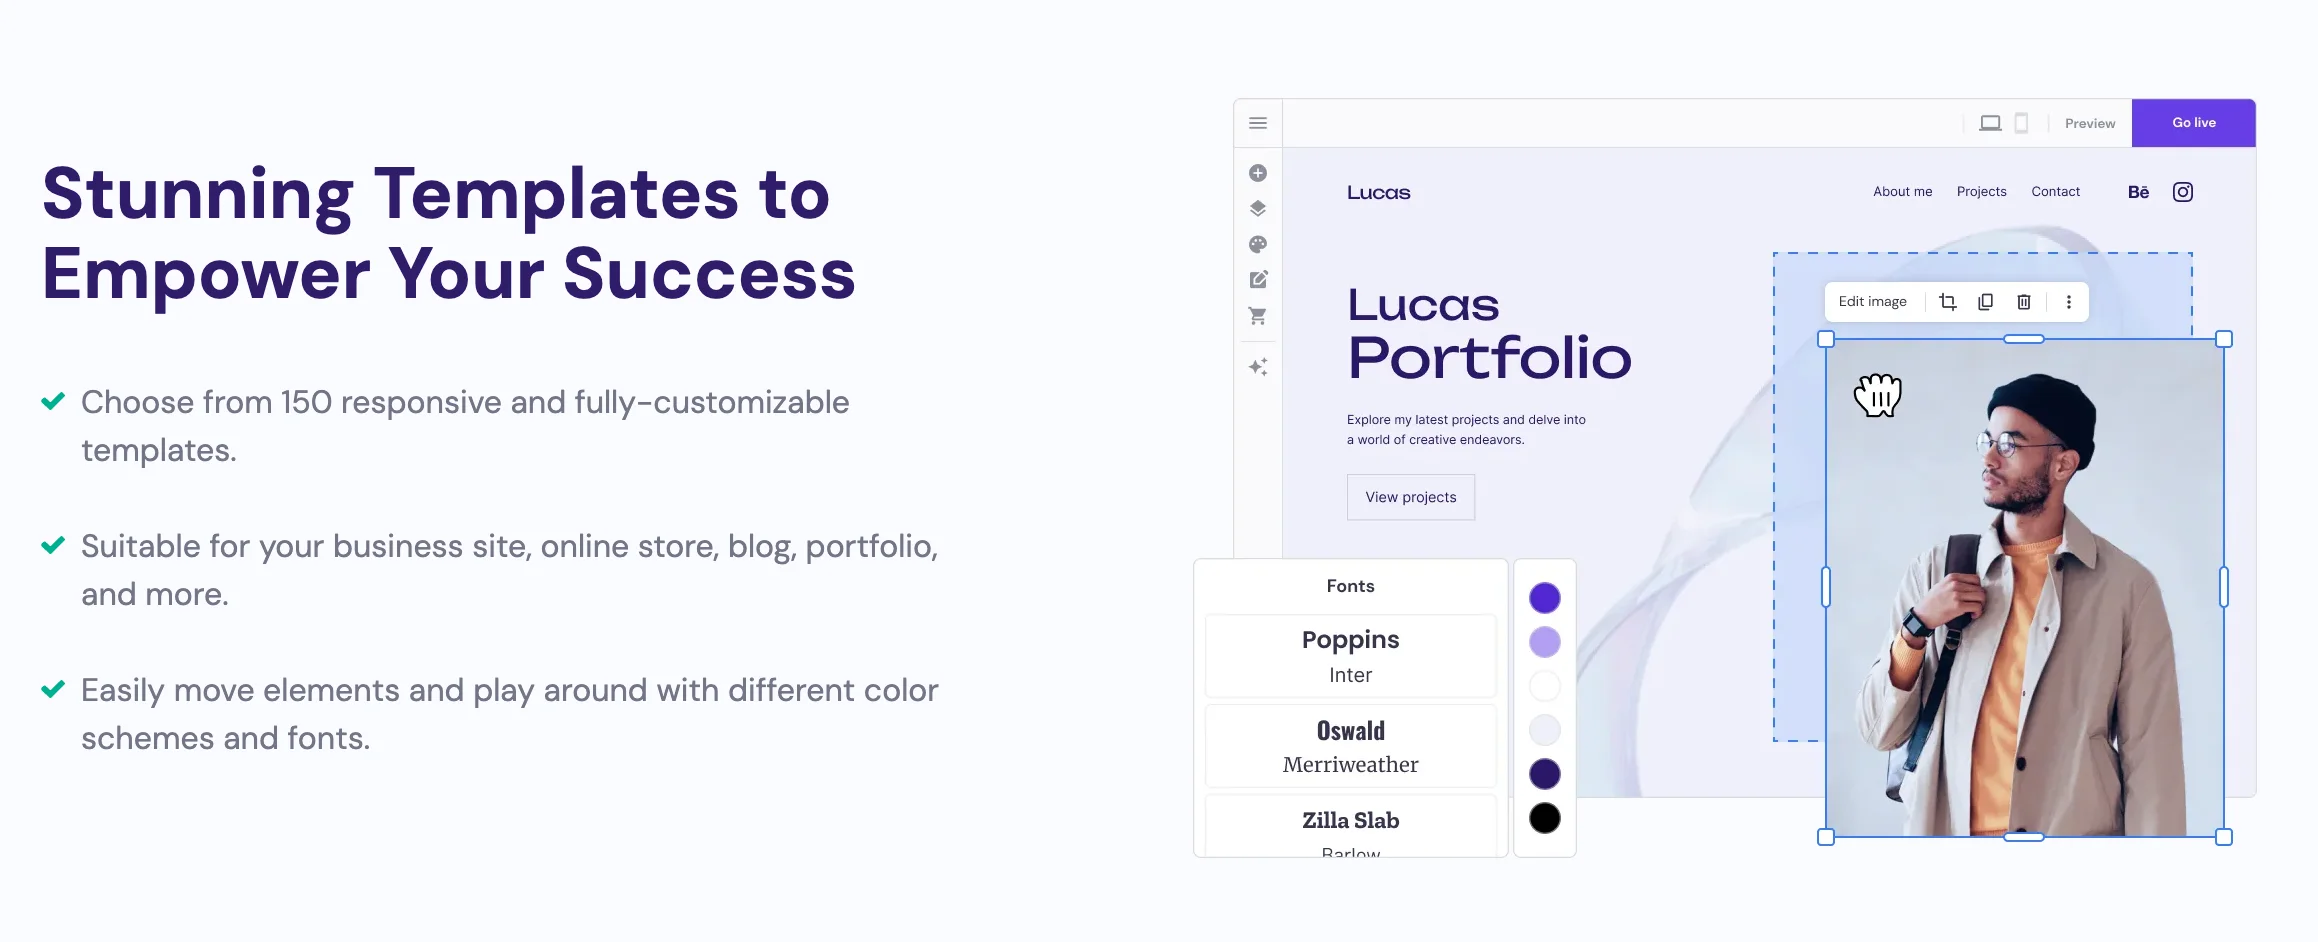
You’ll find thousands more free themes in the WordPress Theme Directory and premium options from top developers.
If you want something higher-end, StudioPress themes are polished and fast. They’re also included with WP Engine hosting plans at no extra cost.
For maximum variety, browse Themeforest for tens of thousands of designs at different price points.
ACTION STEP: Install a WordPress theme.
In your WordPress dashboard, go to Appearance > Themes and click Add New to search and install a free theme—or upload a premium theme .zip.
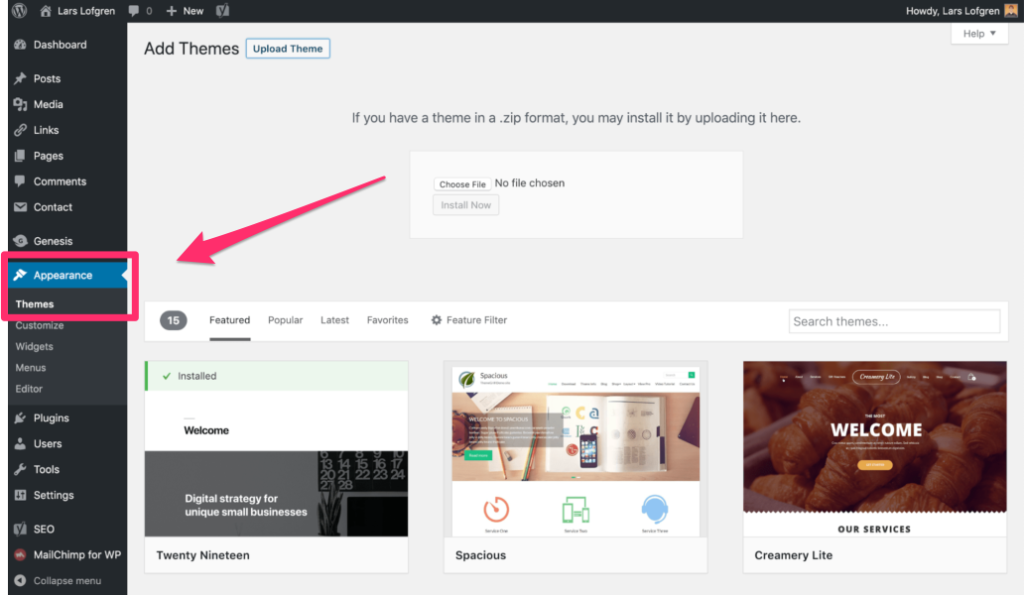
If you purchased a theme, upload the .zip, click Install, then Activate.
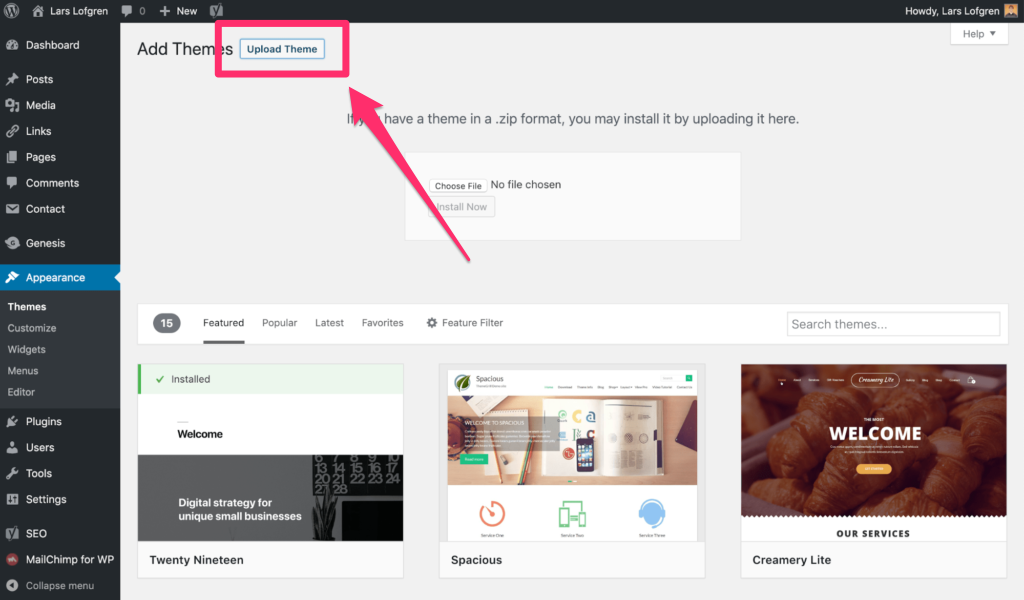
Customize under Appearance > Customize. You can switch themes later without losing content.
Free themes are fine to start—just pick one that’s well-reviewed, mobile-friendly, and updated regularly to avoid security or speed issues.
Step 6: Install WordPress Plugins
Plugins extend WordPress with new features—no coding required. Think of them as apps for your site.
Quality beats quantity. Too many plugins can slow your site or create conflicts. Start with the essentials (5–10) and add more as needed.
ACTION STEP: Install only the plugins that support your goals.
Great starter plugins for beginners include:
- Akismet – Blocks spam comments automatically.
- Yoast SEO – On-page SEO tools and schema basics.
- Contact Form 7 – Simple contact forms.
- LiteSpeed Cache – Best choice on LiteSpeed-powered hosts (like Hostinger) for faster loads. Tip: Don’t run multiple caching plugins at once.
- Mailchimp for WordPress – Connects signup forms to your list.
- WordPress Popular Posts – Auto-displays your most-read posts.

Install from your dashboard via Plugins > Add New. Search by name, click Install, then Activate.
Resist “plugin bloat.” Fewer, well-maintained plugins keep your site fast and stable.
Step 7: Install Google Analytics
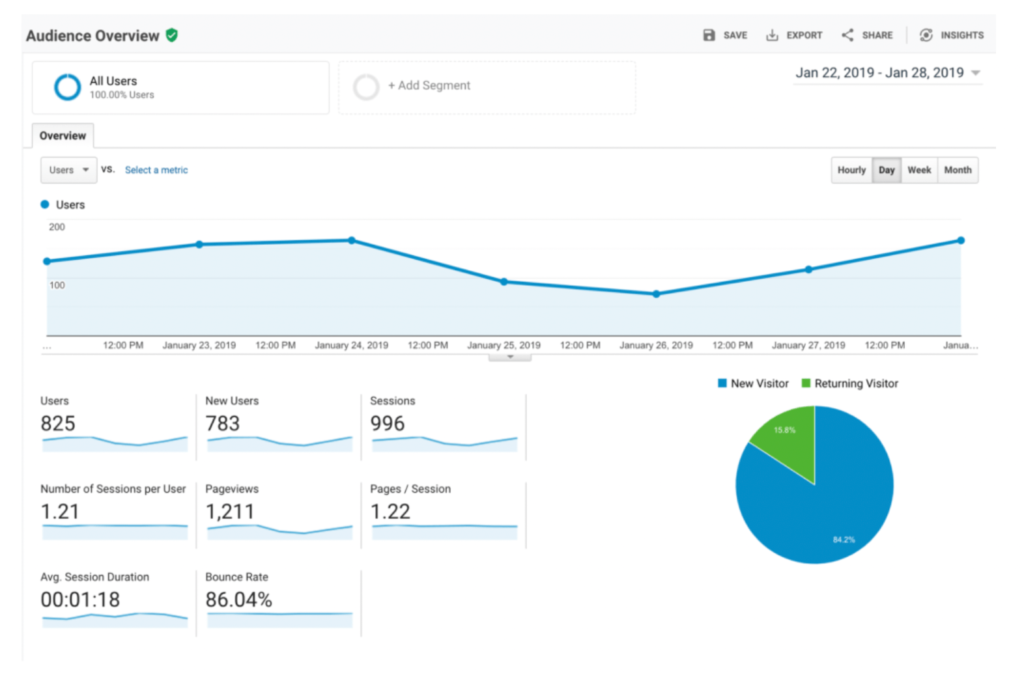
Google Analytics 4 (GA4) shows you how people find and use your blog—vital for spotting what works and what needs improvement. Set it up on day one so data accumulates immediately.
Quickest path on WordPress: use Google’s free Site Kit plugin to connect both GA4 and Search Console without editing code.
ACTION STEP (fast, no code):
- In WordPress, go to Plugins > Add New, search “Site Kit by Google,” then Install and Activate.
- Open Site Kit > Dashboard, sign in with your Google account, and connect Search Console and Analytics.
- Confirm data is flowing by checking GA4’s Realtime report after you browse your site.
- Optional: enable Enhanced Measurement in GA4 to auto-track scrolls, outbound clicks, and file downloads.
If you prefer manual setup, add your GA4 Measurement ID (starts with “G-”) to your site header using a header-injection tool or your theme’s header settings.
Two big reasons to set this up immediately:
- Historical tracking: The sooner you install, the more data you’ll have to analyze later.
- Motivation: Seeing those first visits is a huge boost.
Bonus: While you’re in Site Kit, verify your site with Search Console. This lets you monitor queries, click-through rates, and indexing issues directly from Google.
Need more help? See my full guide to setting up Google Analytics.
Step 8: Set Up Your Email List
If you want a profitable blog, build your email list early. It’s the most reliable way to reach readers, launch products, and drive steady traffic.
Your list is an owned audience—unaffected by social algorithms or search volatility.
ACTION STEP: Start collecting emails today.
Even if you’re not sure what you’ll send, add a simple form to your sidebar and below posts. Offer updates or a small freebie (checklist, template, or mini-guide).
I recommend starting with Constant Contact because it’s beginner-friendly and integrates easily with WordPress.
Compare more options in my guide to the best email marketing tools.
Here’s a simple example from Divalicious Recipes:
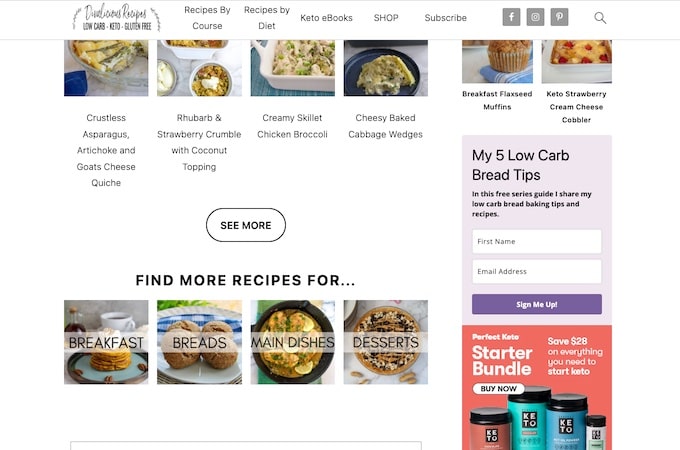
You don’t need a fancy lead magnet to begin. Start with helpful updates. As your list grows into the hundreds and then thousands, it often becomes your #1 revenue channel.
Step 9: Pick a Blogging Cadence
Blogging is a long game. Think marathon, not sprint. Consistency compounds.
The best creators choose a realistic pace and stick to it for months (and years). That’s your cadence.
Use these benchmarks:
- Minimum: 1 post per week, 2,000+ words—enough depth to be the best answer.
- Moderate: 2–3 posts per week—faster growth if you can maintain quality.
- Advanced: 5–7 posts per week—usually a team effort.
- Enterprise: 25+ posts per week—typical for large content teams.
In 2026, long-form still wins when it’s genuinely helpful. Aim for 2,000–3,000+ words only when the topic calls for it—otherwise, answer the question completely and stop.
Google’s guidance and recent core updates continue to prioritize people-first content. Don’t write for bots. Write to solve the reader’s problem thoroughly and clearly, with examples and clear next steps.
Use tools to assist, not replace:
- AI writing tools: Great for ideation and outlines. Always edit for accuracy, nuance, and your voice.
- SEO assistants: Clearscope/Surfer can help coverage, but a “green score” doesn’t guarantee rankings. Prioritize originality and clarity.
- Grammar checkers: Use them, but don’t let them flatten your personality.
Your most valuable posts may not chase the biggest keywords; they’ll solve specific, high-intent problems better than anyone else. Add first-hand experience, screenshots, data, and checklists—this boosts trust and “information gain.”
ACTION STEP: Commit to one new post per week.
This pace balances quality with everything else (email, design, outreach). A simple weekly routine:
- Day 1: Research, outline, and draft.
- Day 2: Edit hard, add visuals, format in WordPress, publish, and promote.
Set a bar: each new post should be more useful than the top three results for the same query.
Step 10: Build an Audience
Your blog won’t grow without readers. Audience building starts on day one.
A practical early goal: 1,000 true fans—people who read, share, and buy. That’s enough to fuel a full-time business in many niches.
ACTION STEP: Publish consistently, engage where your readers hang out, and make your site the best resource in your niche.
Fundamentals that work in 2026:
- Be consistent: Never skip your publishing day.
- Increase volume when you can: Move to 2–3 posts/week after you’ve nailed quality.
- Out-help competitors: Search your topic, open the top 3 results, and ask, “What’s missing?” Fill those gaps.
- Offer a fresh angle: Share experience, examples, and failures—not just summaries.
- Write like a human: Conversational, specific, and actionable.
- Encourage interaction: Use a commenting tool like Disqus or gather feedback via email.
- Show up in communities: Facebook Groups, Reddit, Discord, X, LinkedIn, and niche forums—help first, share content sparingly.
- Ask this on repeat: “How can I make this more helpful for the reader?”
It typically takes 12–24 months to get serious traction. Keep publishing, keep improving, and compound small wins.
Fun stat: 77% of internet users read blogs. You only need a tiny sliver to build a business.
As your blog matures, refine marketing. See my post on the 5 Stages of Blog Growth for channel-by-channel tactics.
Step 11: Monetize Your Blog
Once you’ve built traffic and trust, it’s time to turn your blog into a business.
Three models consistently work:
- Info products – Courses, eBooks, webinars, paid communities
- Affiliate marketing – Recommend products and earn commissions
- Freelancing or consulting – Use your blog as a lead engine
I’ll break them down.
How Info Products Work
The basic funnel:
- Attract qualified search traffic with helpful posts
- Offer a useful free resource to build your email list
- Nurture with value, then pitch a product (course, workshop, community)
- Convert ~0.5%–1% of new subscribers into $200–$2,000 products
The key is a strong, honest sales message and a niche tied to money, status, or relationships—people buy outcomes.
How Affiliate Programs Work
Affiliate marketing is straightforward: recommend tools you truly trust and earn a commission when readers buy through your link.
This works best when your content solves a problem and the product is the logical next step. Focus on product fit and honest comparisons.
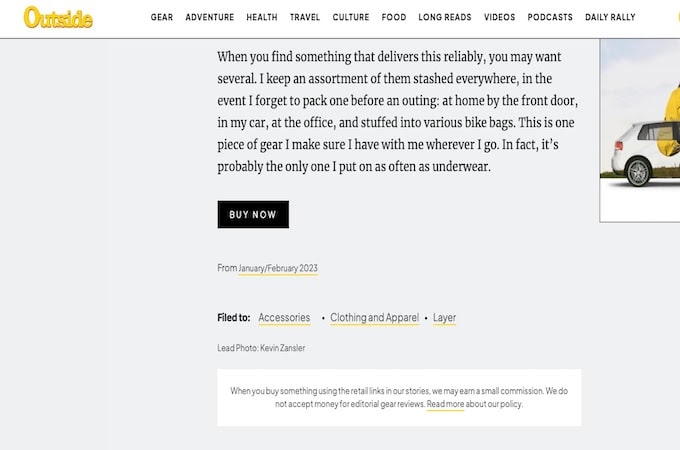
Always include a clear disclosure, like this from Outside Magazine:
How Freelancing and Consulting Work
Want revenue fast? Use your blog to attract clients. You can land projects with modest traffic by publishing helpful, niche-specific content and showcasing outcomes.
This route often gets people to $3,000–$5,000/month quickly. You can layer in products or affiliates later.
What About All Those Other Monetization Methods?
Most alternatives aren’t worth it early on:
- Books: Great for authority, usually low direct revenue.
- Events: Higher risk until you have an audience.
- Display ads: Require significant traffic before earnings add up; many premium ad networks expect ~50k–100k sessions/month.
- Speaking: Authority-boosting but inconsistent income unless you’re well known.
Bottom line: Focus on services, affiliates, and products. Add other channels only when they support your core model.
And above all—keep going.
LAST ACTION STEP: Stay consistent. Keep publishing, keep improving, and keep learning from my library of blogging guides.